This article would introduce five methods to set mapping relationships.
- Method 1: Manually Mapping
- Method 2: Auto Mapping
- Method 3: Modify Mapping Relationship
- Method 4: Import to Create Mapping
- Method 5: Map Merchant SKU > Generate Merchant SKU
- Method 6: Map Merchant SKU > Quickly Mapping Merchant SKU
Method 1: Manually Mapping
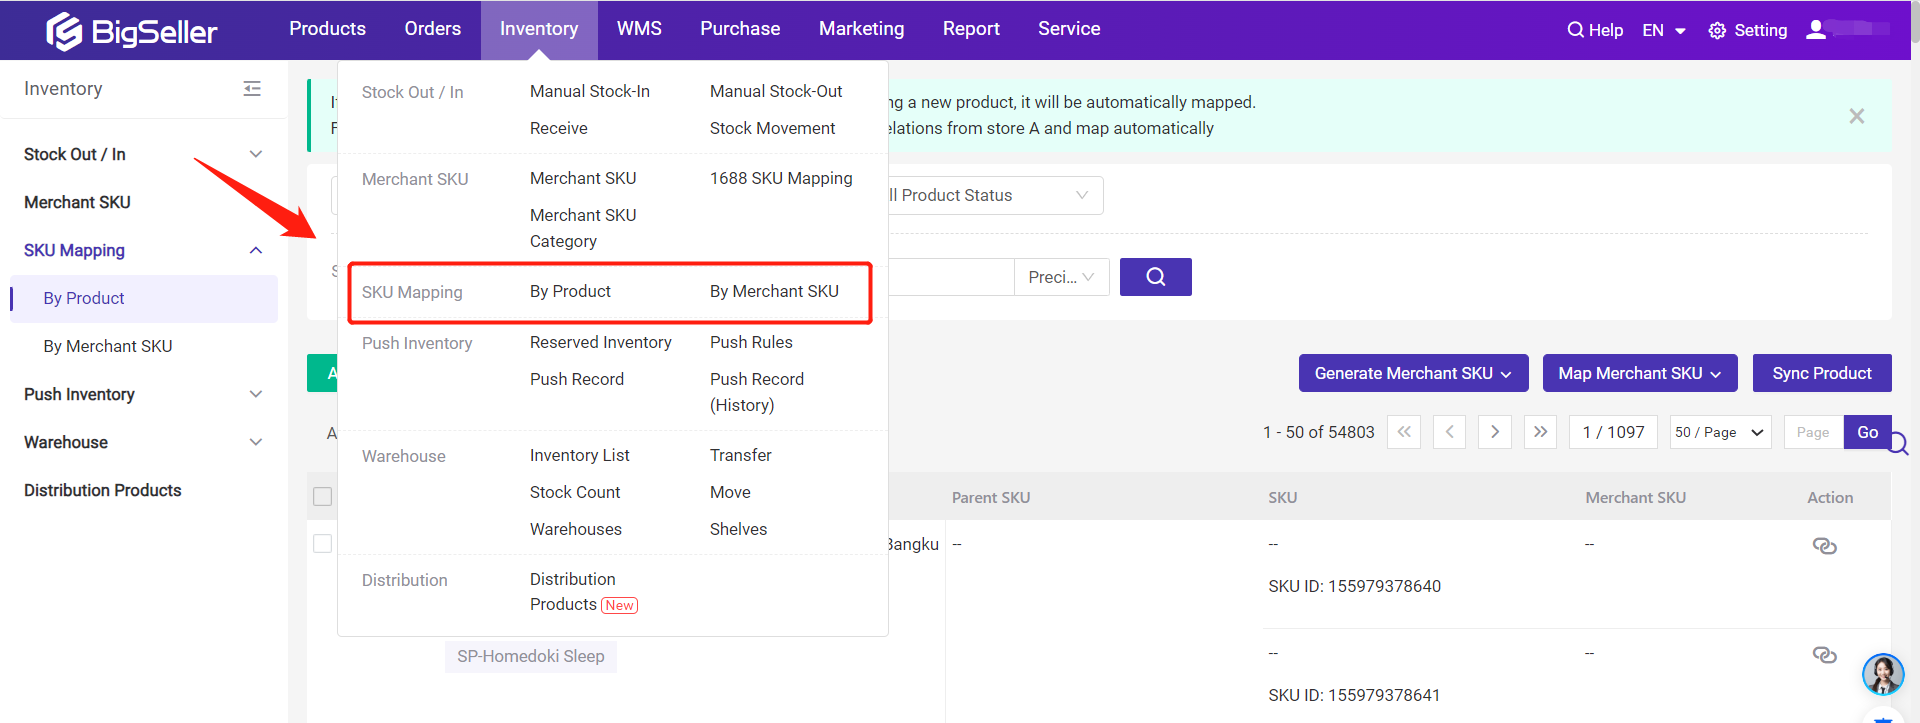
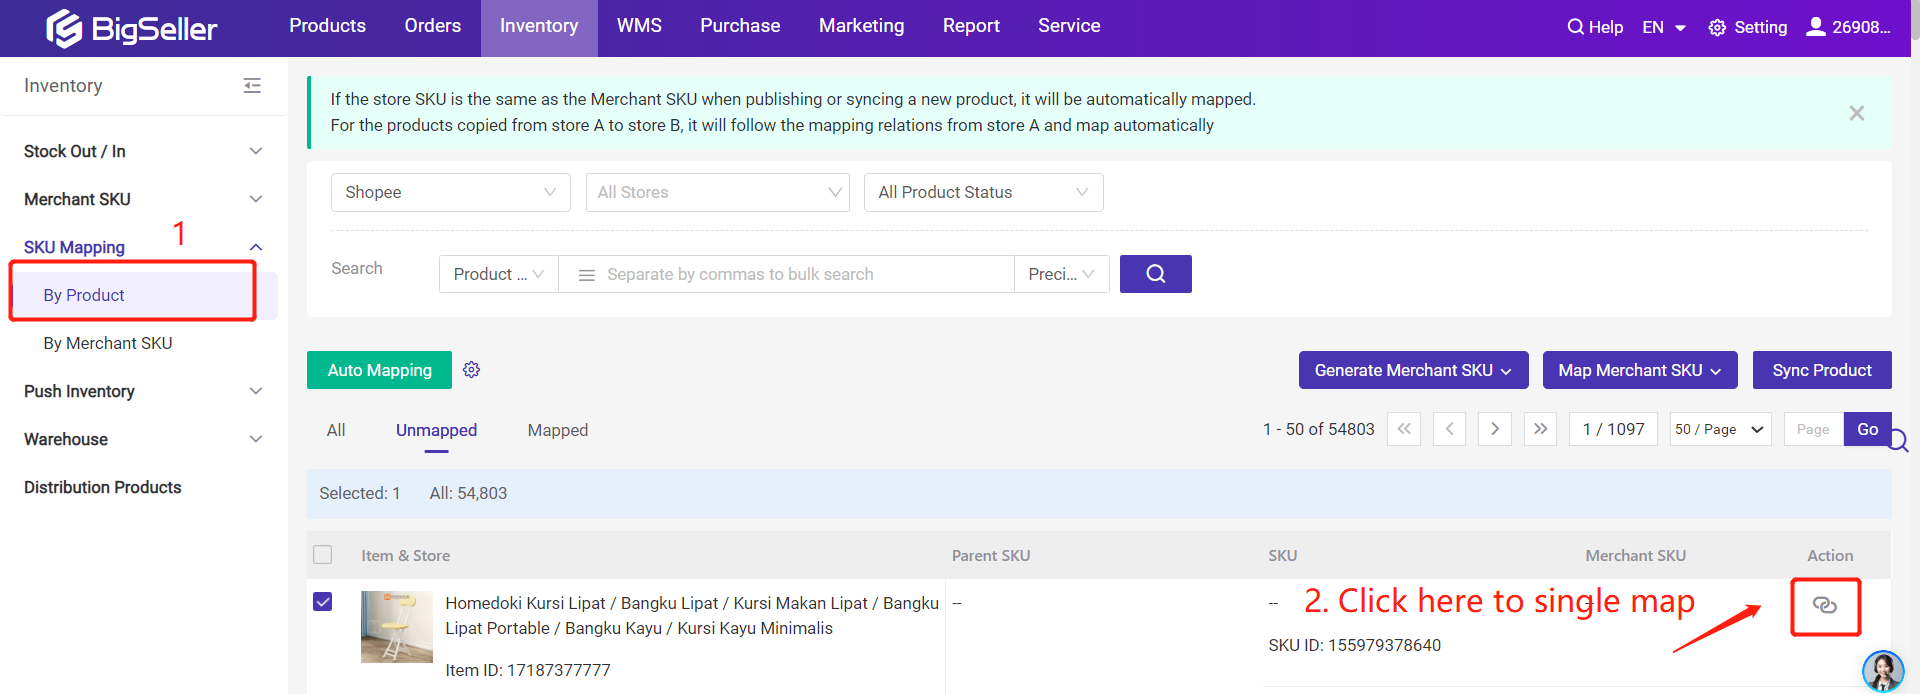
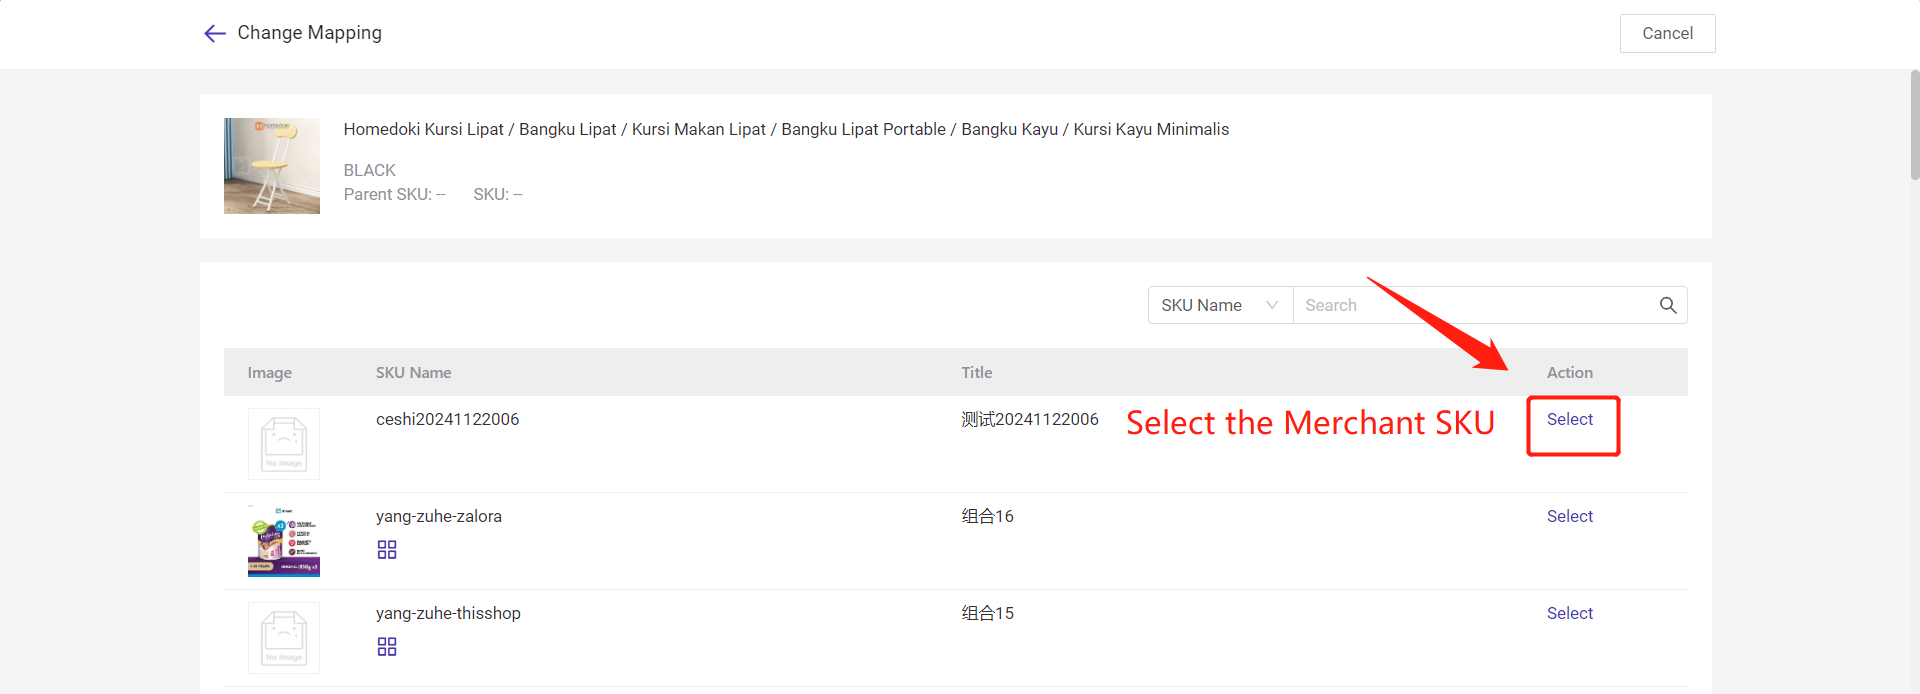
💡 Note: Before mapping, you must first confirm that you already created the Merchant SKU in BigSeller warehouse. If you haven't created the Merchant SKU, you can go to Inventory > Merchant SKU page to create, then start doing mapping.Steps: Inventory > SKU Mapping > Unmapped > Click "map" icon > search the merchant SKU you want to map > click "select"
Method 2: Auto Mapping
Steps: Inventory > SKU Mapping > Set Mapping Rules How to set SKU mapping rules? > Click "Auto Mapping"
Method 3: Modify Mapping Relationship
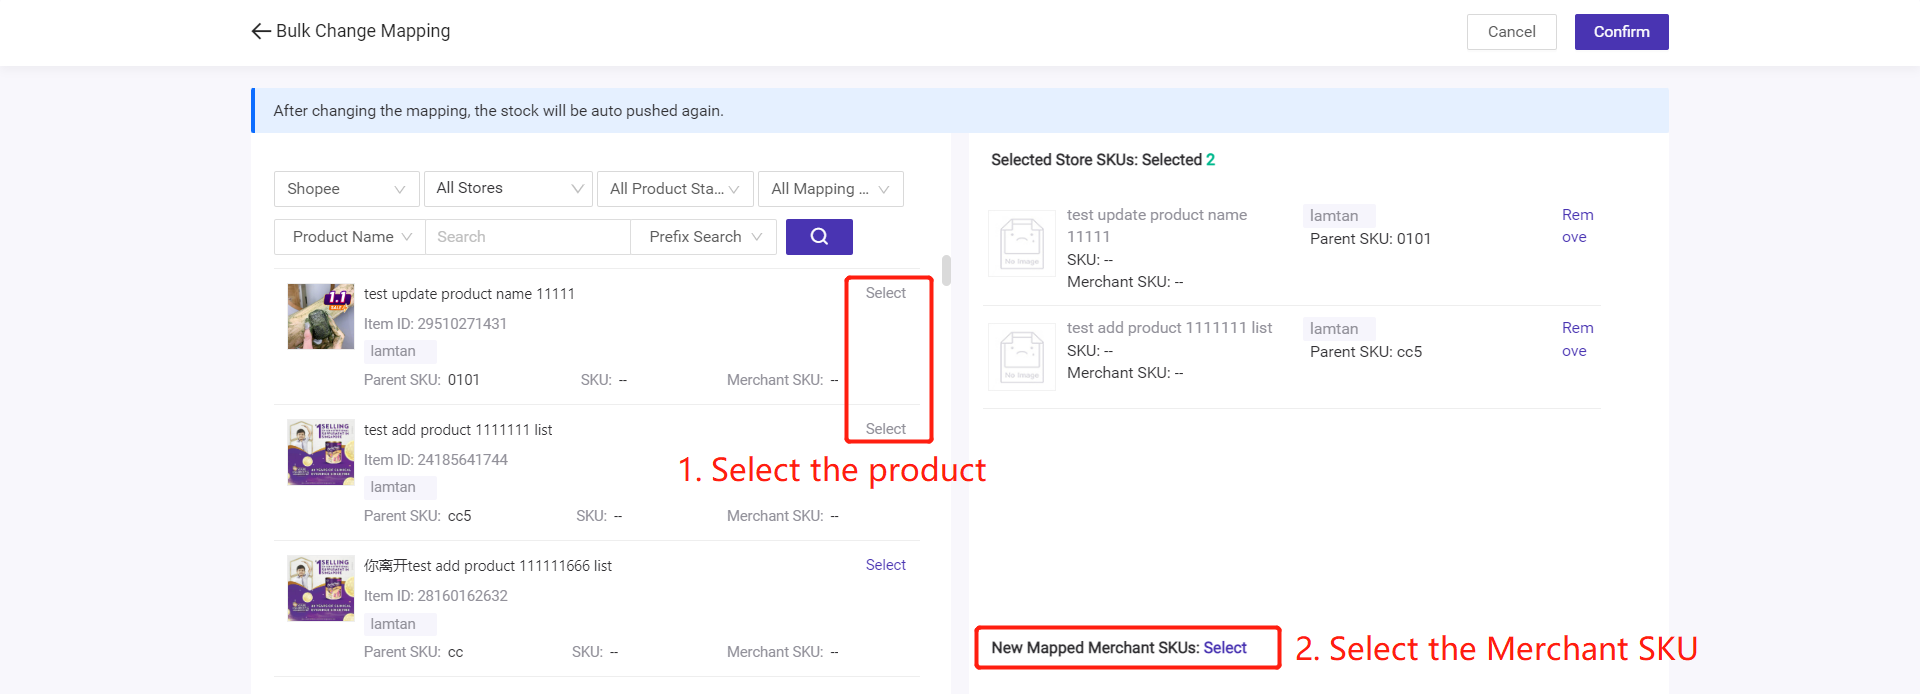
Steps: Inventory > SKU Mapping > All > Change Mapping > Select the product/variant you want to modify > Select the new mapped merchant SKU > Check the options you want > Confirm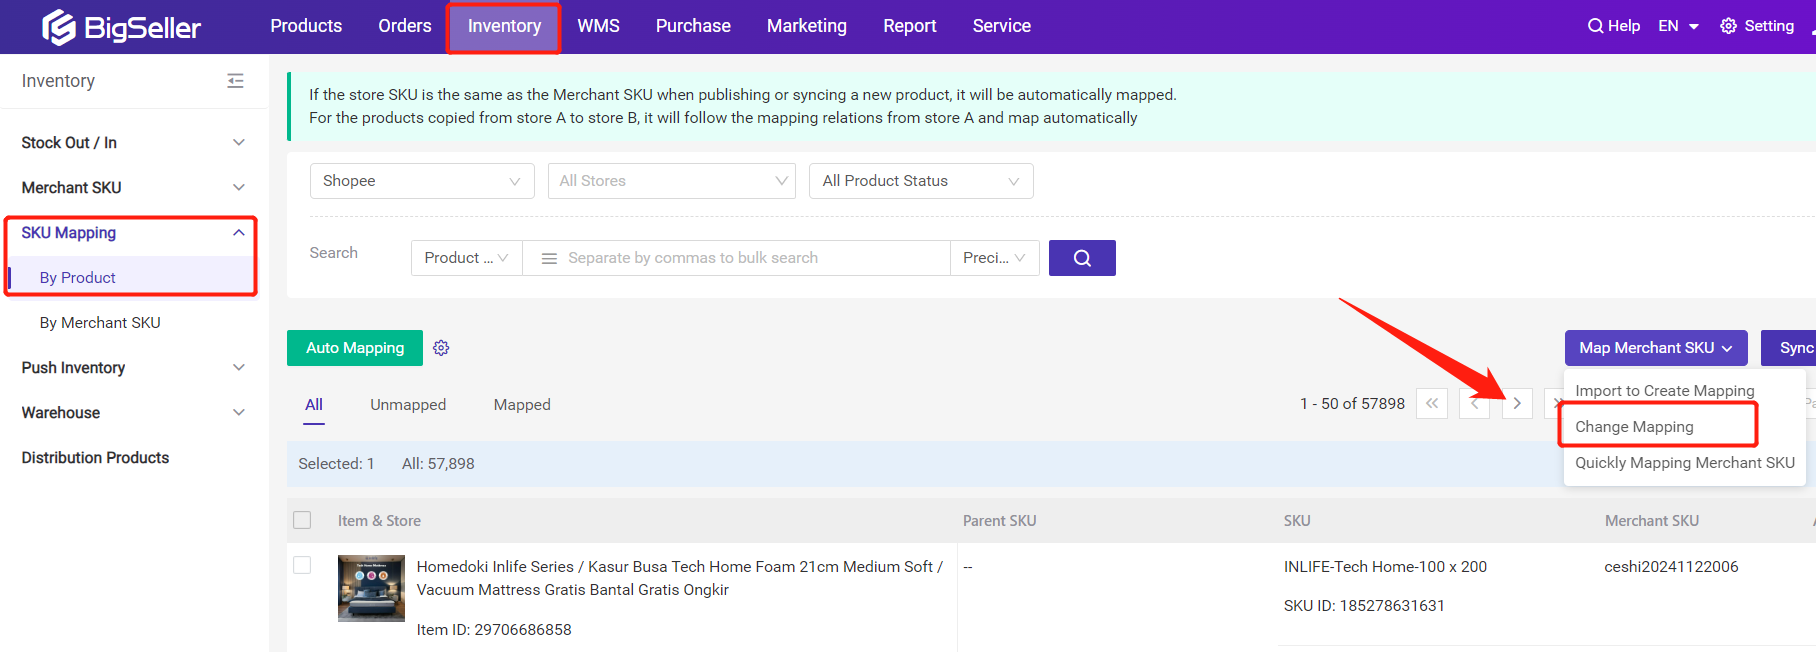
Method 4: Import to Create Mapping
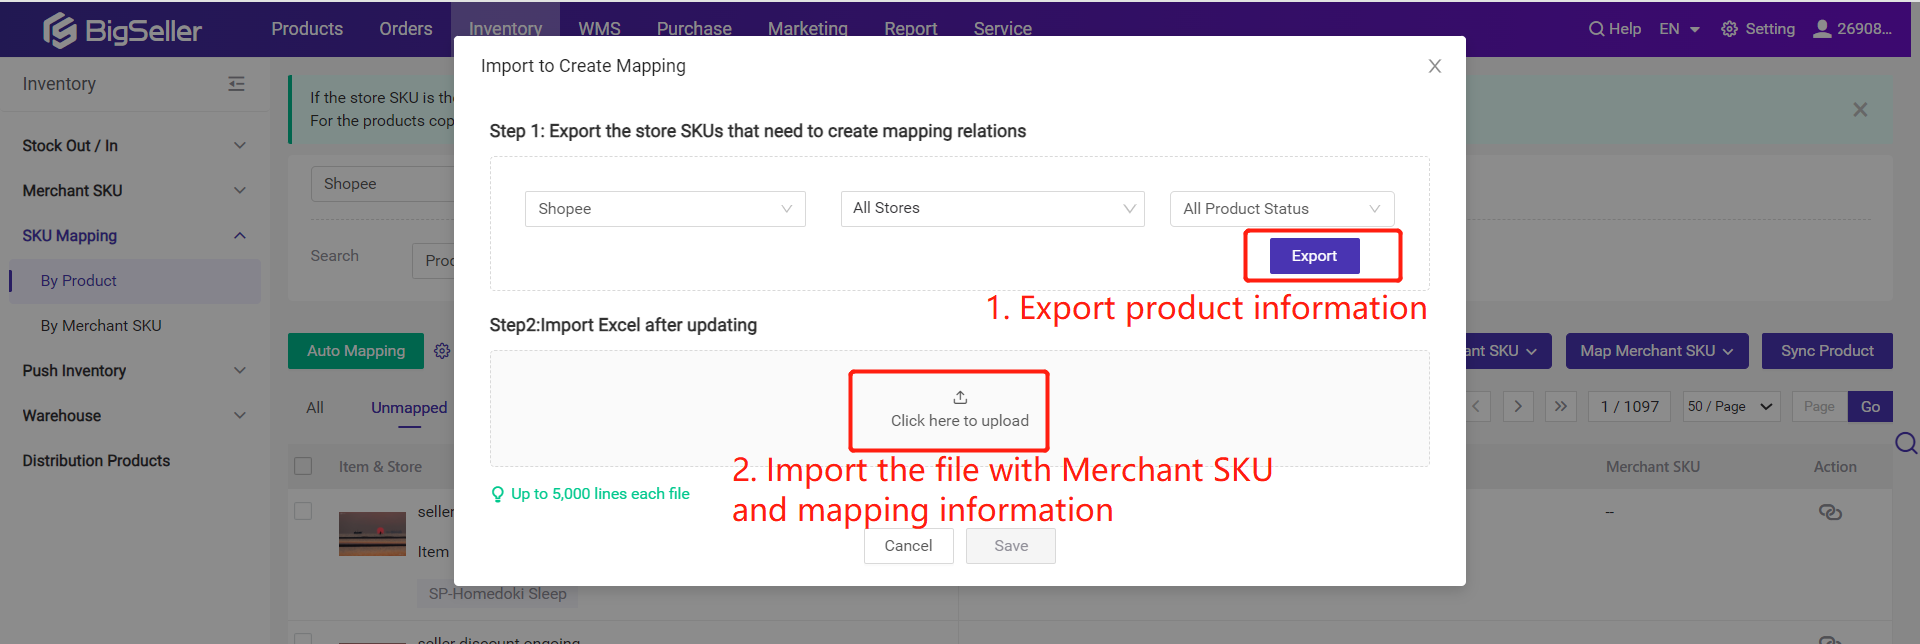
Steps: Go to Inventory > SKU Mapping > Unmapped > Import to Create Mapping > select marketplace and store to export the store SKU > enter the file and upload > Save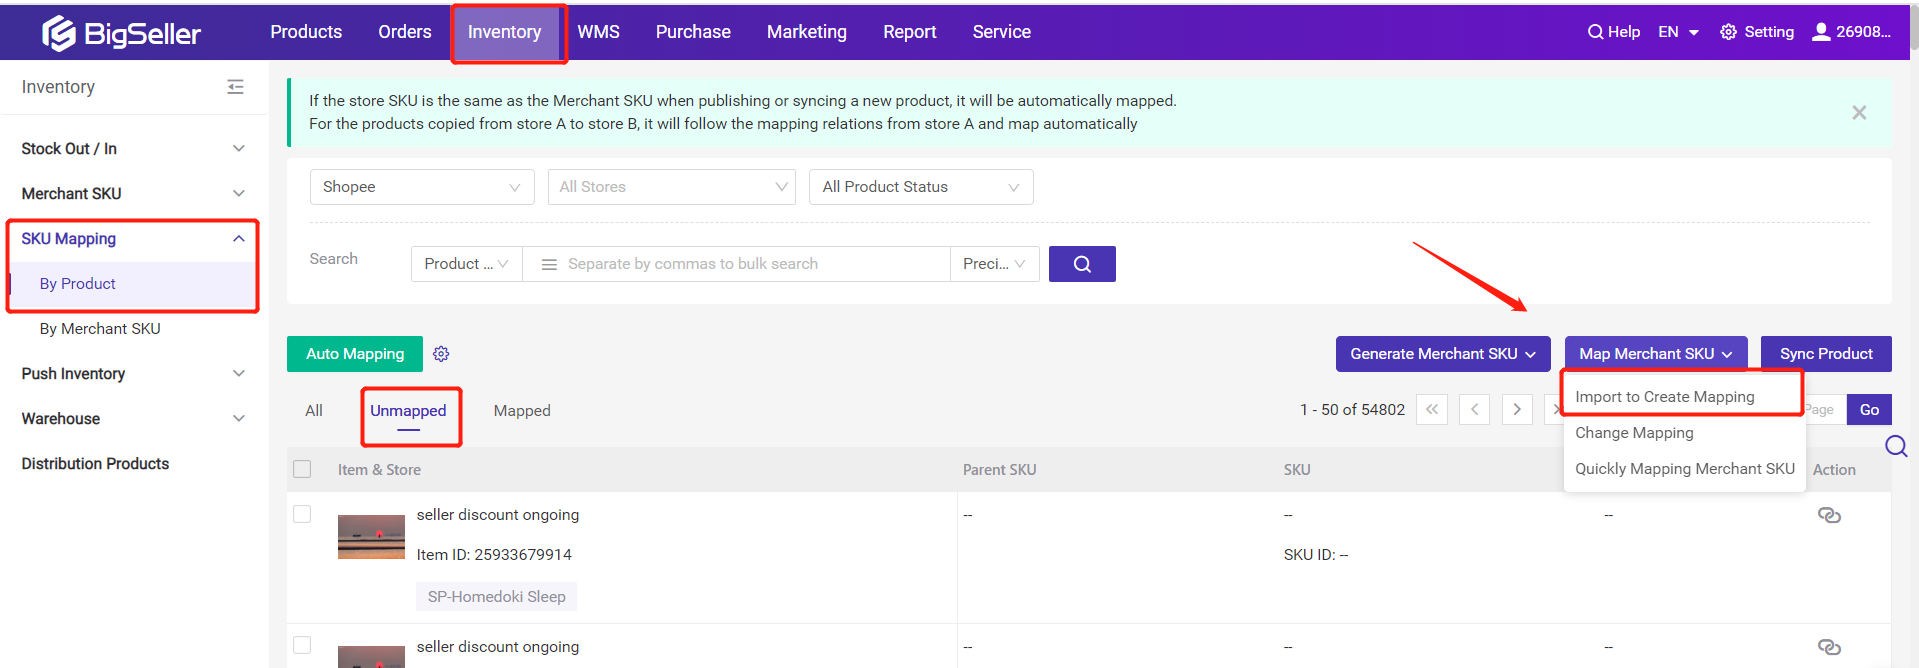
Method 5: Generate Merchant SKU By Product
Steps: Inventory > SKU Mapping > By Product > Unmapped > select the products > Generate Selected/All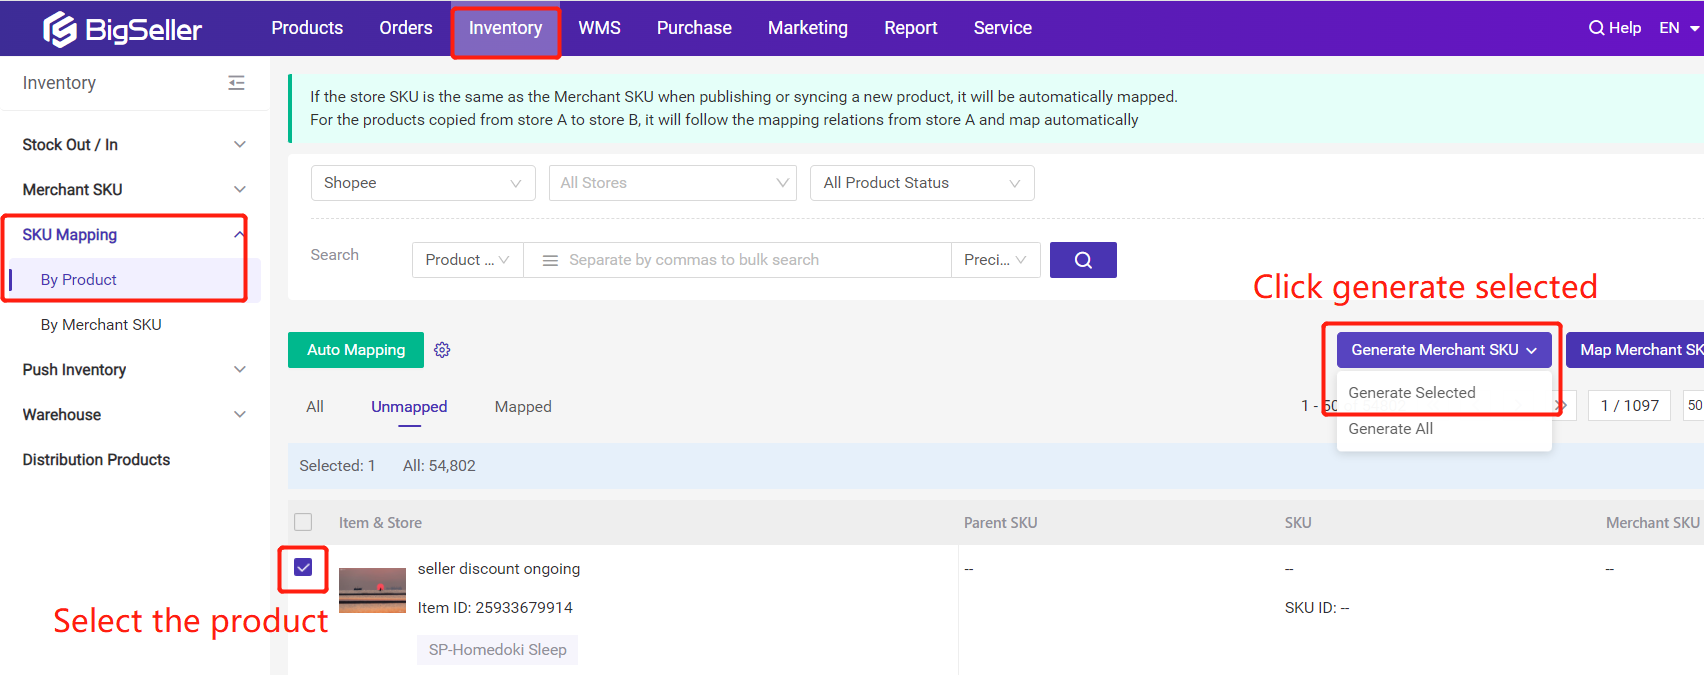
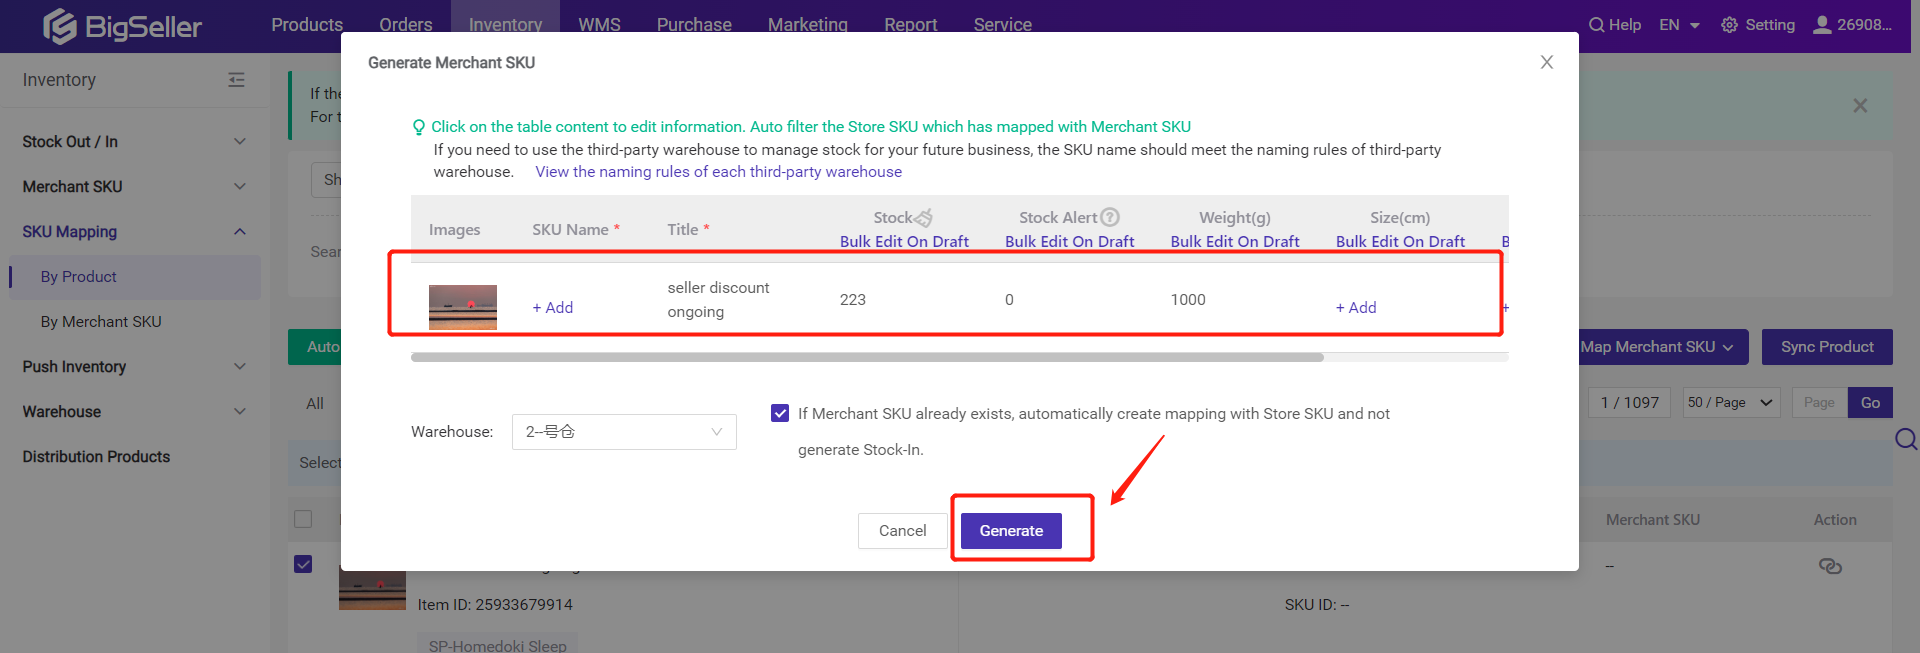
Method 6: Map Merchant SKU > Quickly Mapping Merchant SKU
Steps: Inventory > SKU Mapping > By Product > Unmapped > Map Merchant SKU > Quickly Mapping Merchant SKU
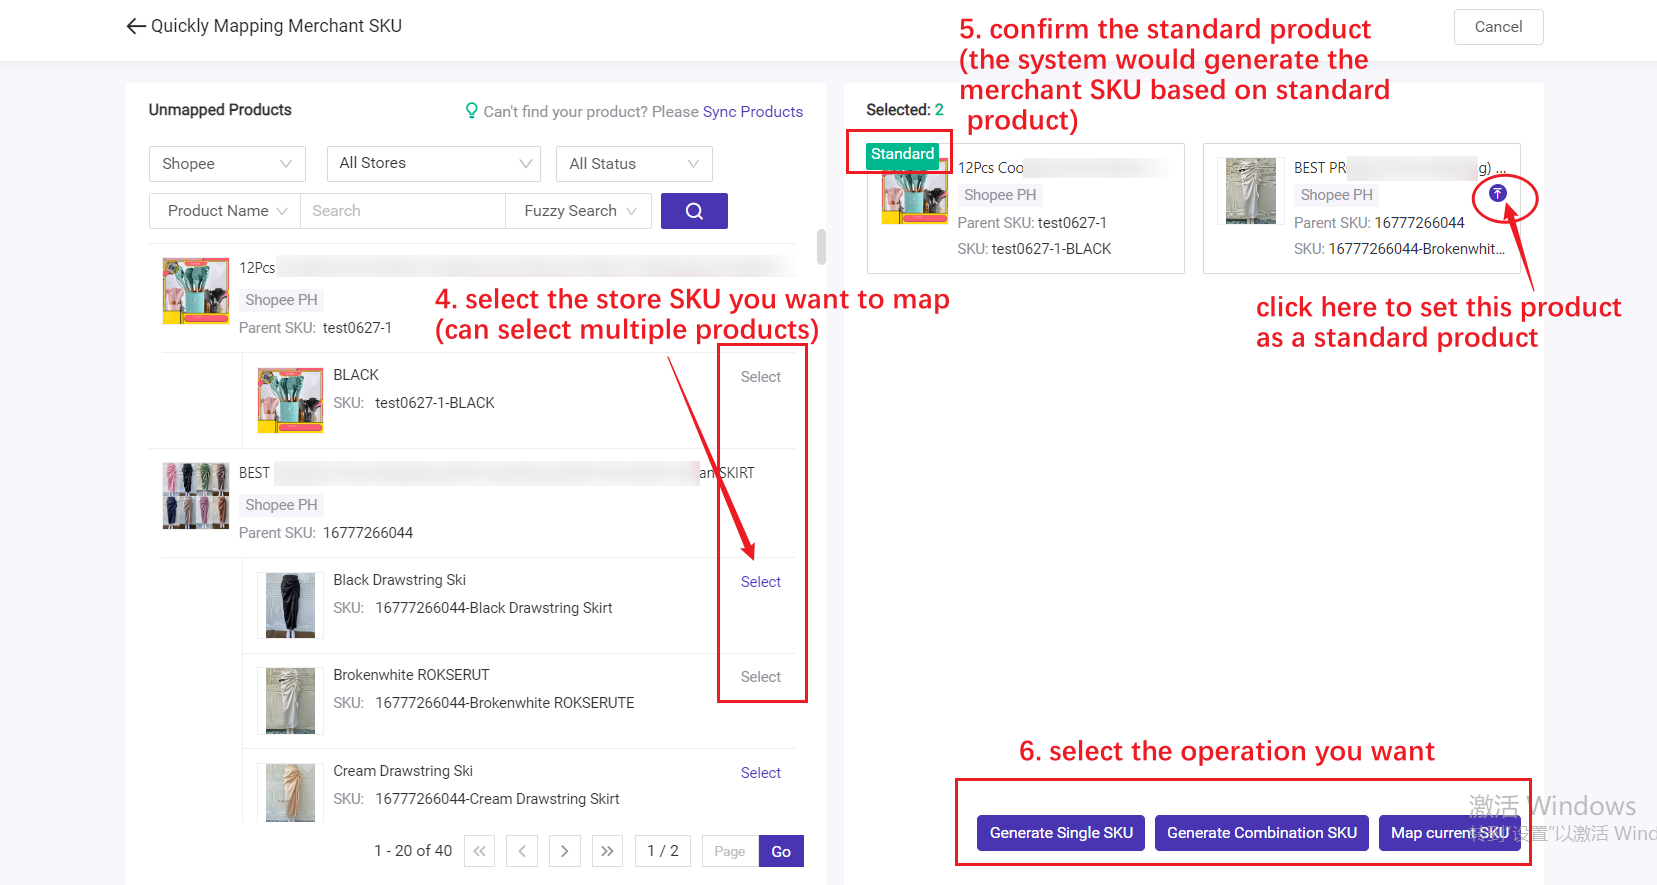
1) Generate Single SKU
- For example: if you select Shopee product "Book001" and Lazada product "Book002" and Shopify product "Book003", and set "Book002" as the standard product, when you click generate single SKU, it will generate a merchant SKU "Book002" for the above three products and map them.
- You can select multiple products and click this button, it will generate a combination SKU for the selected products.
- Select one product or multiple products to map the existing merchant SKU.
💡 Notes
- Quickly Mapping Merchant SKU page only shows the unmapped products;
- The merchant SKU you generated is the same as the store SKU of the standard product by default;
- Please set the parent SKU or SKU before you do the SKU mapping. (optional)
