Introduction to Move Feature
Move refers to the process of moving goods from one shelf (or area) to another within the warehouse, which can be used for batch adjusting or setting the shelf.
For example, if you purchase a new batch of shelves and need to move the products from the old shelves to the new shelves, you can use this feature to first create a move list in BigSeller and move the goods based on the printed move list. Besides, if the merchant SKU does not have a shelf, you can also use this function to set one. Make the warehouse management process more systematic, visual, and trackable.
Ps. Transfer refers to the exchange of goods between two warehouses. 👉 Learn More
💡 A SKU can only be placed on one shelf, and changing the quantity of merchant SKU during move is not supported.
Step 1: Go to Inventory > Move > Add Move List

Step 2: Select the Warehouse > Select merchant SKU
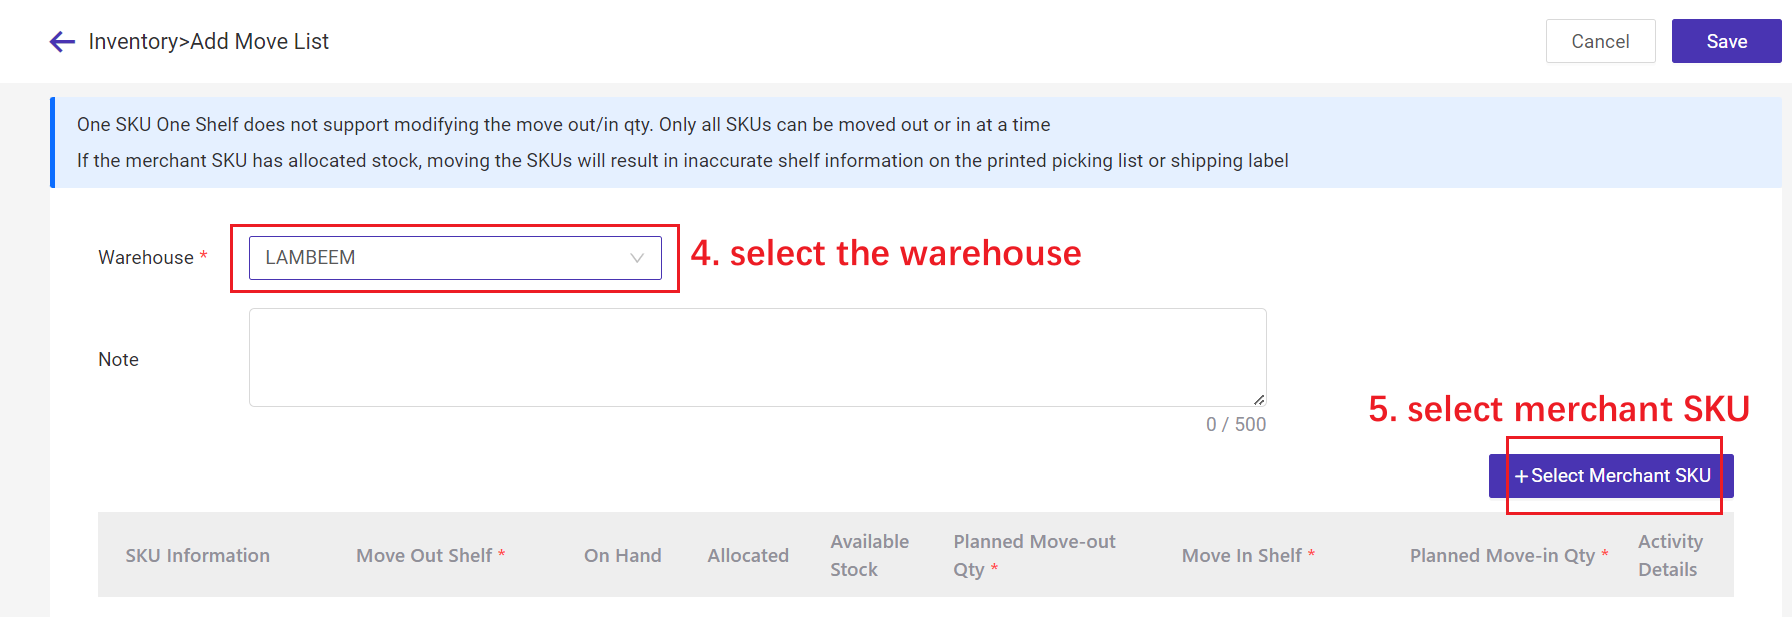
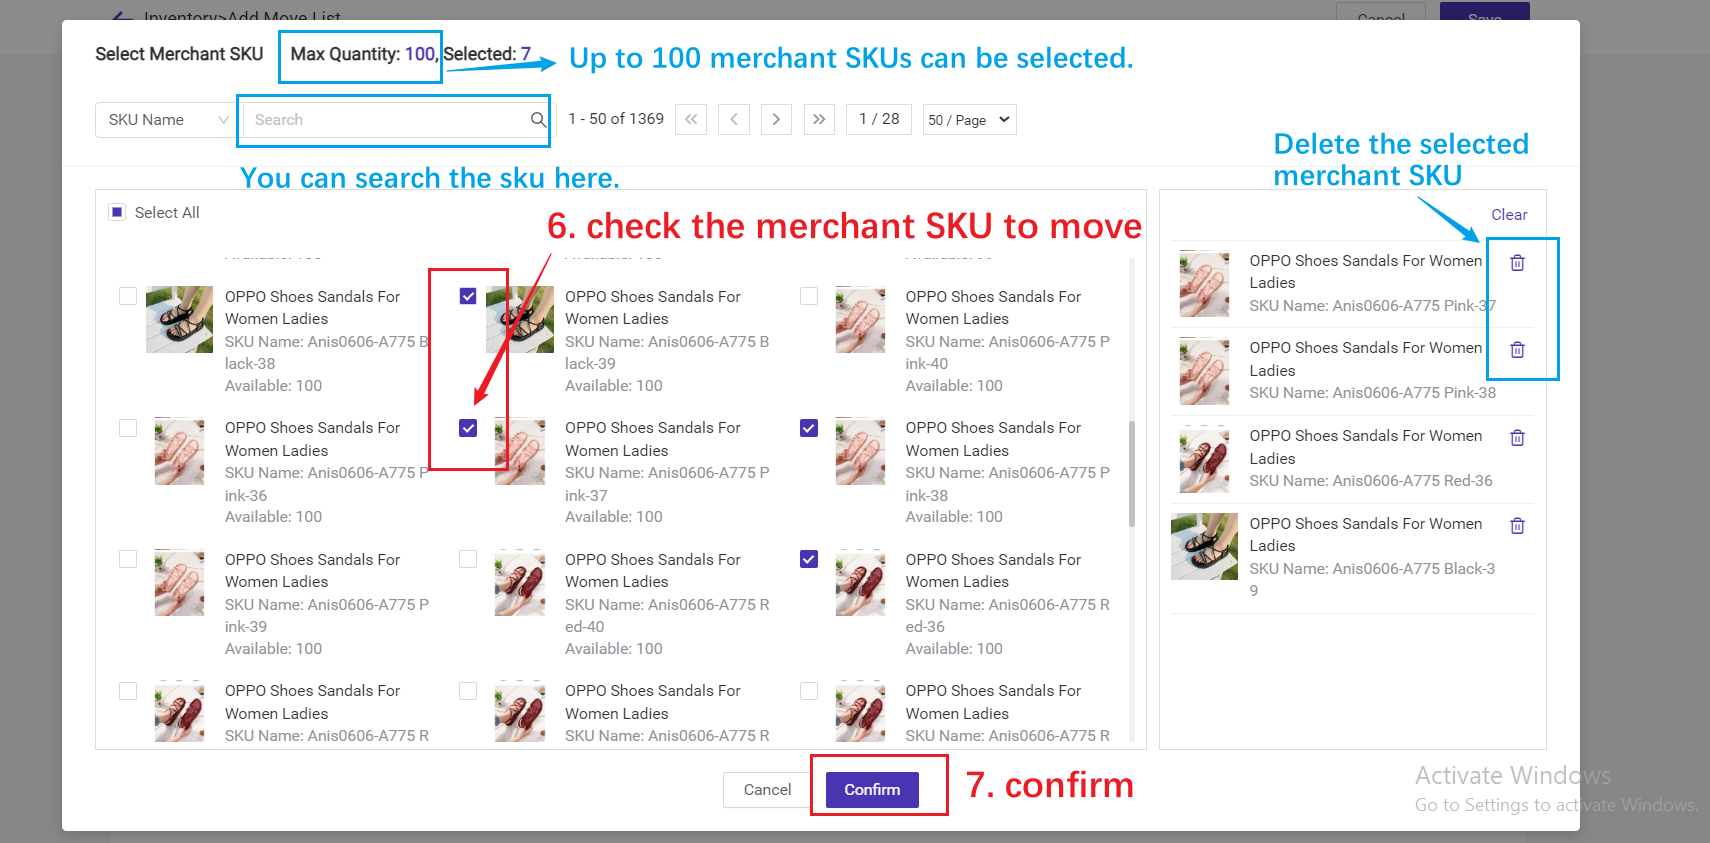
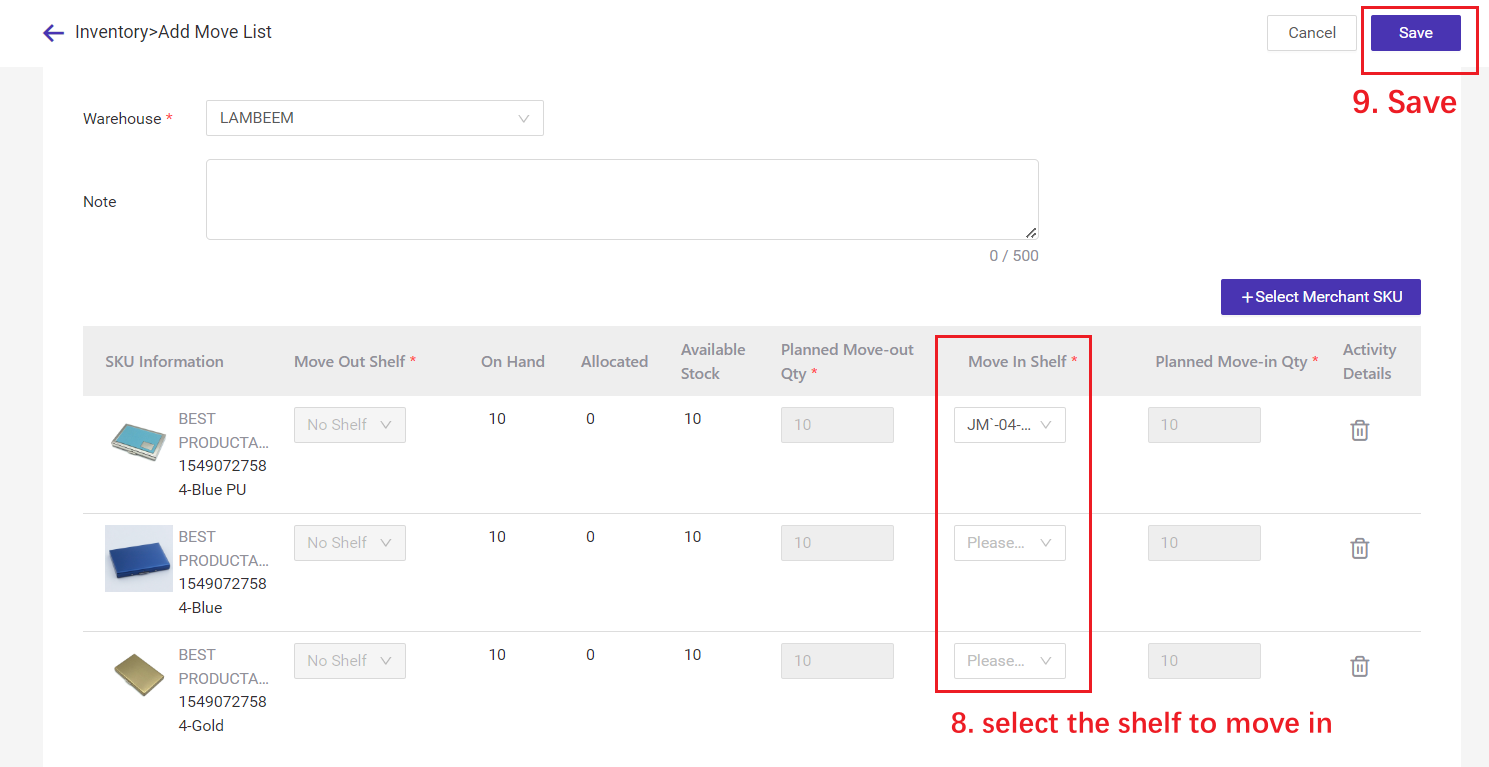
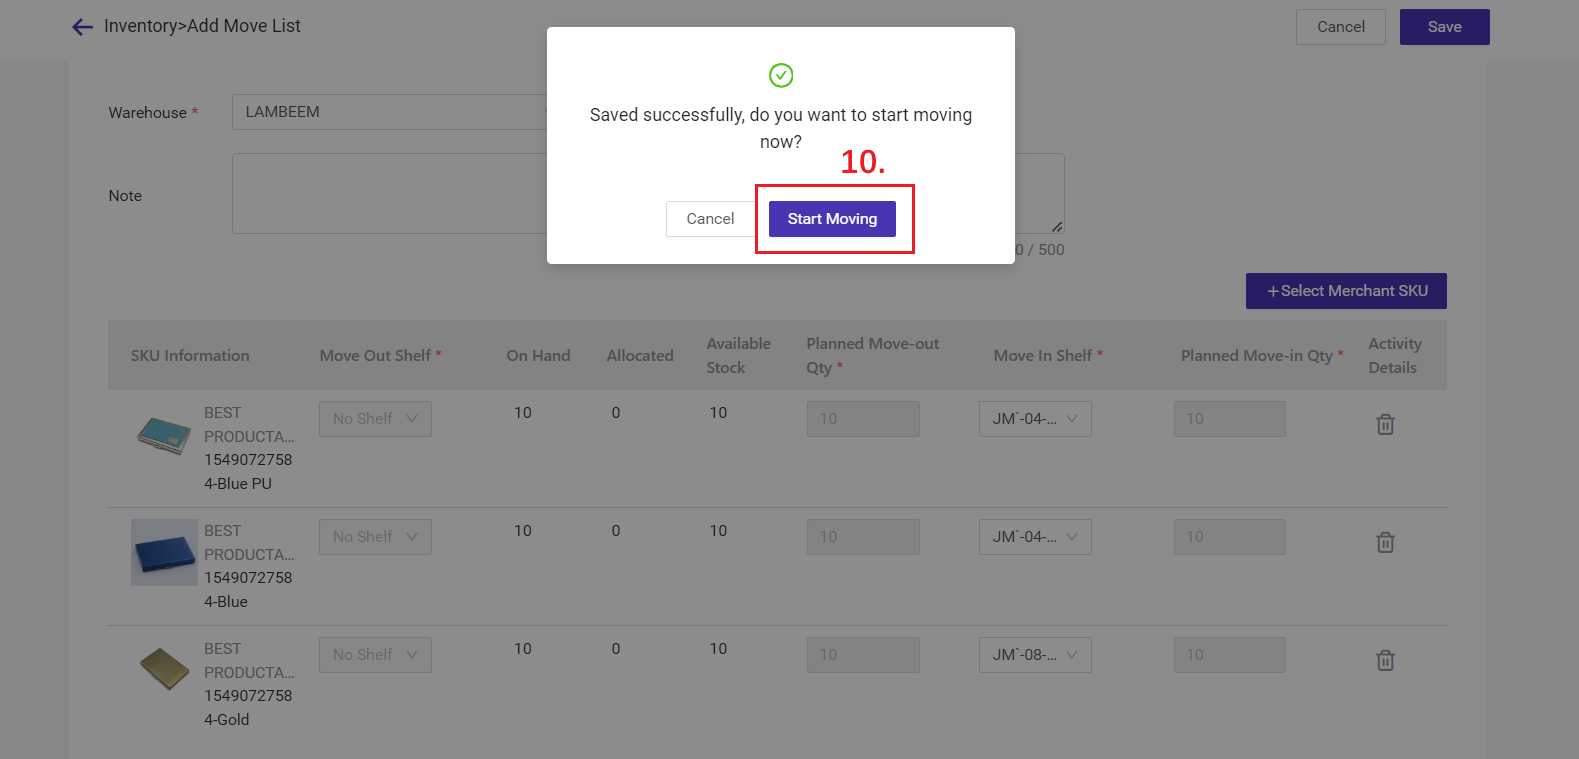
Step 3: Select the Move-in Shelf > Save > Start Moving
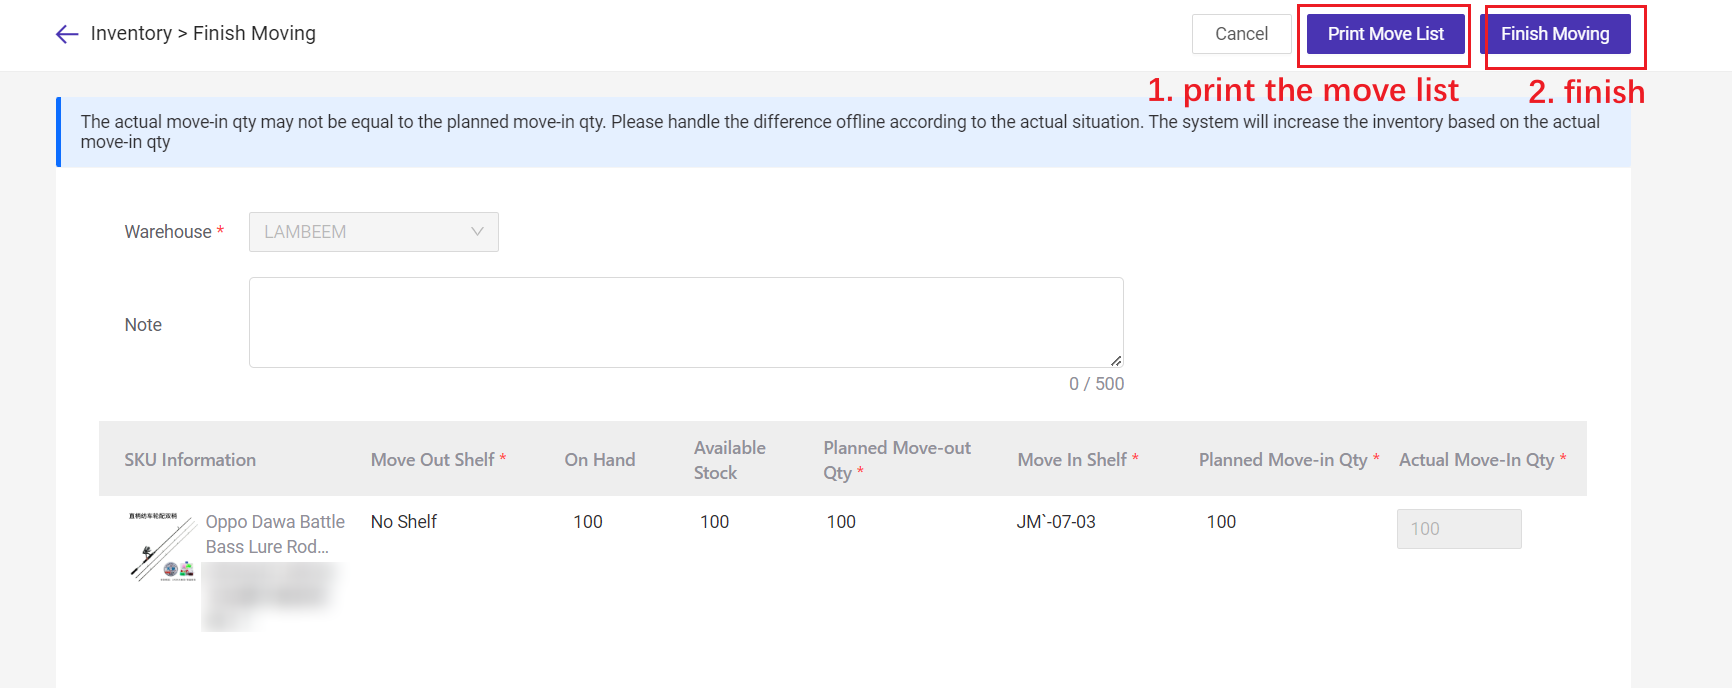
Step 4: You can print the move list to start moving goods. After completing the task, please click "Finish Moving", and this list will be in the "Completed" list.
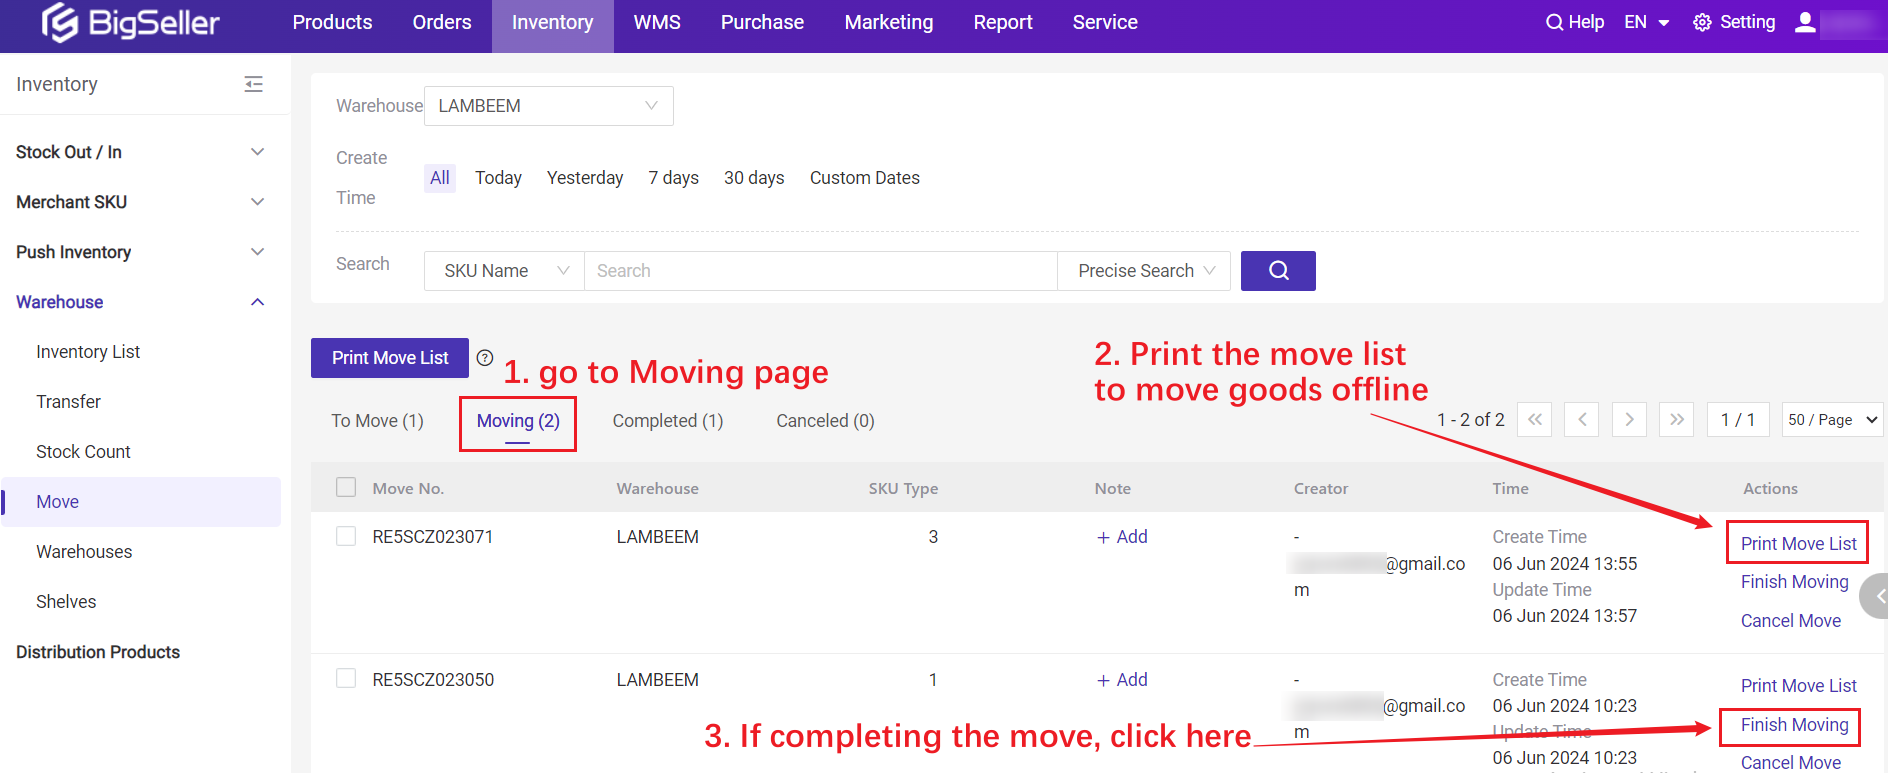
If you have previously created a move list but have not completed it, you can also operate on the "Moving" page.
After completing the task, please click "finish moving", and this list will be in the "Completed" list.
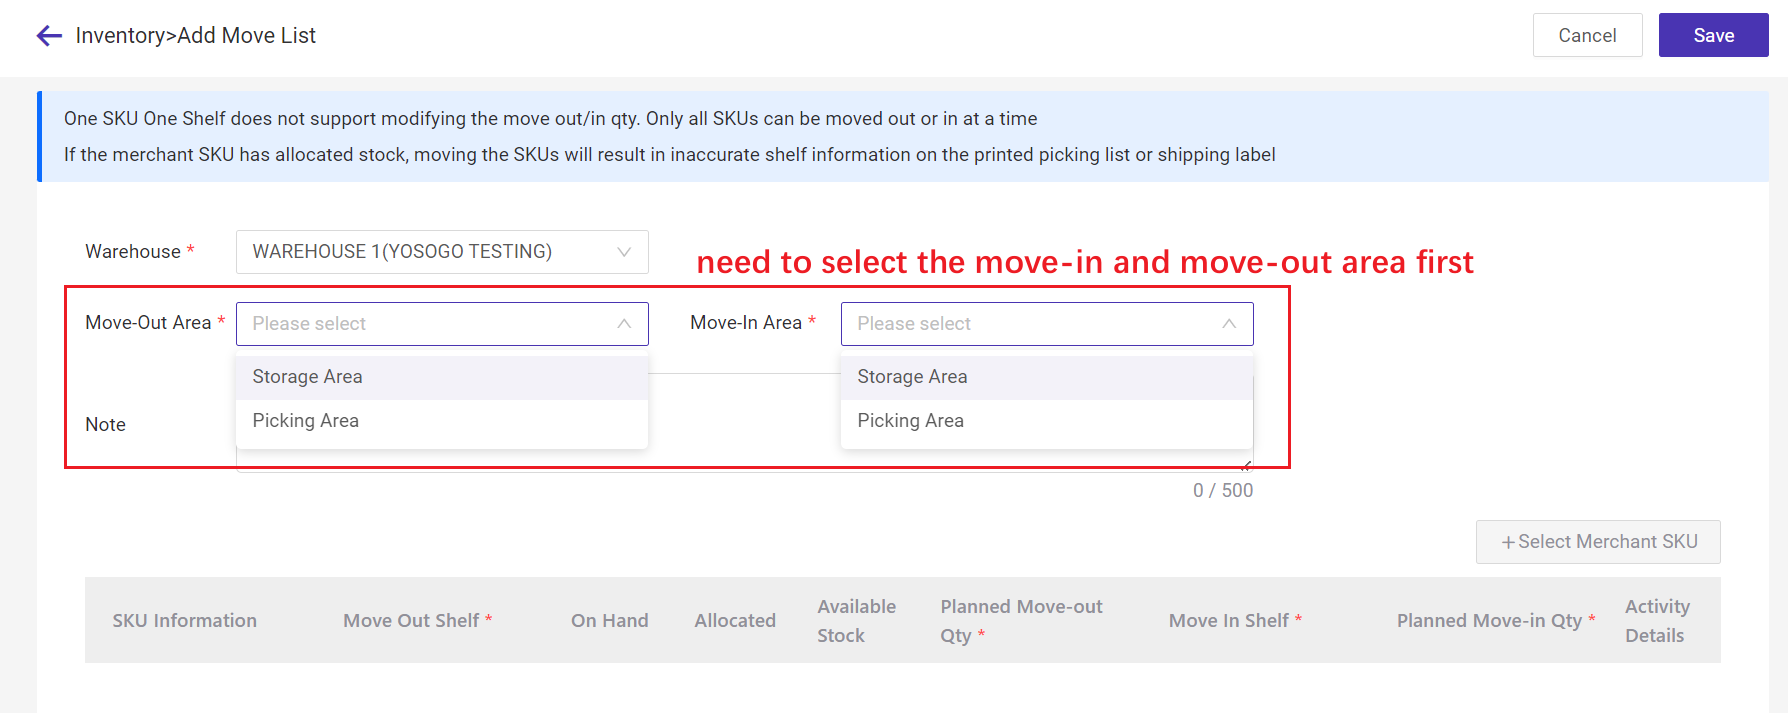
💡 Warehouse Pick&Store Zoning refers to dividing the warehouse into two areas: Picking Area and Storage Area. The picking area supports one SKU on one shelf, while the storage area supports one SKU on multiple shelves. 👉 Learn More
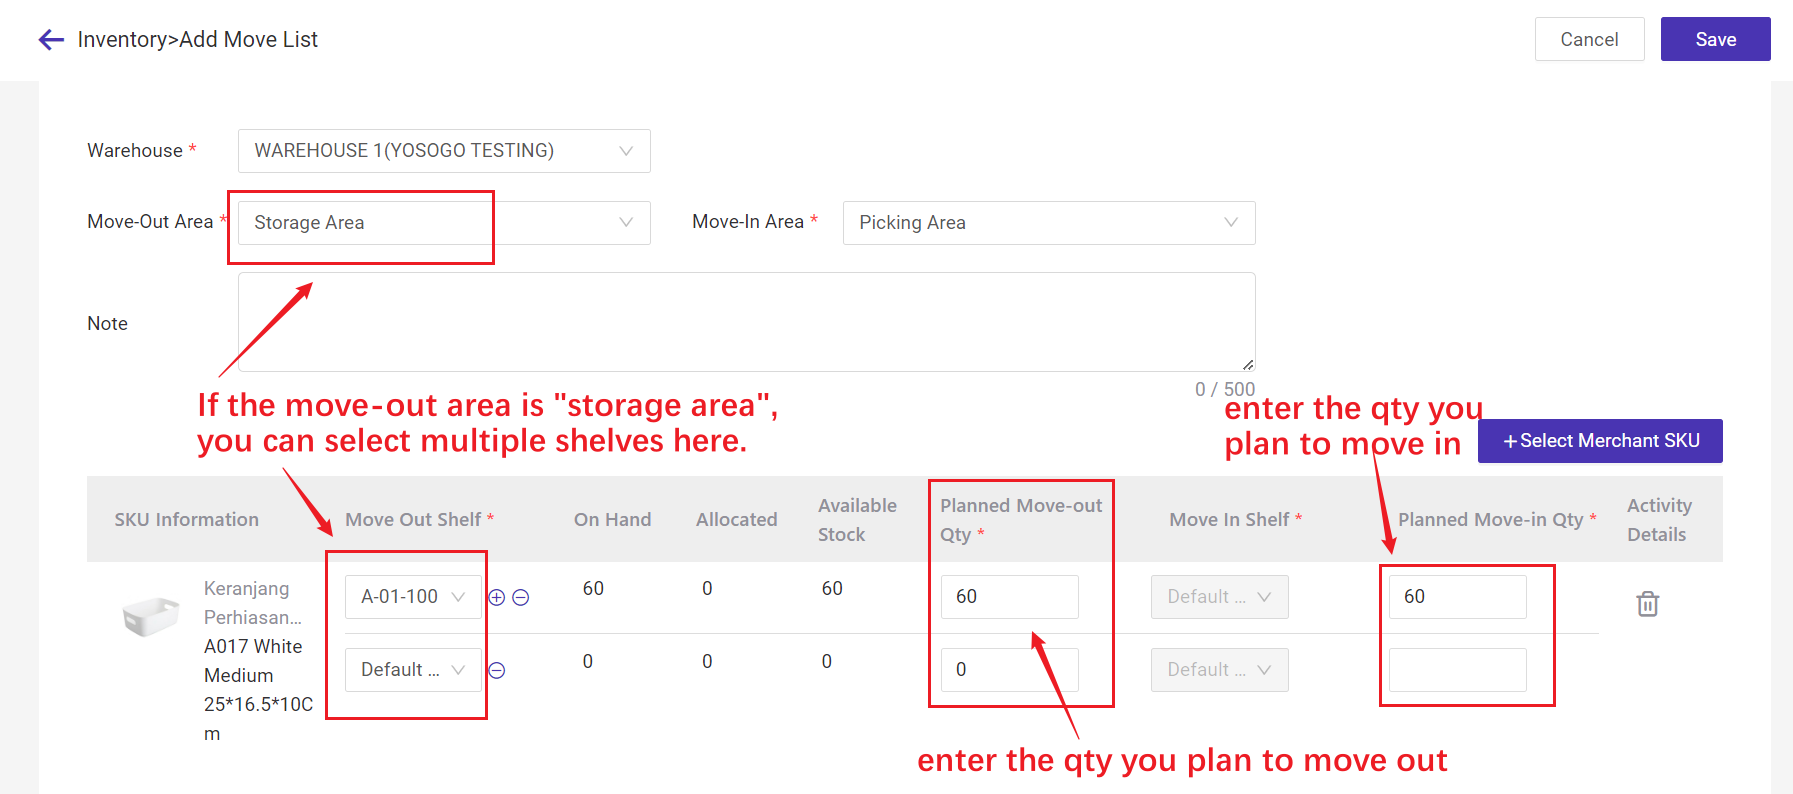
For example, the planned move-in qty is 60, but two items were sold before the move was completed, so the actual move-in qty was 58.
For example, if you purchase a new batch of shelves and need to move the products from the old shelves to the new shelves, you can use this feature to first create a move list in BigSeller and move the goods based on the printed move list. Besides, if the merchant SKU does not have a shelf, you can also use this function to set one. Make the warehouse management process more systematic, visual, and trackable.
Ps. Transfer refers to the exchange of goods between two warehouses. 👉 Learn More
1. Steps
Type 1: One SKU One Shelf
If your warehouse has not enabled [One SKU Multiple Shelves], you only need to select the move-in shelf. After the move is completed, all stocks of the selected SKUs will be directly moved to the new shelf.💡 A SKU can only be placed on one shelf, and changing the quantity of merchant SKU during move is not supported.
Step 1: Go to Inventory > Move > Add Move List

Step 2: Select the Warehouse > Select merchant SKU


Step 3: Select the Move-in Shelf > Save > Start Moving


Step 4: You can print the move list to start moving goods. After completing the task, please click "Finish Moving", and this list will be in the "Completed" list.

If you have previously created a move list but have not completed it, you can also operate on the "Moving" page.

After completing the task, please click "finish moving", and this list will be in the "Completed" list.
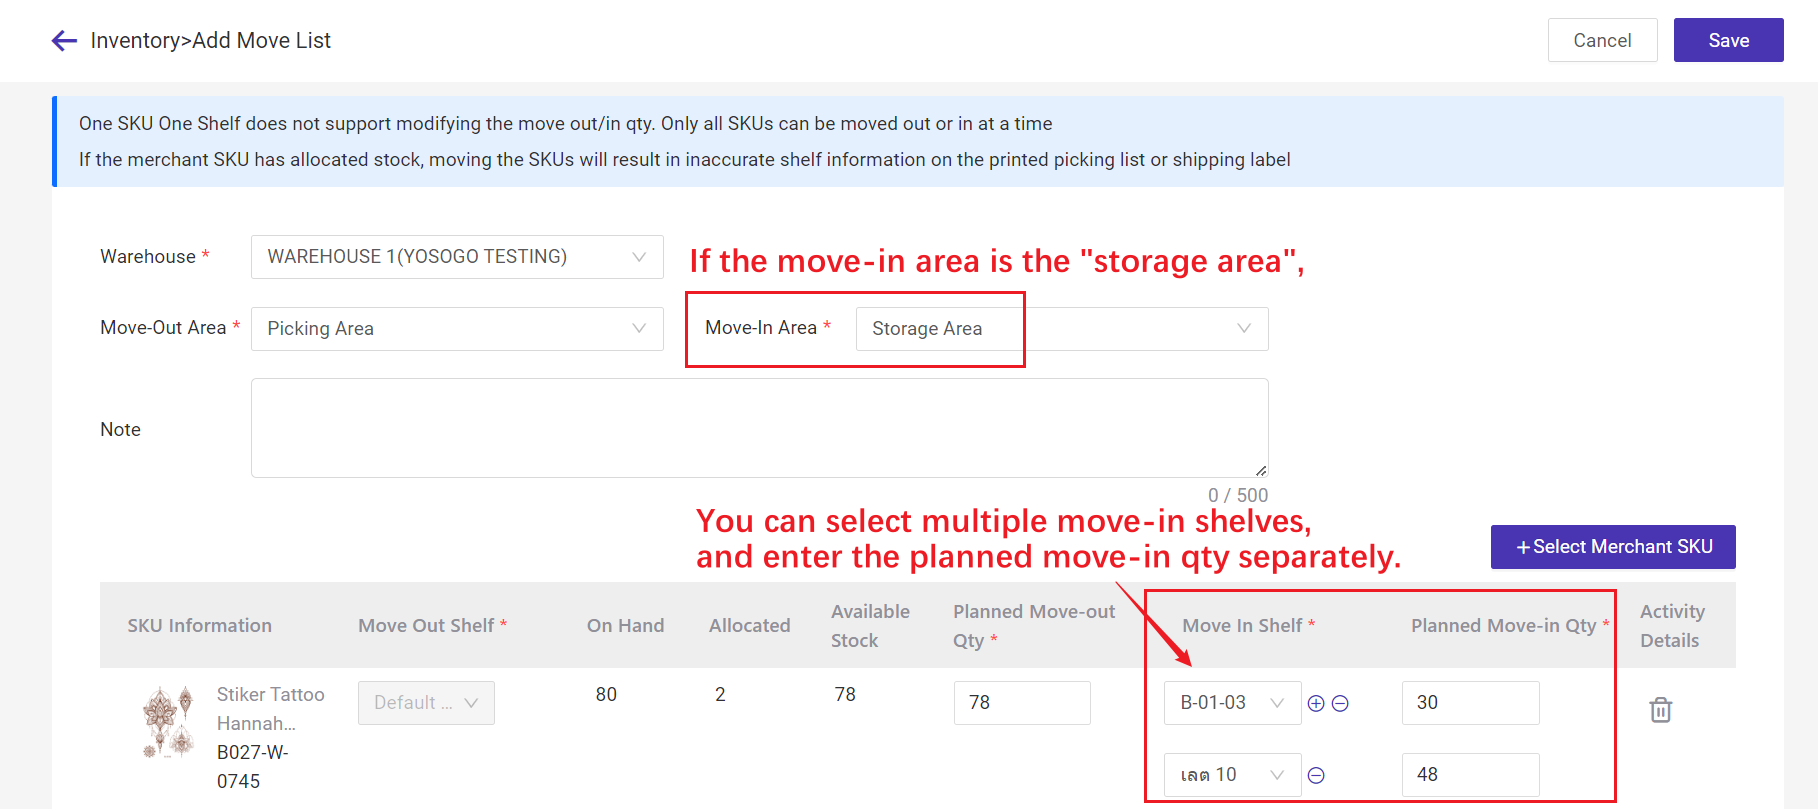
Type 2: One SKU Multiple Shelves
Warehouses enabled the pick&store zoning feature need to select the move-in/out area first.
💡 Warehouse Pick&Store Zoning refers to dividing the warehouse into two areas: Picking Area and Storage Area. The picking area supports one SKU on one shelf, while the storage area supports one SKU on multiple shelves. 👉 Learn More


2. Notes
1. The actual move-in qty may not be equal to the planned move-in qty. The system will increase the inventory based on the actual move-in qtyFor example, the planned move-in qty is 60, but two items were sold before the move was completed, so the actual move-in qty was 58.
Is this content helpful?
Thank you for your feedback, which drives us to provide better services_
Please contact us if the document can't answer your questions