Introduction to Inventory Transfer
Update Time: 02 Sep 2025 02:27
1. Process Steps
Two steps to completing the SKU transfer: creating a transfer list and receiving it.1.1 Create a Transfer List
Go to Inventory > Transfer > Transfer Plan > Add Transfer List > Fill in the list > Submit
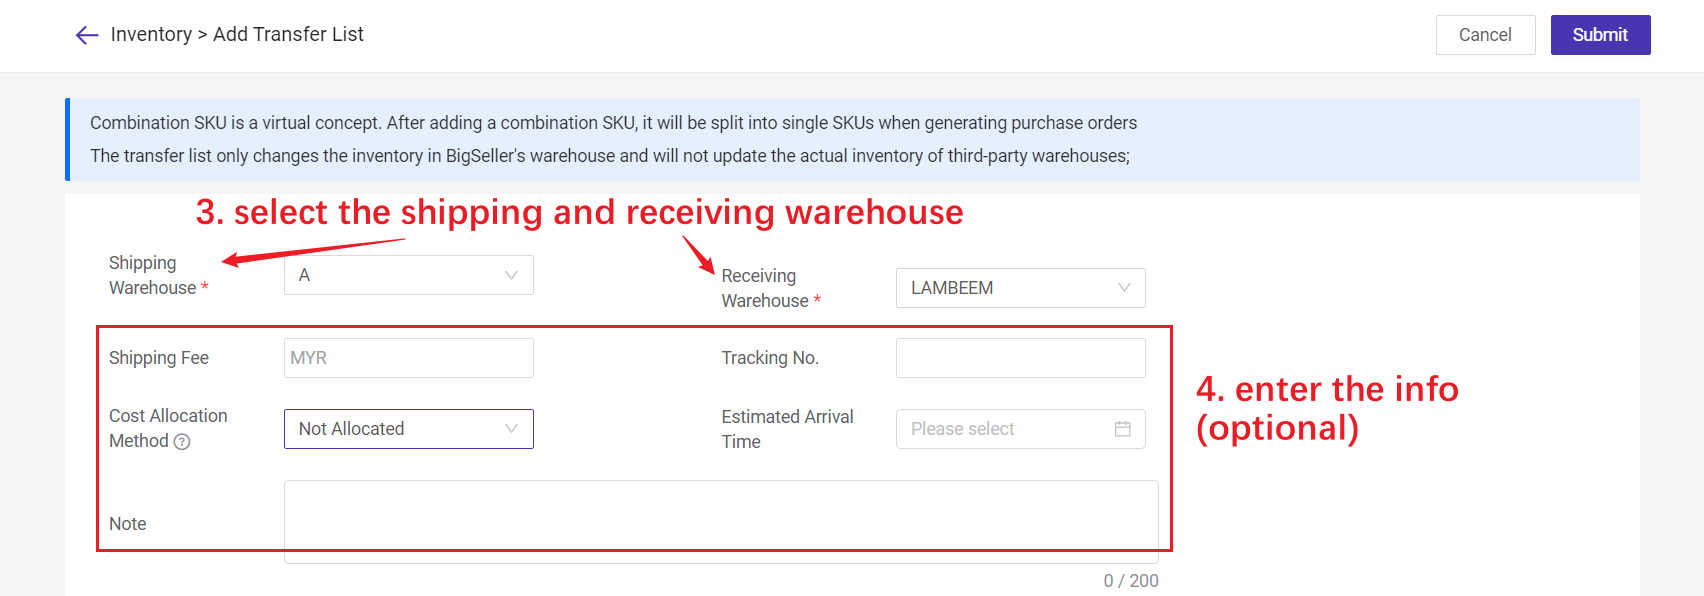
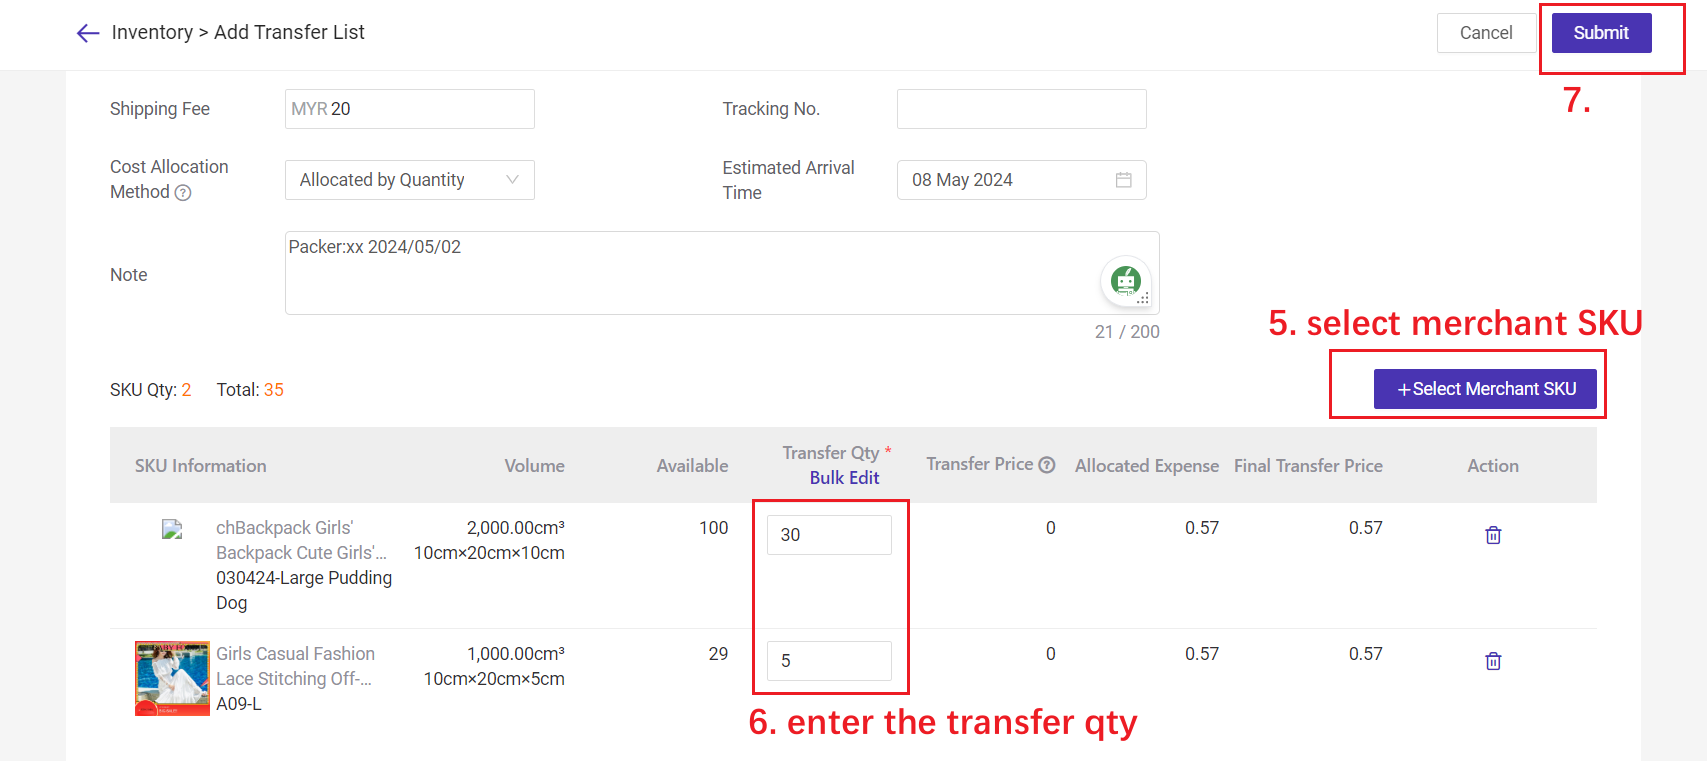
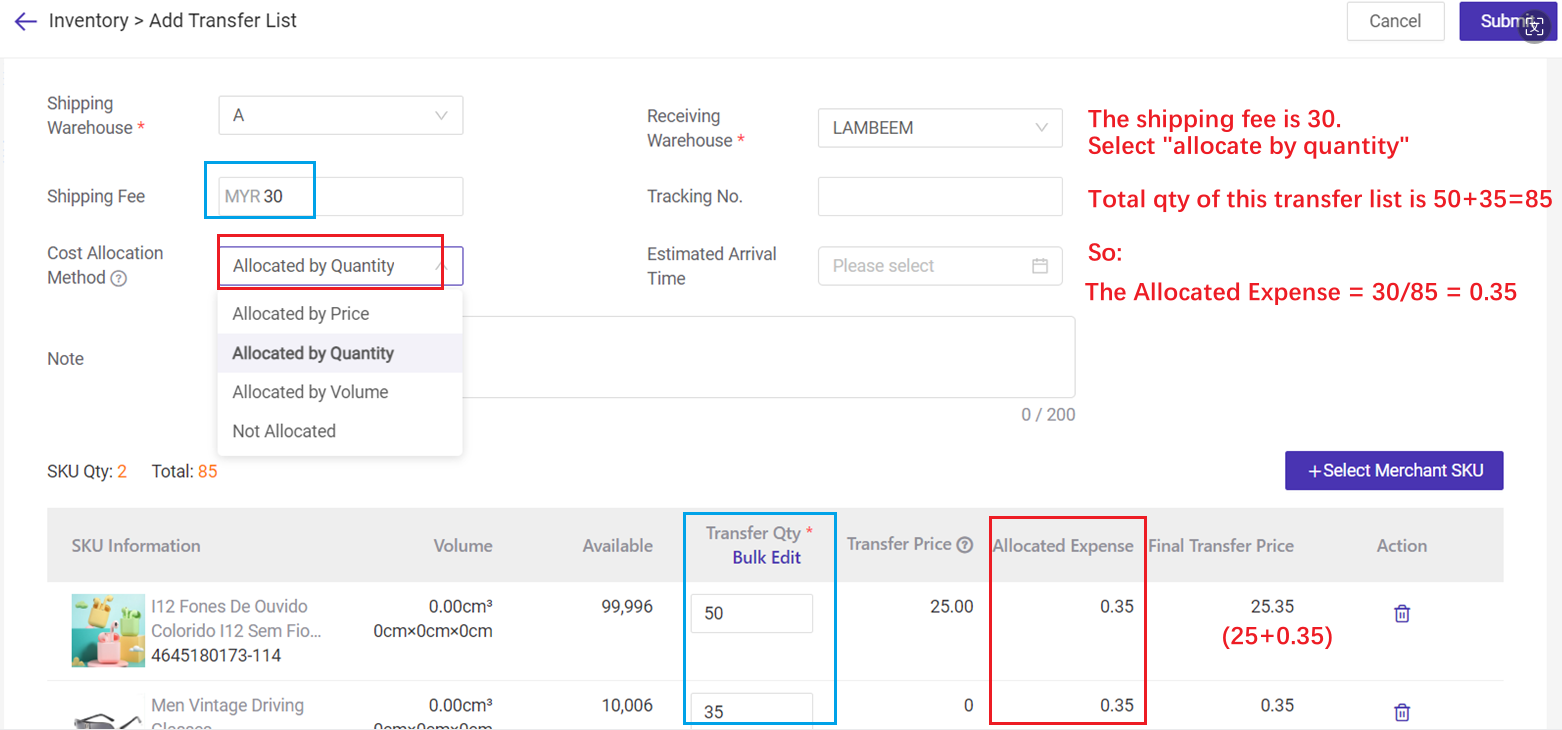
🔖 Cost Allocation Method: Sometimes there may be shipping fee for the transfer list. You can set the cost allocation method to calculate the expense for every SKU. And this allocated expense will ultimately be added to the cost as the final transfer price.
- Allocated by Price: Allocated expense = Unit Cost Price / Total Cost Price * {x}.
- Allocated by Quantity: Allocated expense = {x} / Transfer qty
- Allocated by Volume: Allocated expense = Unit SKU Volume / Total Volume * {x}
- Not Allocated
{x} means the shipping fee.
For example:
1.2 Print Transfer List
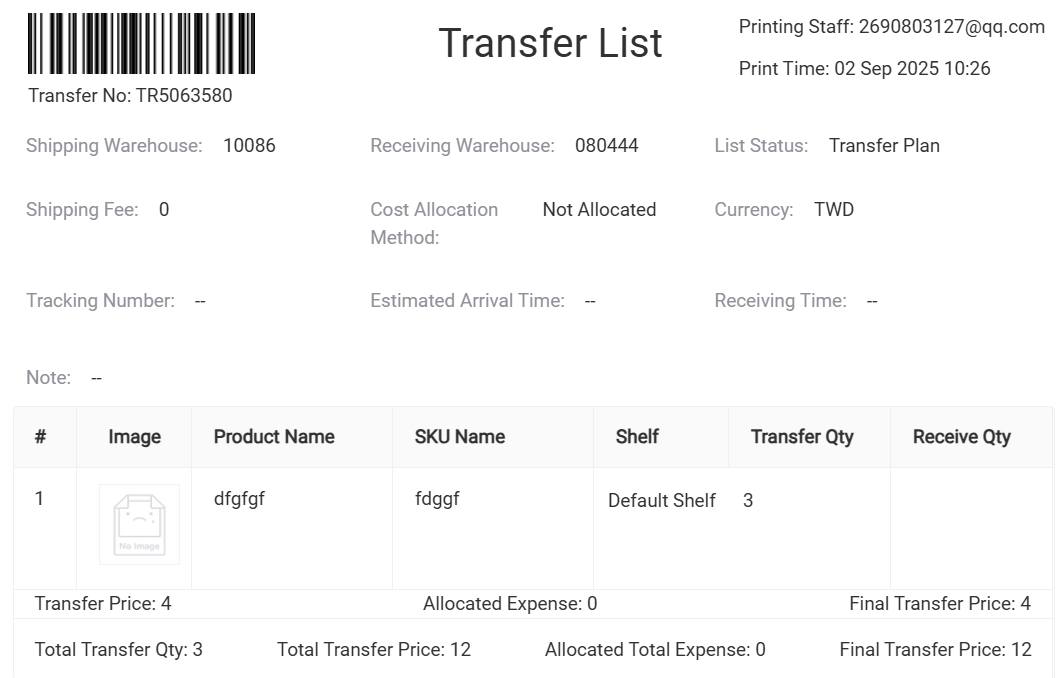
Pickers can perform picking and outbound based on the paper Transfer List generated by the system.
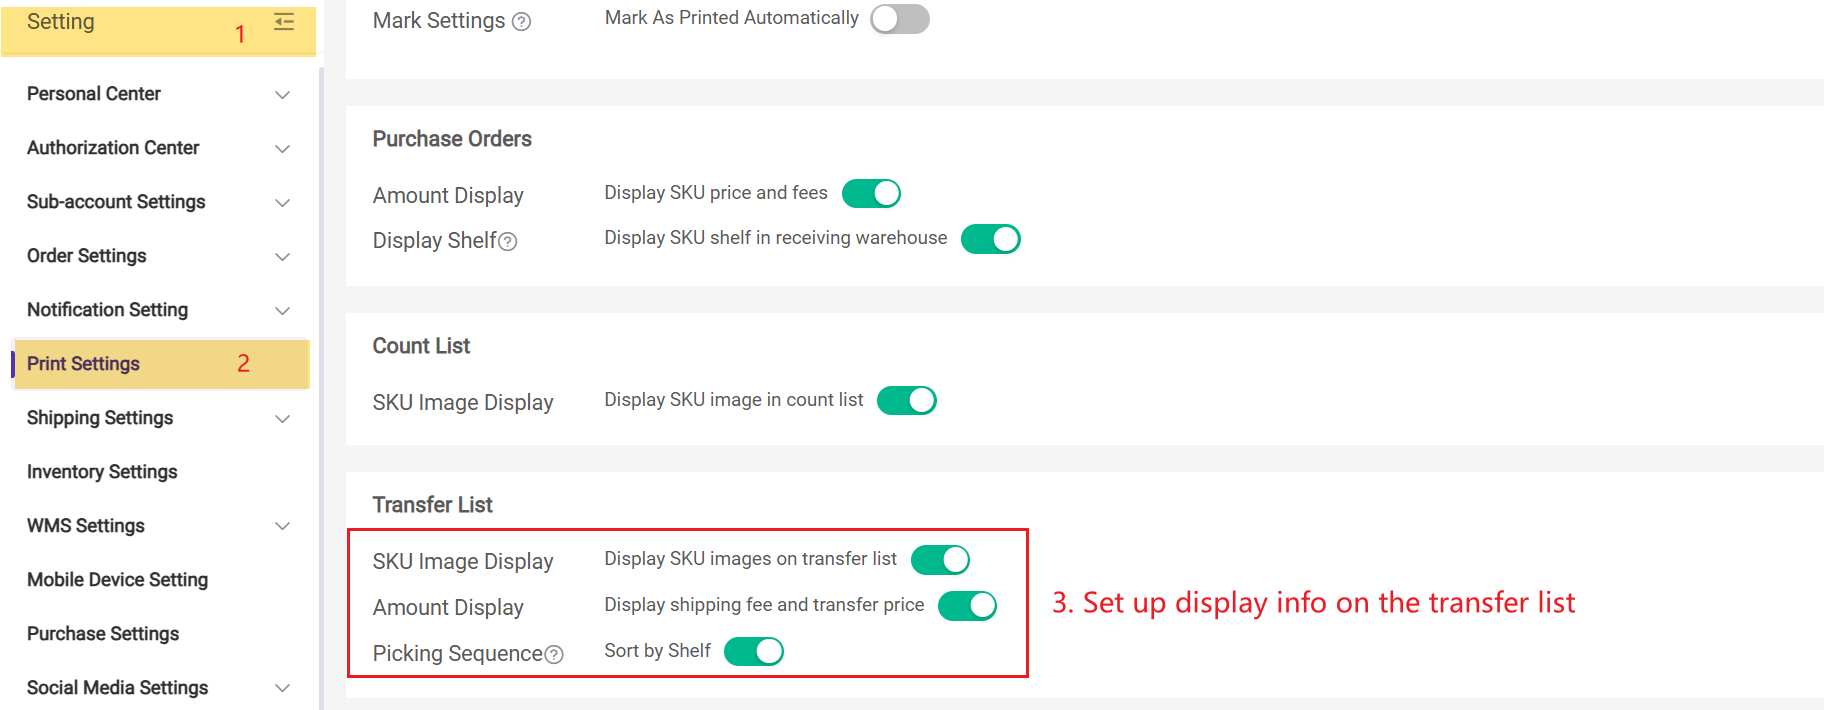
Step 1: Configure Print Settings (Go to Settings > Print Settings and set up)
-
Display SKU images on transfer list
-
Display shipping fee and transfer price
-
[New] Picking sequence – sort by shelf (the SKU list on the transfer list can be sorted in ascending order by shelf name; currently only supported for warehouses with One SKU One Shelf)
Step 2: Print the Document -> Go to the Transfer page and print the transfer list.
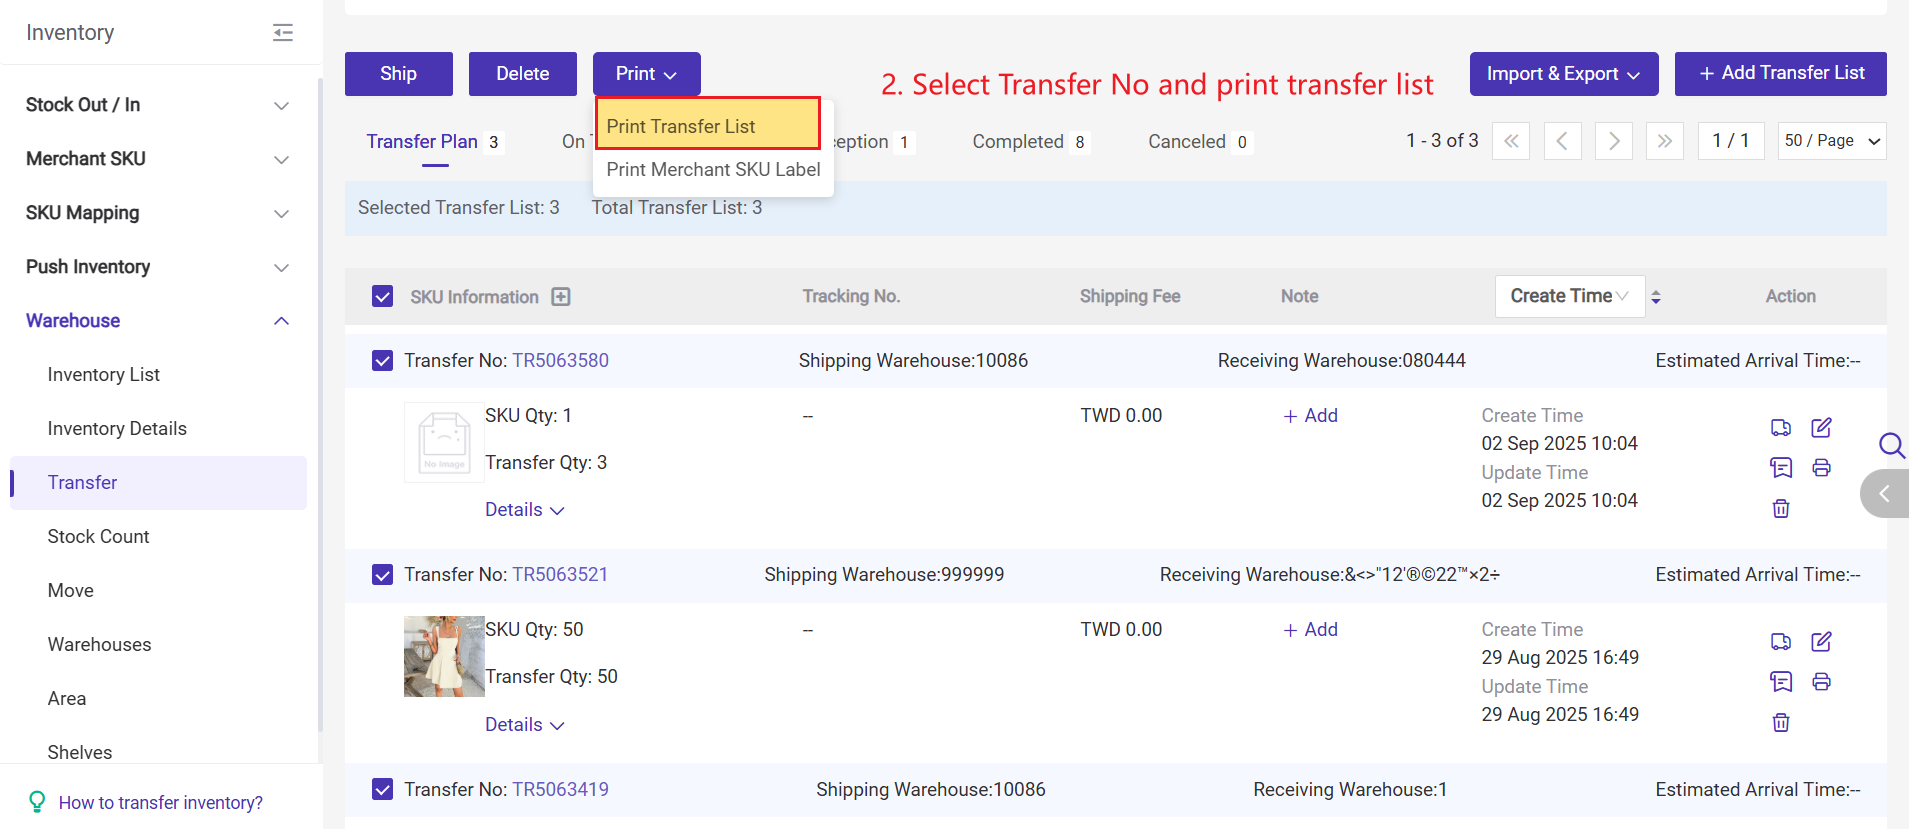
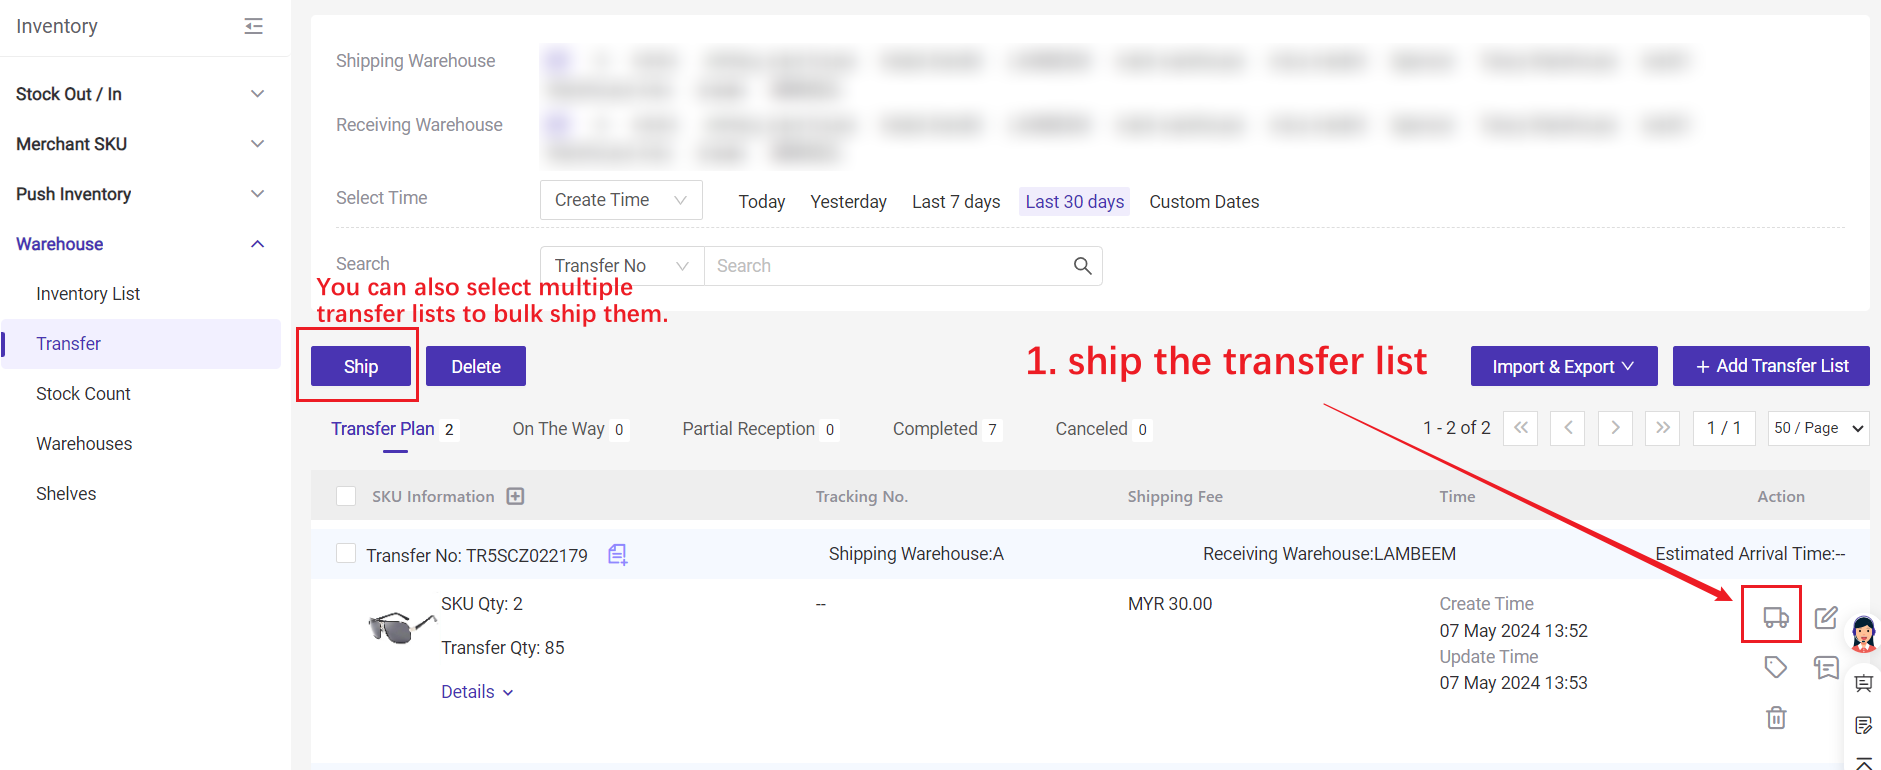
1.3 Ship the Transfer List
Confirm shipping after the goods were shipped from the warehouse
Then the transfer list will move to the On The Way page and also appear on the Receiving > Transfer Receiving page.
1.3 Confirm Receiving
Method 1: Receive ManuallyYou can receive one by one or in bulk.
Go to Inventory > Transfer > On the Way > select transfer list > Transfer Receiving > click on Confirm Receiving button > enter received quantity> Confirm
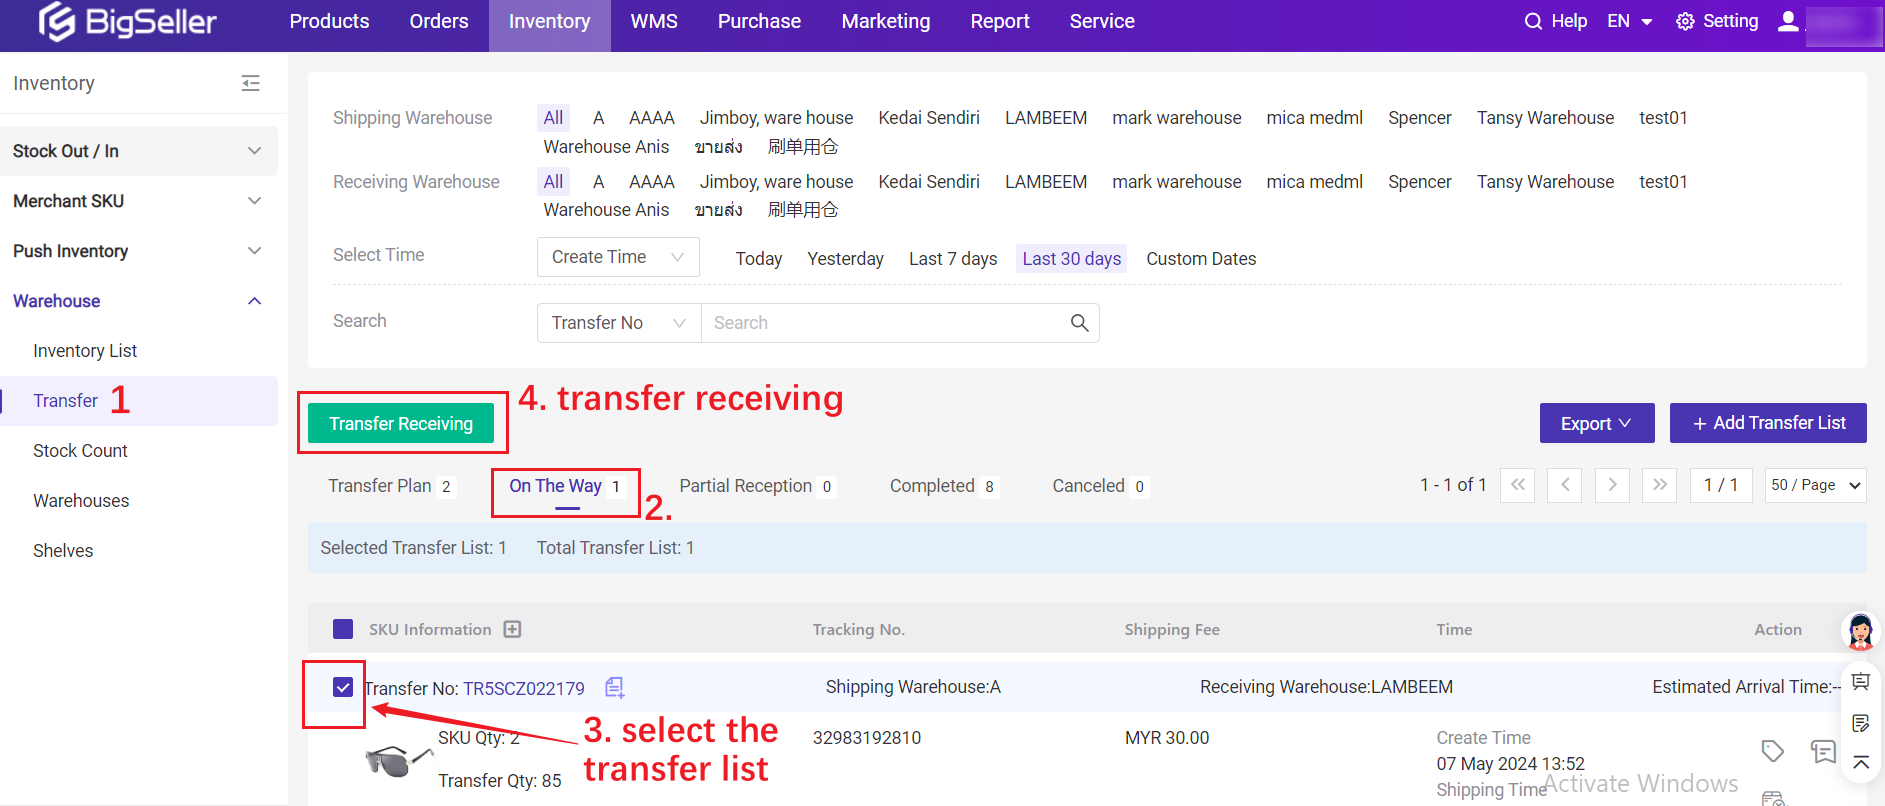

If all goods are received (received quantity = transfer quantity), the receiving status of the transfer list will be changed to Received.
If only some of the goods are received (received quantity<transfer quantity), the receiving status will be Partial Reception. You can continue receiving goods.
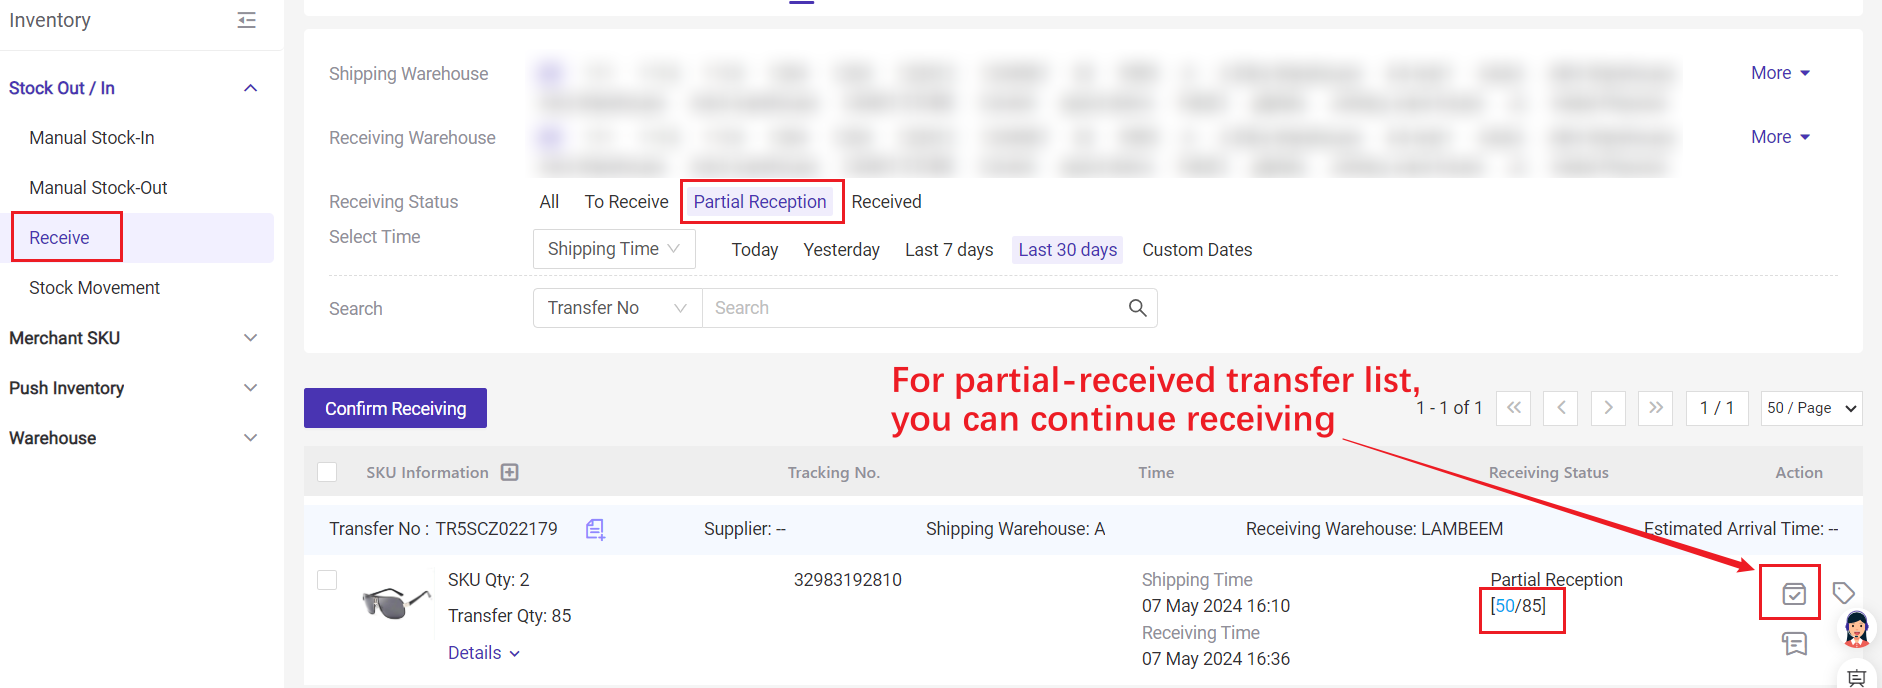
After confirming, the goods will be in stock immediately and the number will increase.
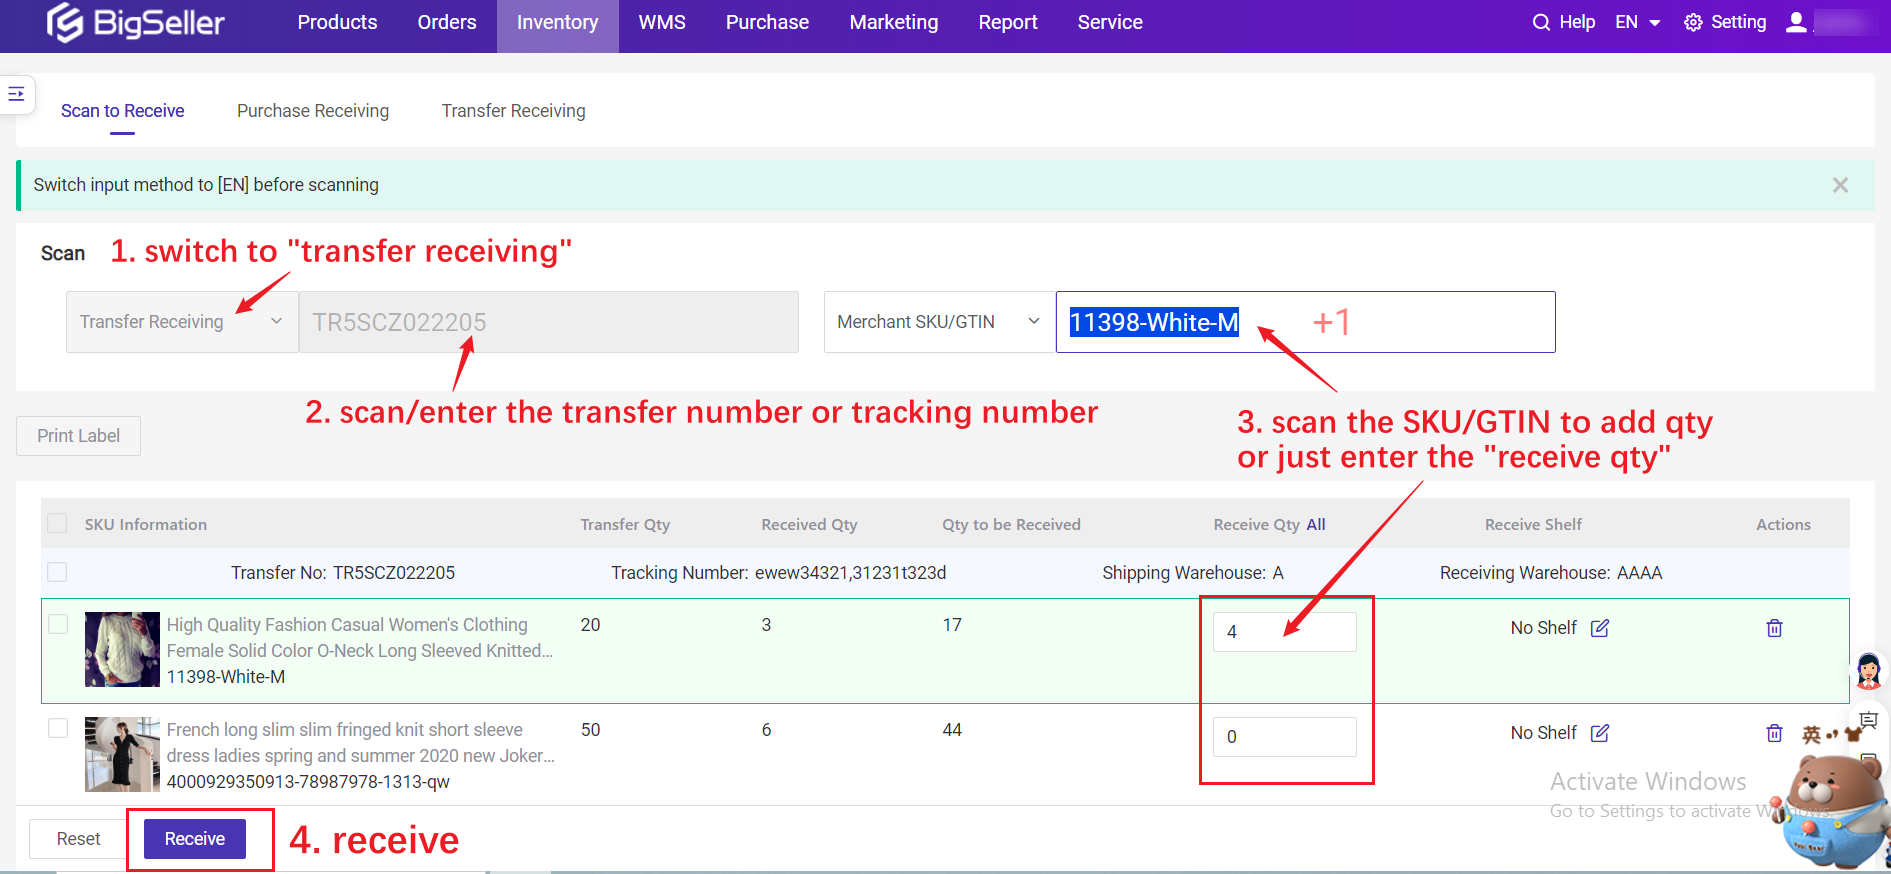
Method 2: Scan to Receive
Go to Inventory > Receive > Scan to Receive

1.4 Print Label
SKU labels can mark product information, facilitating real-time tracking of inventory quantity, shelf, and status. If you don't need to print the label, please ignore this step.There are multiple entrances to print the SKU label.
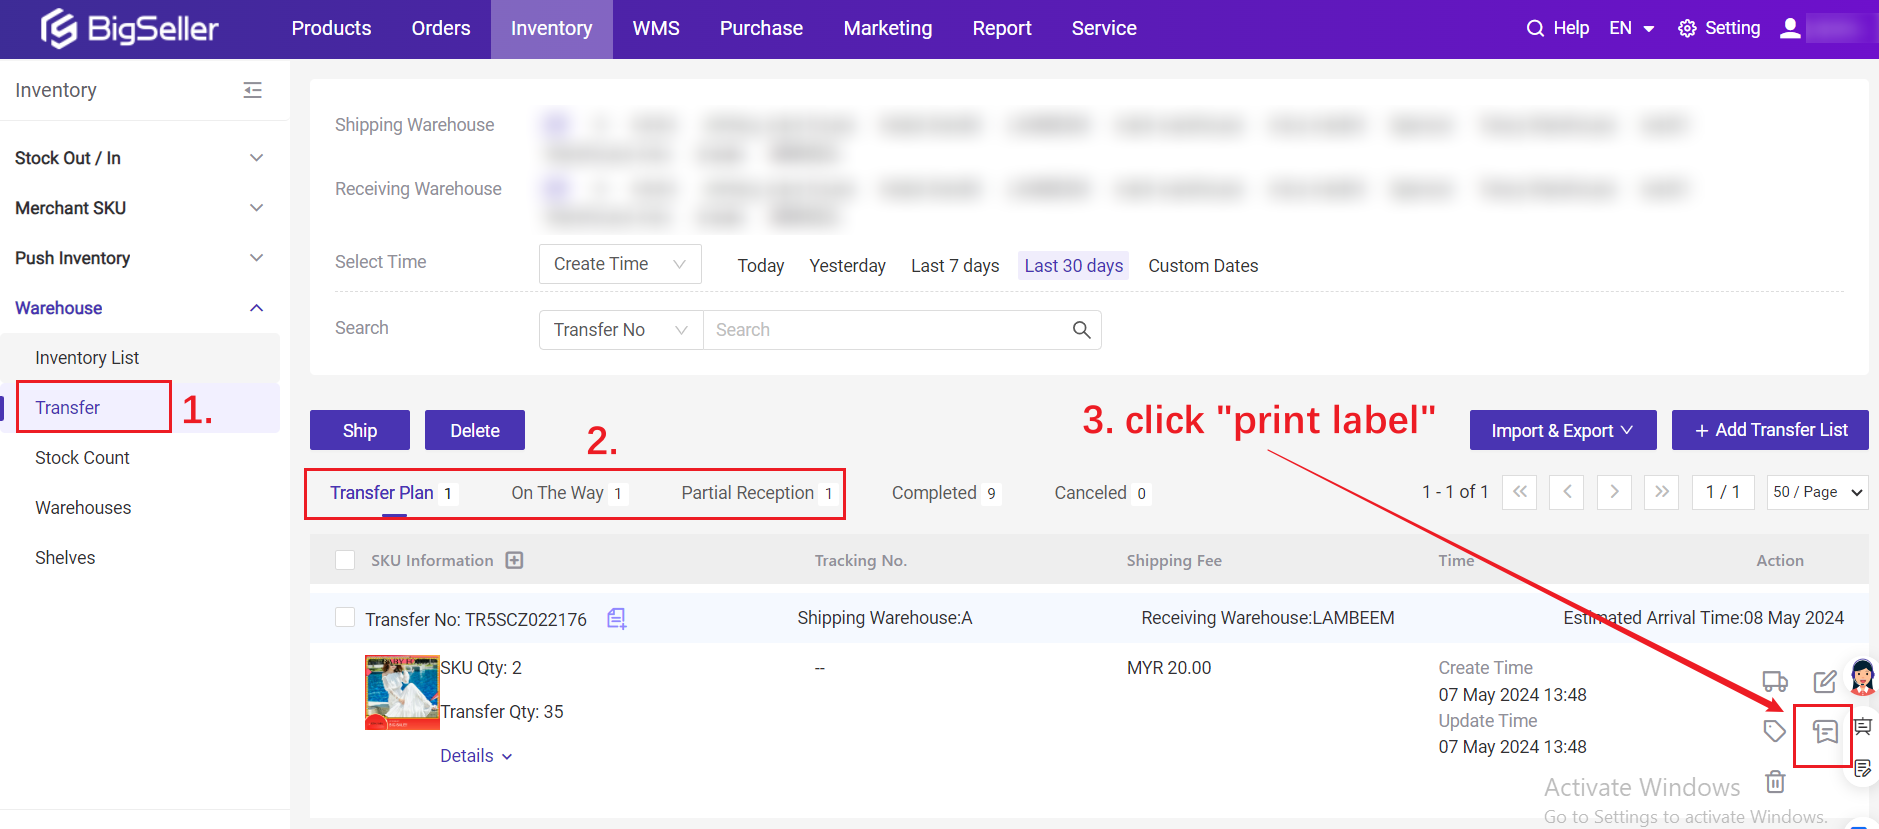
Entrance 1: Transfer Lists
On the Transfer Plan, On the Way and Partial Reception lists, you can print the SKU label.
💡 The Label Print Qty defaults to the Received Qty.
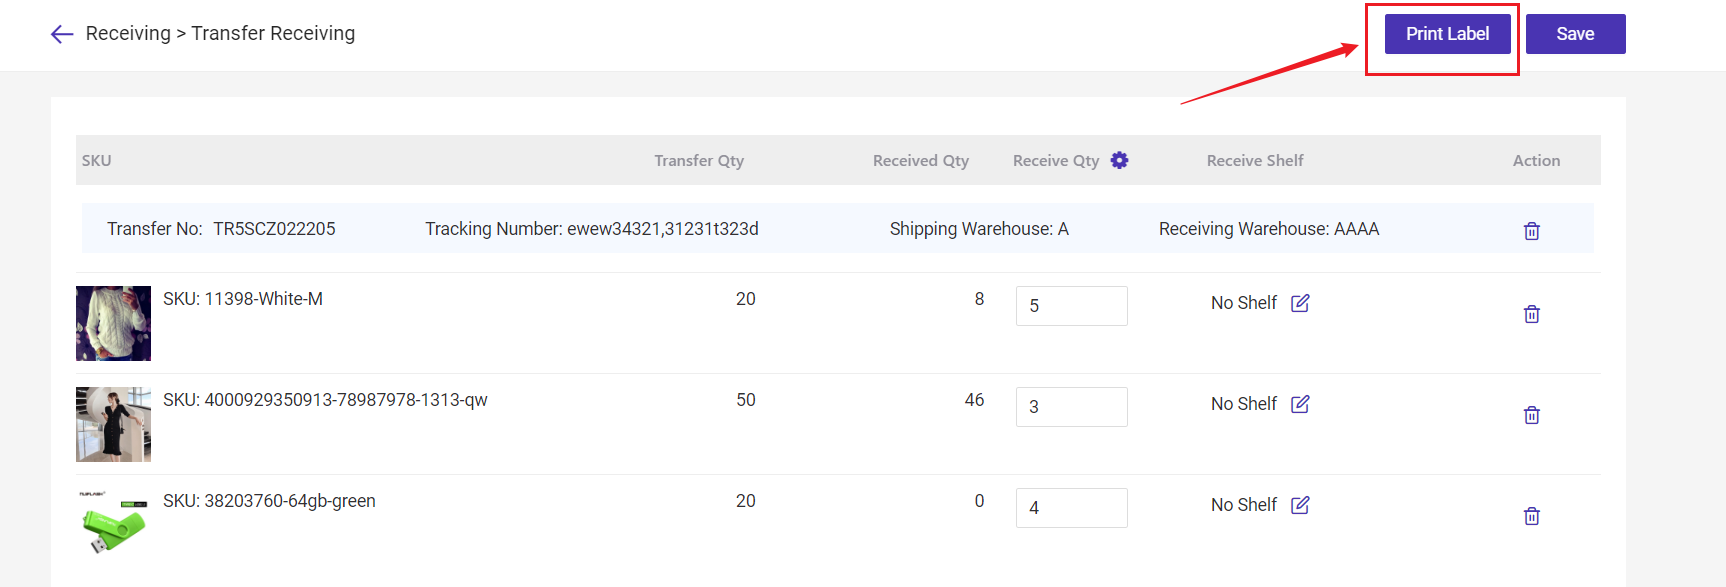
Entrance 2: Transfer Receiving
When receiving the transfer items, you can also print the SKU label.
💡 The Label Print Qty defaults to the Receive Qty.
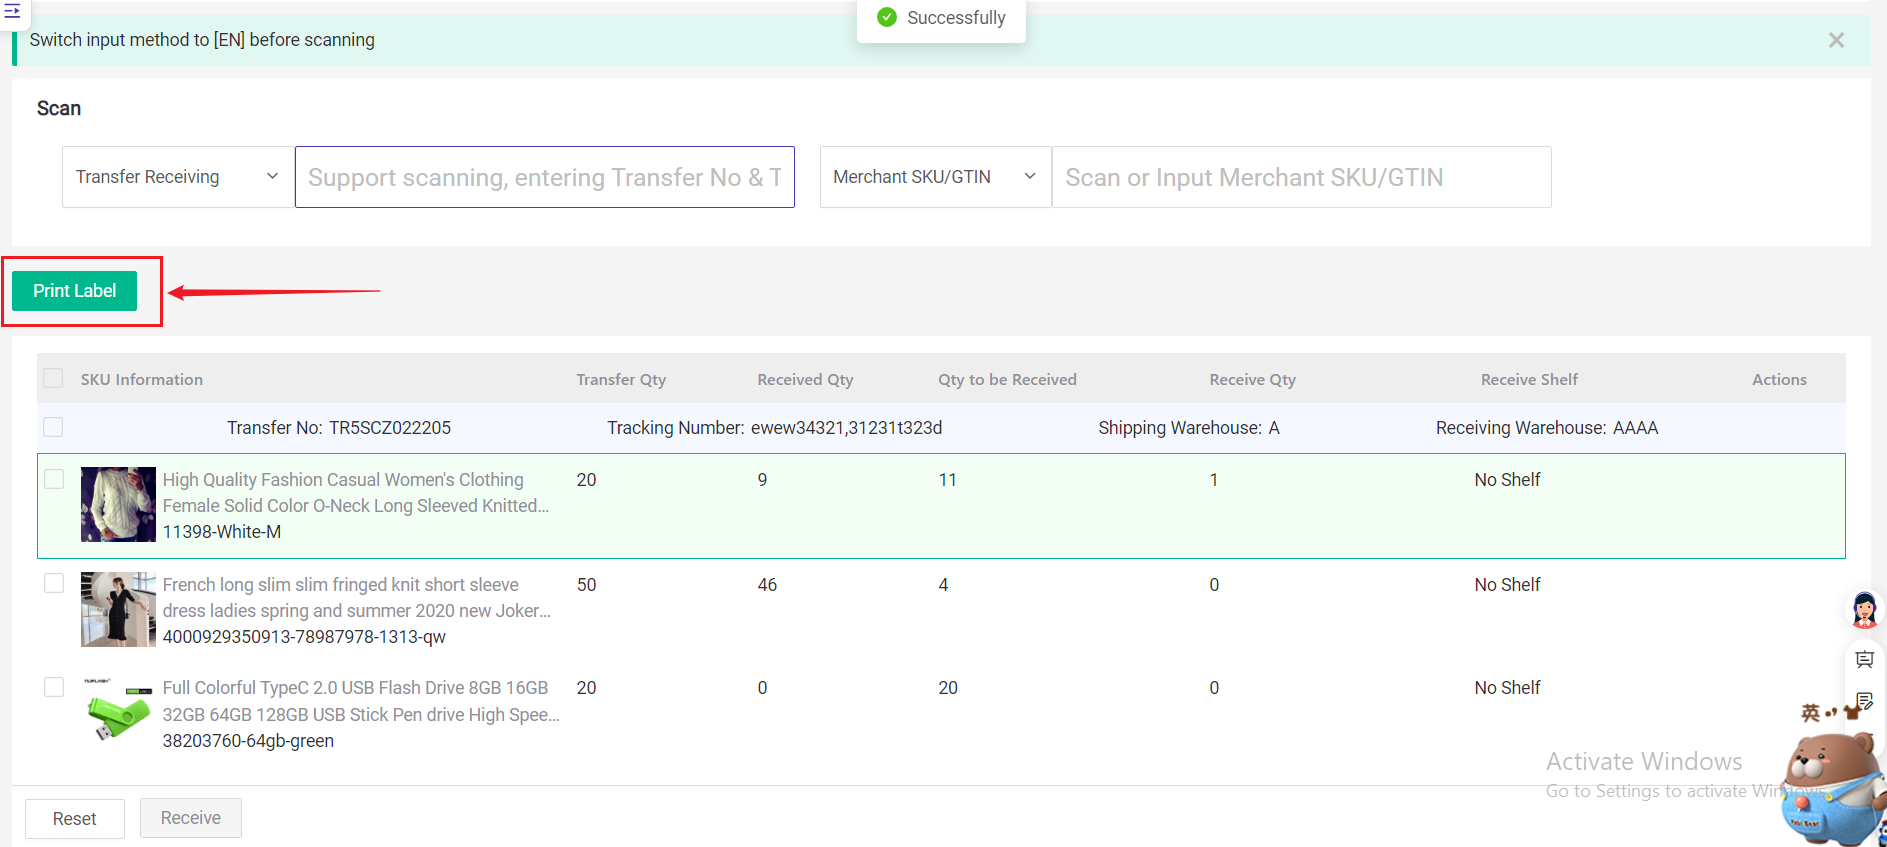
Entrance 3: Scan to Receive
After confirming receiving in [Scan to Receive], you can select SKU to print label.
💡 The Label Print Qty defaults to the Receive Qty.
2. FAQs
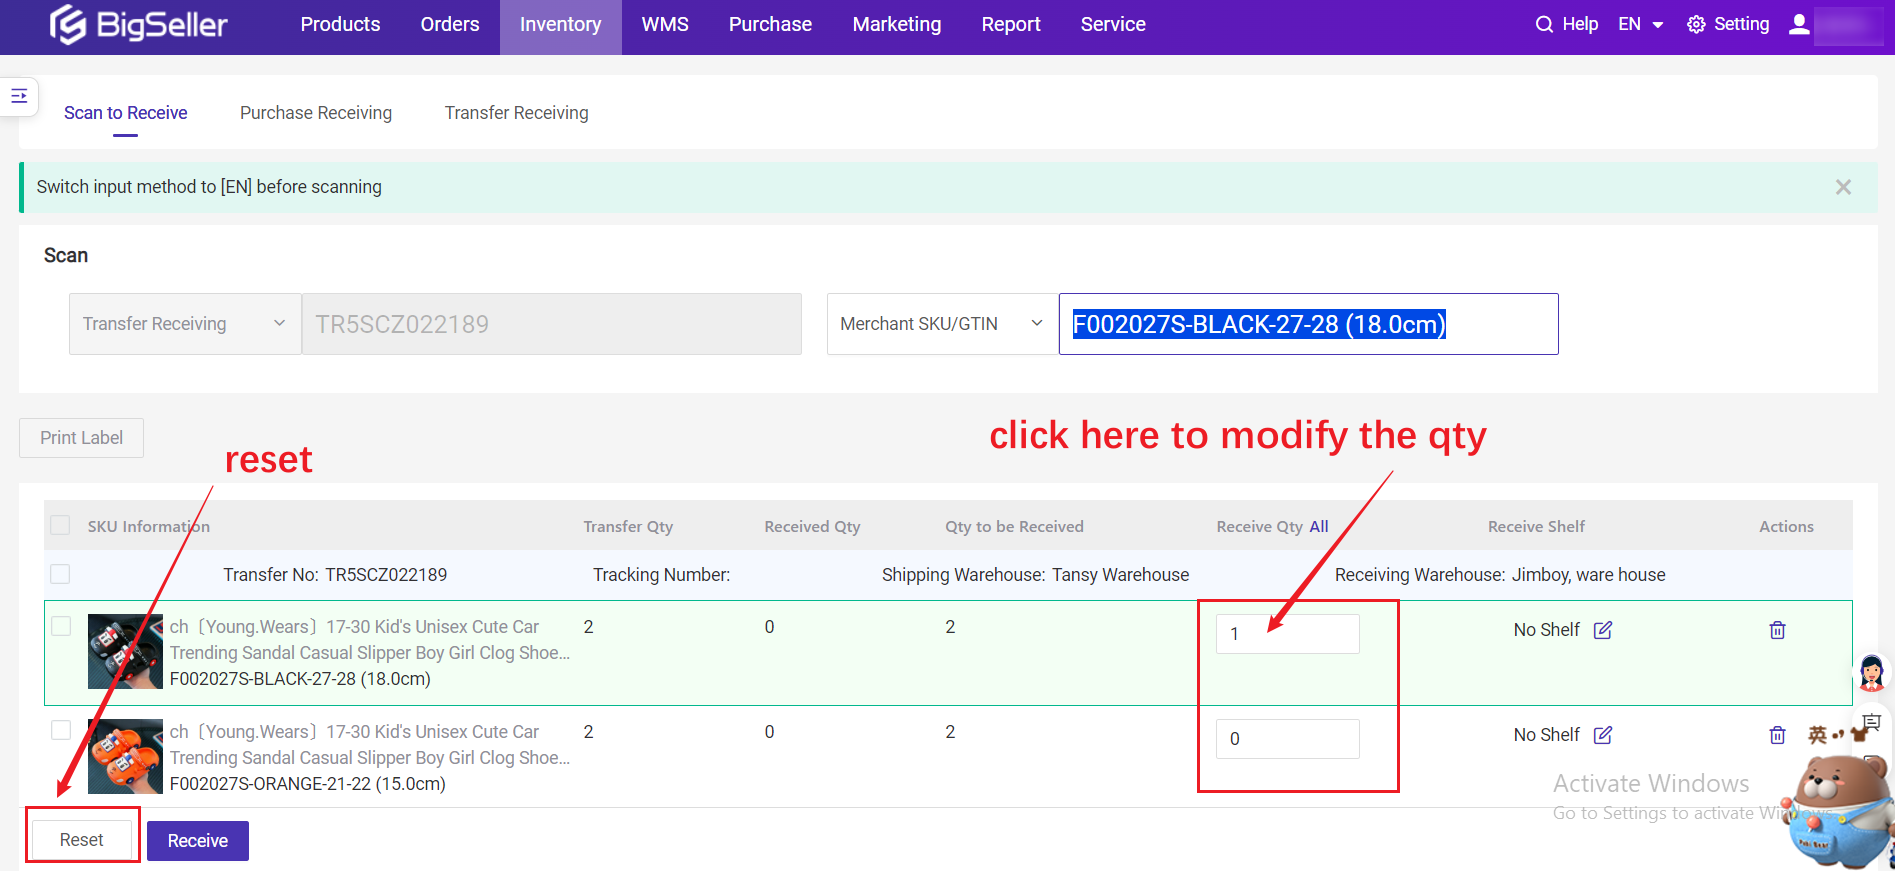
Q1. Can I make any further modifications if the quantity of goods received is filled in incorrectly during scanning?A1. Yes, you can just click the number of Receive Qty to modify. If there is too much data that needs to be modified, please click "reset", the page will be cleared, and you can start scanning again.
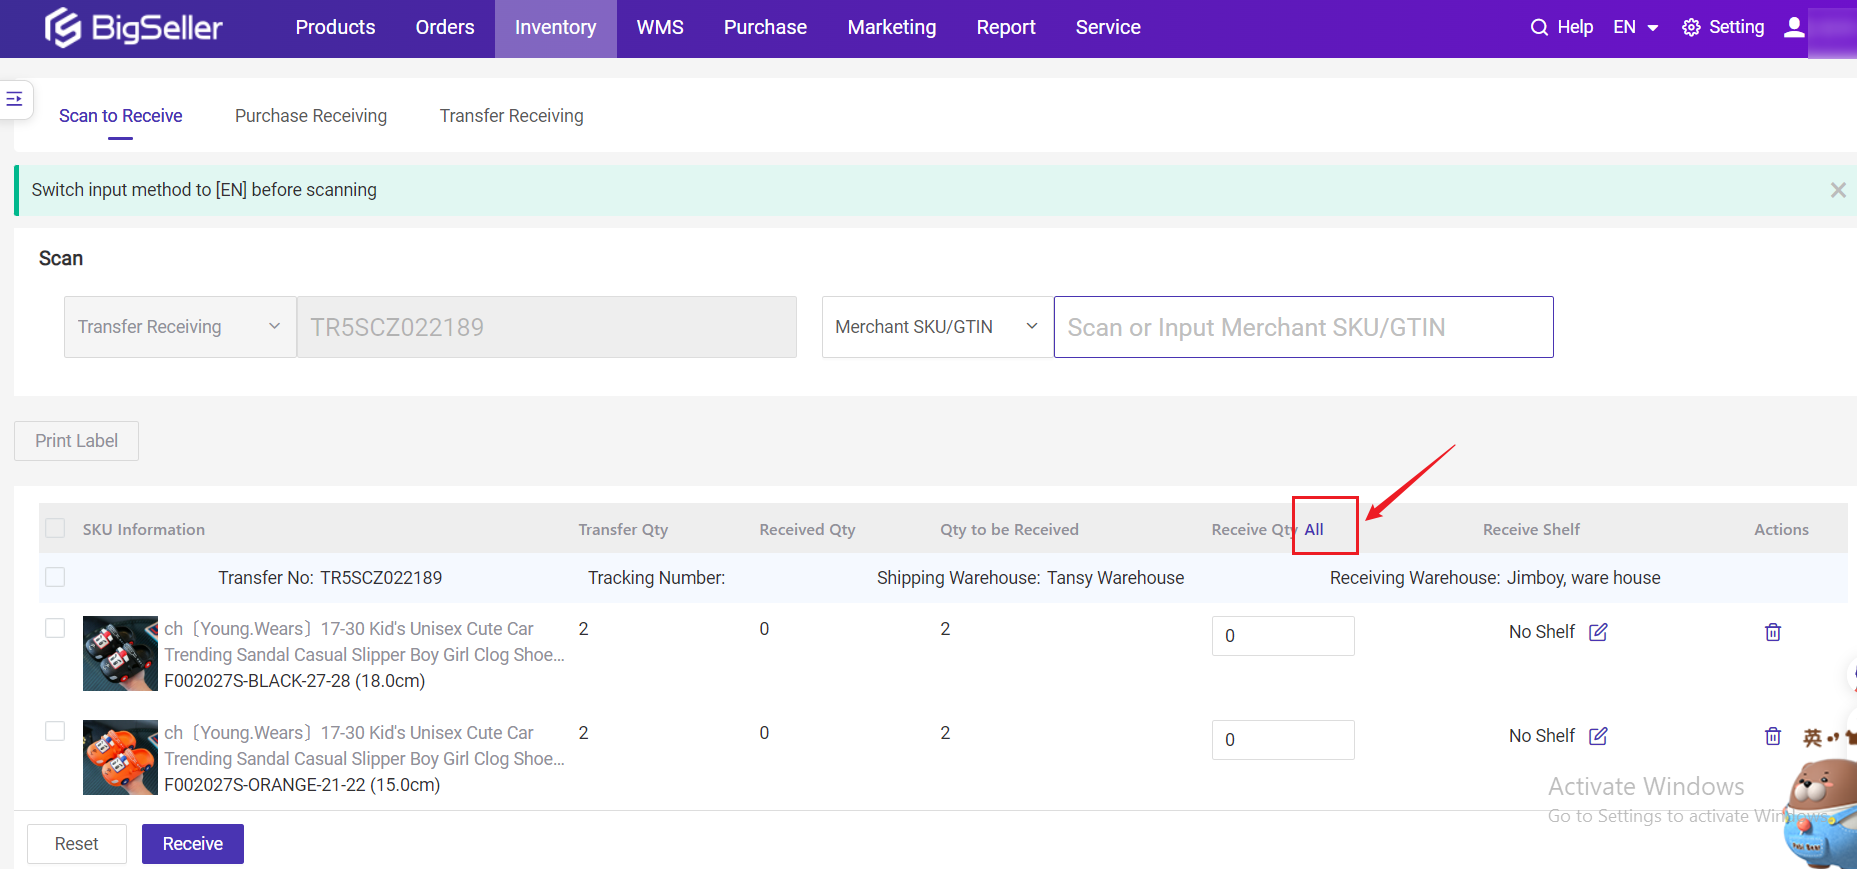
Q2. How to quickly input the receiving quantity?
A2. You can click the "All" icon, and the "Qty to be received" will be filled into the "Receive Qty".
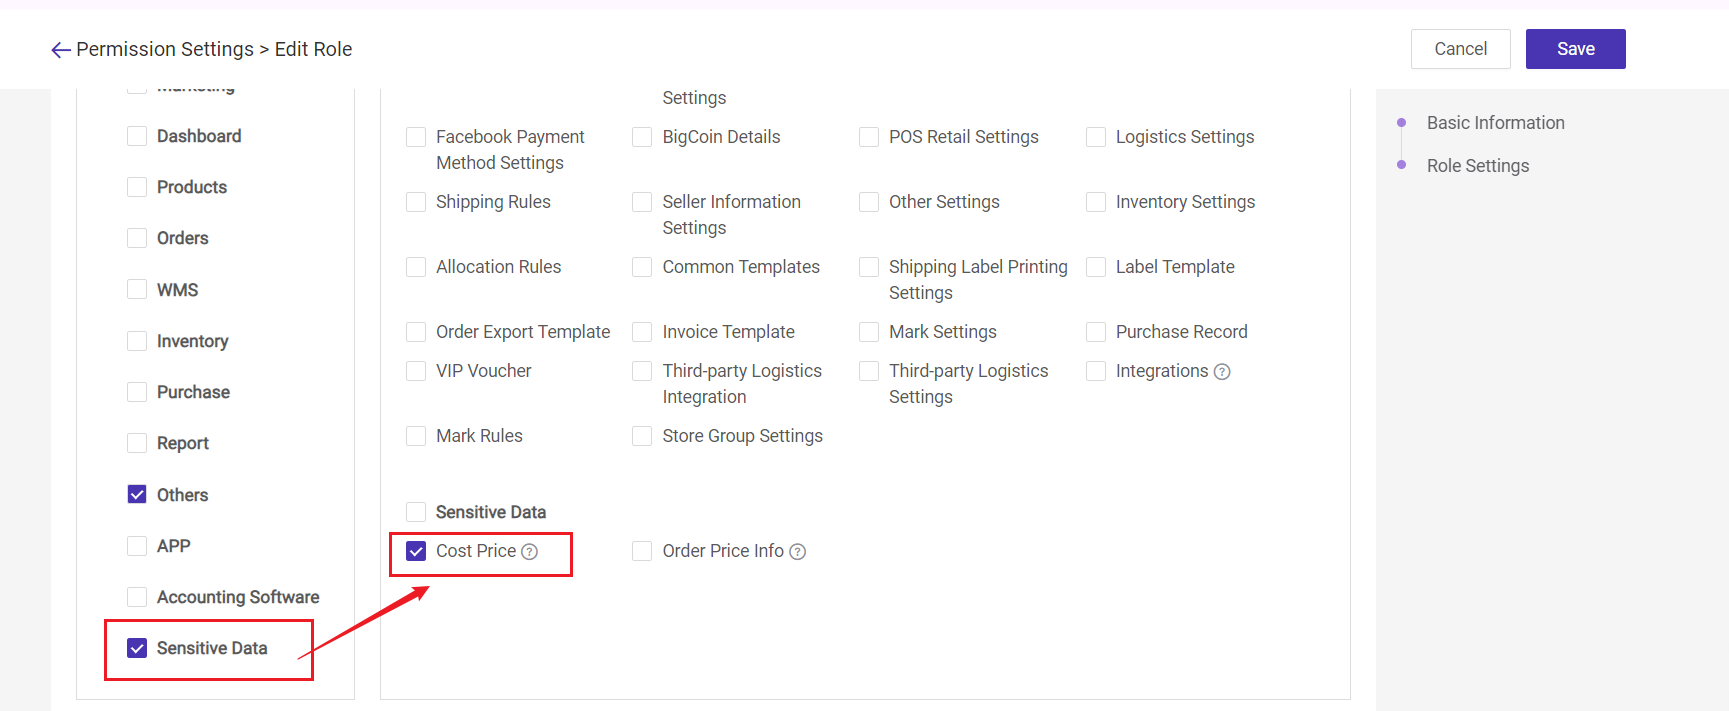
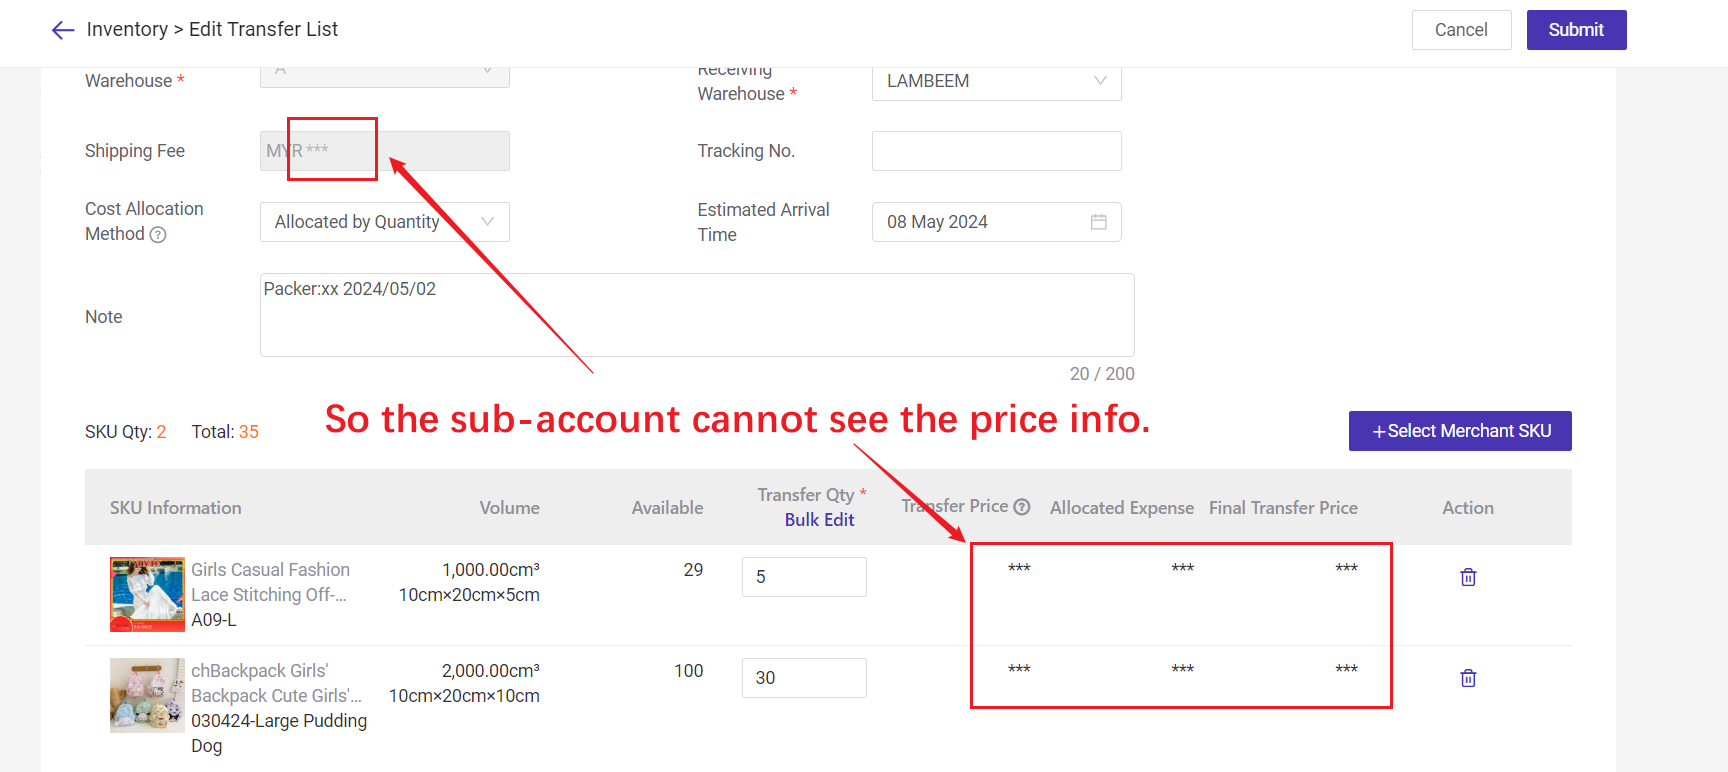
Q3. Can sub-accounts not see cost price and other price data?
A3. Yes, you can hide cost prices for sub-accounts by setting sub-account permissions. (Not check Sensitive Data > Cost Price)

Is this content helpful?
Thank you for your feedback. It drives us to provide better service.
Please contact us if the document can't answer your questions