How to Change Shelf using BigSeller APP?
Copy link & title
Update Time: 10 Jun 2025 06:08
You can use the BigSeller App to quickly update SKU shelf locations. Key scenarios include:
1) New arrivals – Directly place SKUs from the default shelf onto the specific shelf.
2) Optimize layout – Move hot-selling items to easier-to-access shelves.
3) Manage overstock – Relocate slow movers from hot zones to cold zones.
4) Add/remove products – Allocate shelves for new SKUs or clear space for discontinued ones.
💡 Notes
-
The Shelf Change feature does not require enabling Unstored Inventory Management. No unstored quantity will be generated, and you can update SKU shelf with one click.
- This feature is compatible with both one-SKU-one-shelf and one-SKU-multiple-shelves warehouse.
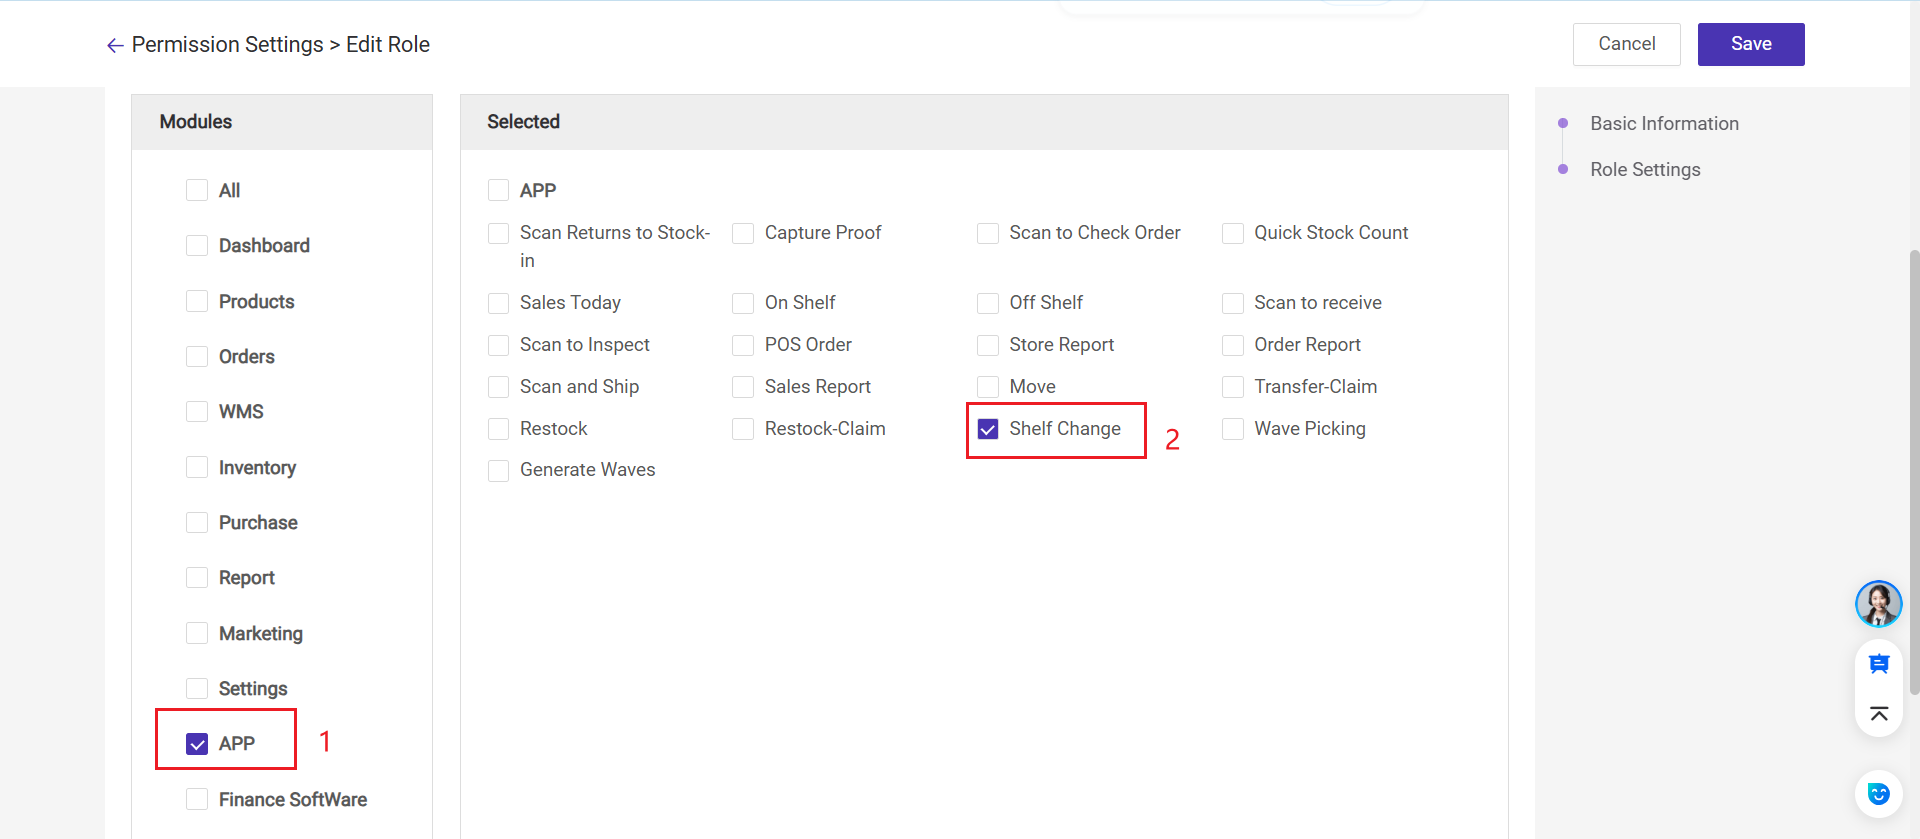
- If a sub-account needs to use this feature, the main account must enable the permissions for its role.
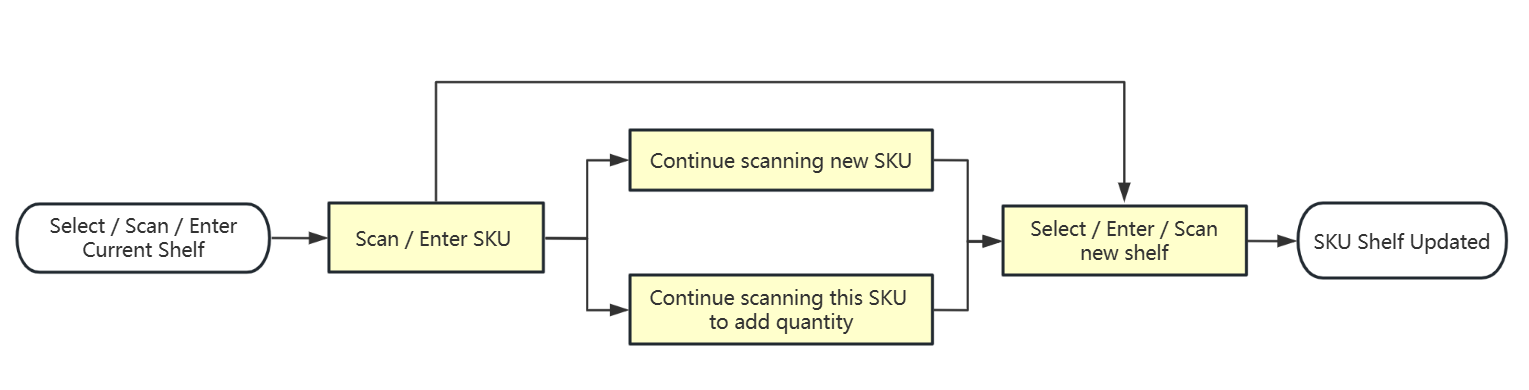
1. Process for One SKU One Shelf Warehouse

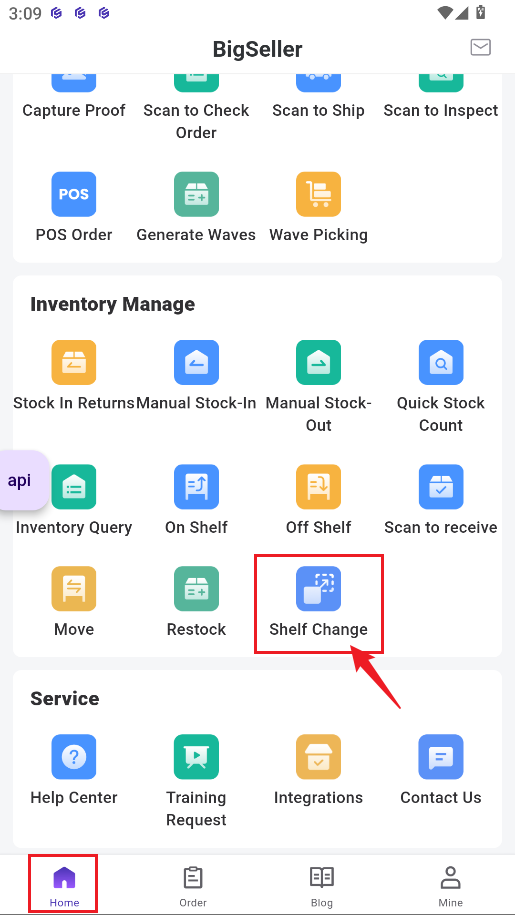
Step 1: Go to BigSeller APP homepage >> Inventory Manage >> Shelf Change
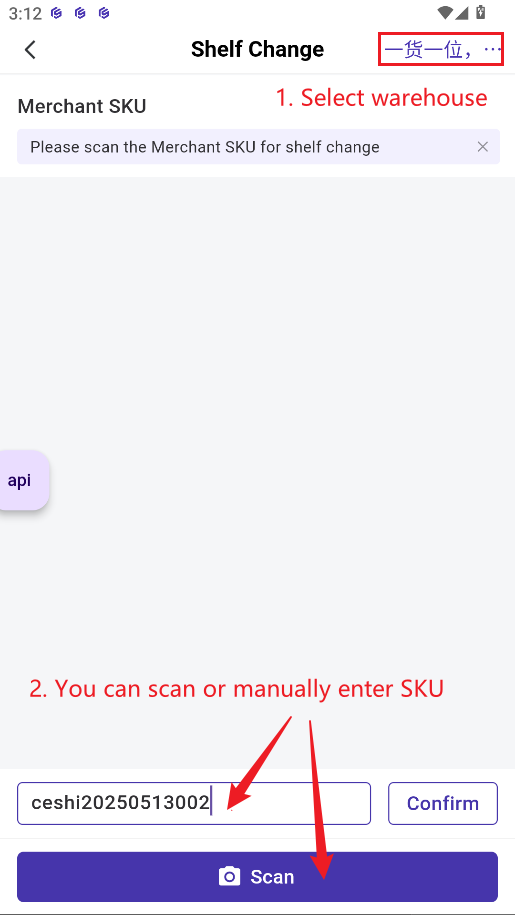
Step 2: Scan or Enter SKU/ GTIN
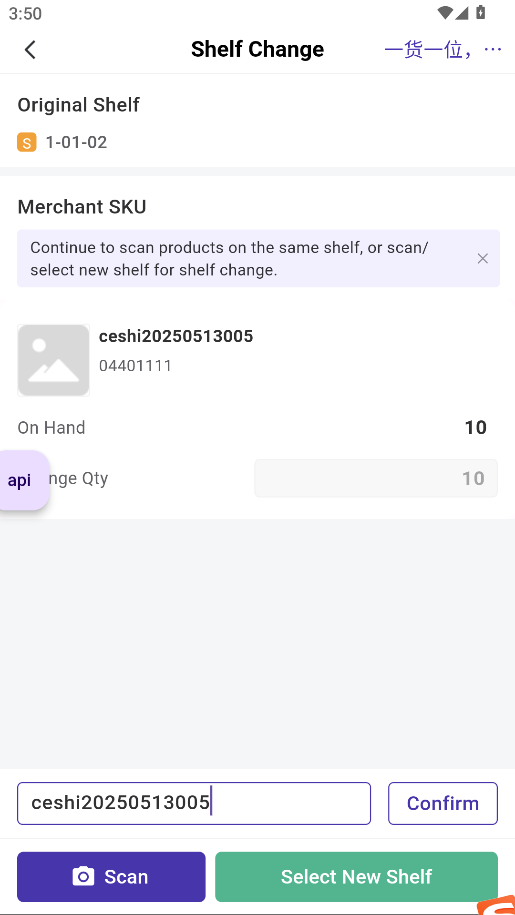
Step 3: Continue to Scan SKUs or Scan new shelf location


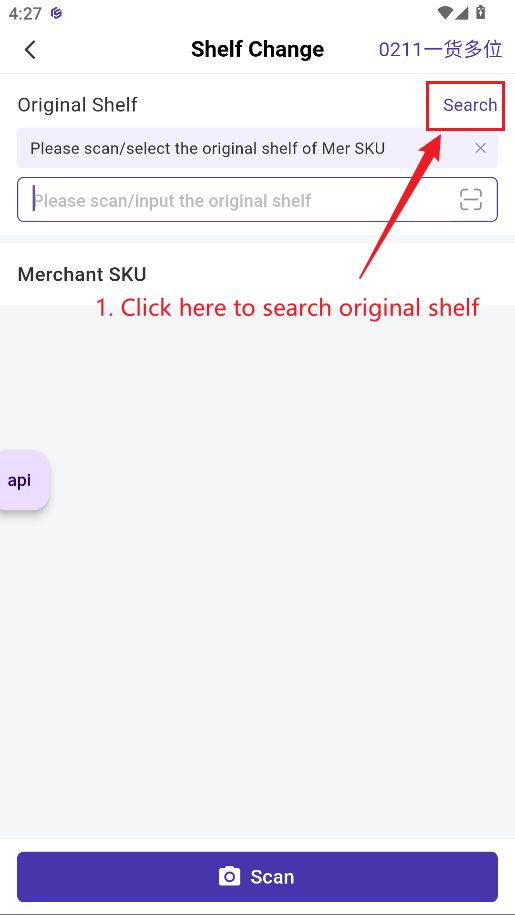
2. Process for One SKU Mutiple Shelves Warehouse
Step 1: Go to BigSeller APP homepage >> Inventory Manage >> Shelf Change
Step 2: Scan or input or manually search for the original shelf of the SKU.
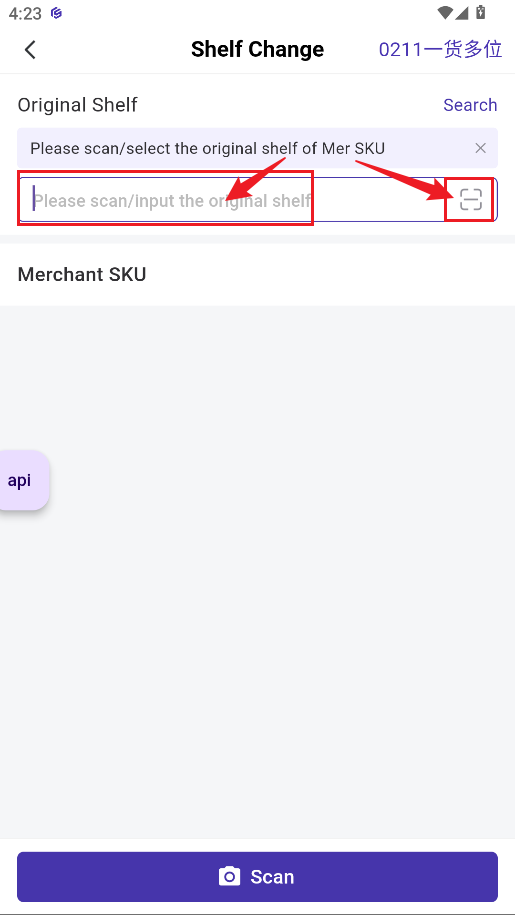
Tip: If scanning or input SKU is not convenient, you can also manually select the original shelf location from the list.

Step 3: Scan / Enter SKU or GTIN
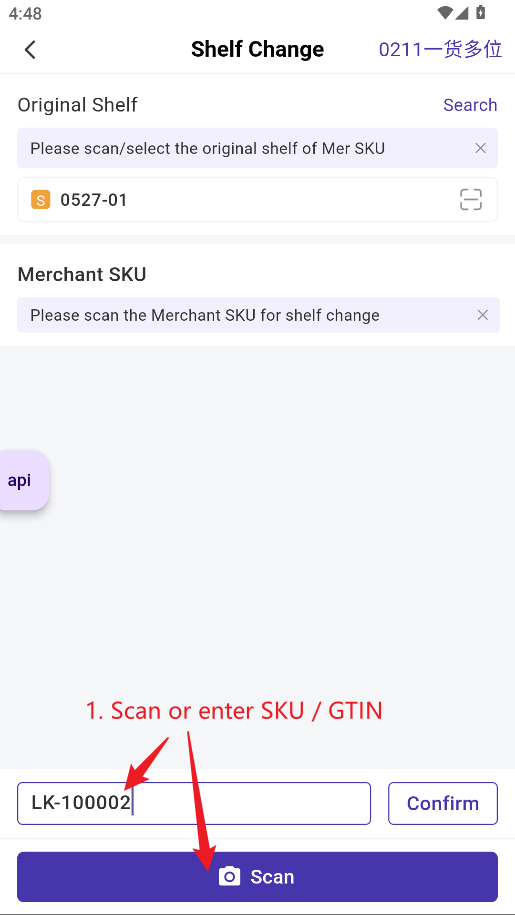
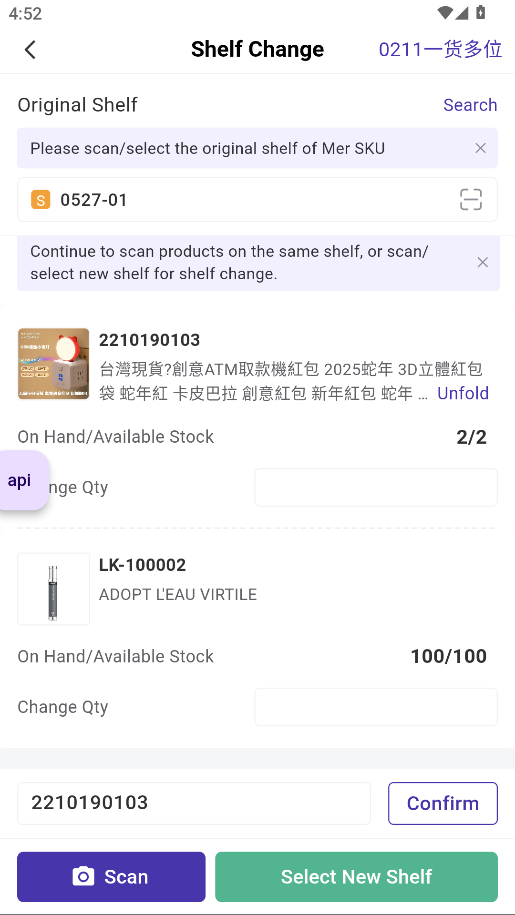
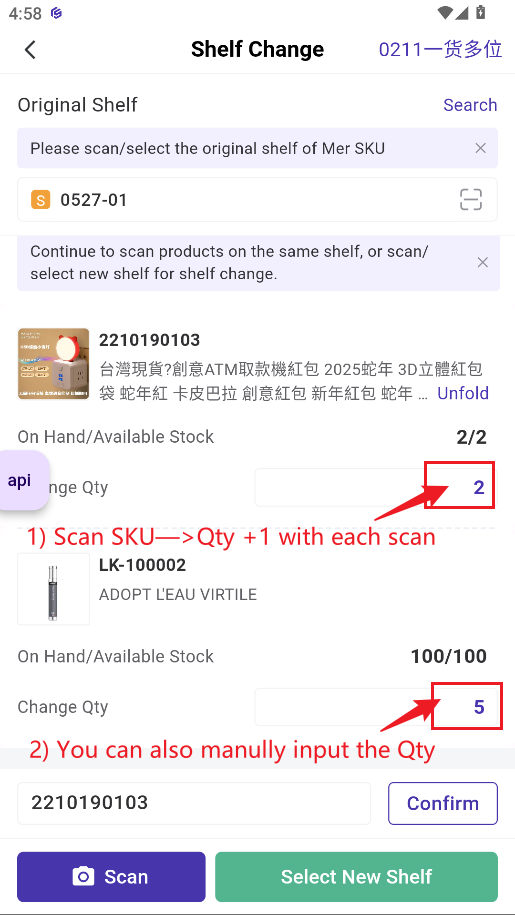
Step 4: At this point, you can:
1) Continue to scan the current SKU, increasing the quantity by one with each scan;
2) Continue to scan other SKUs.
3) Manually enter the quantity to be moved.
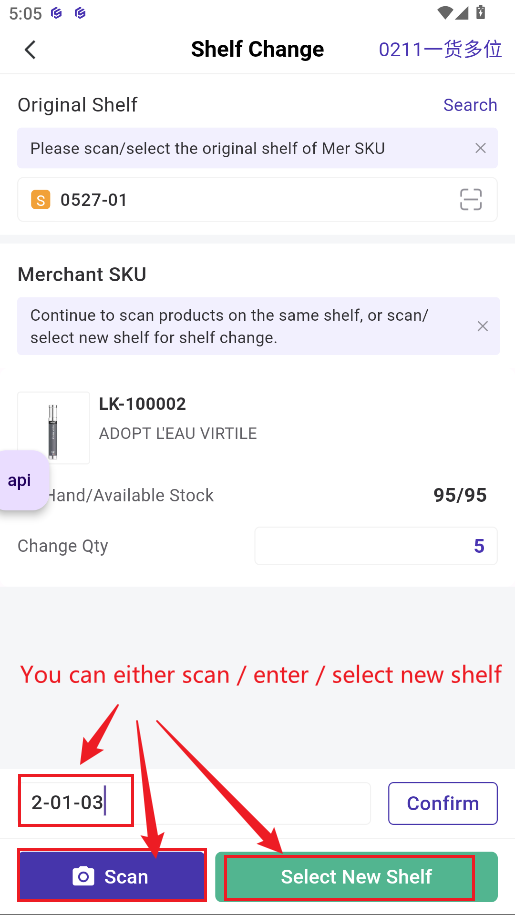
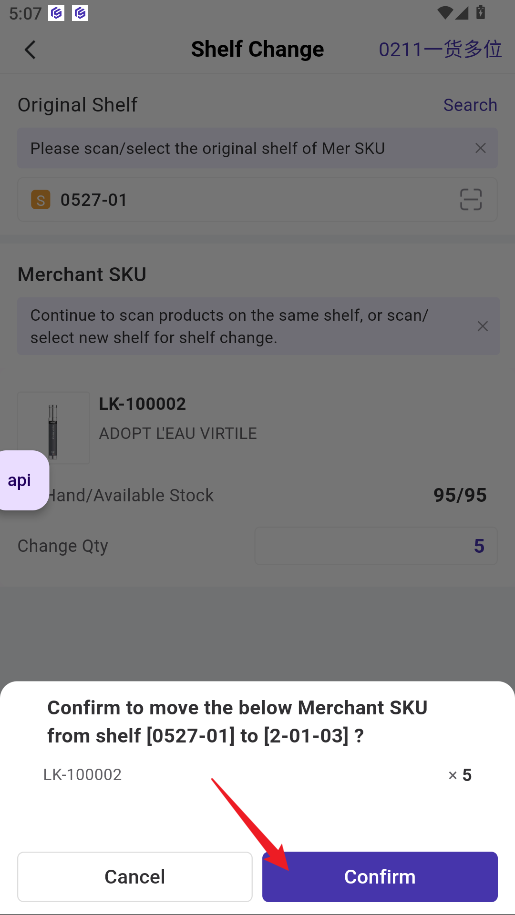
Step 5: Scan / Enter / Select New Shelf
Is this content helpful?
Thank you for your feedback. It drives us to provide better service.
Please contact us if the document can't answer your questions