How to add Shelves?
Update Time: 21 Apr 2025 08:27
Please go to Inventory > Warehouse > Shelves page. There are three ways to add shelves.
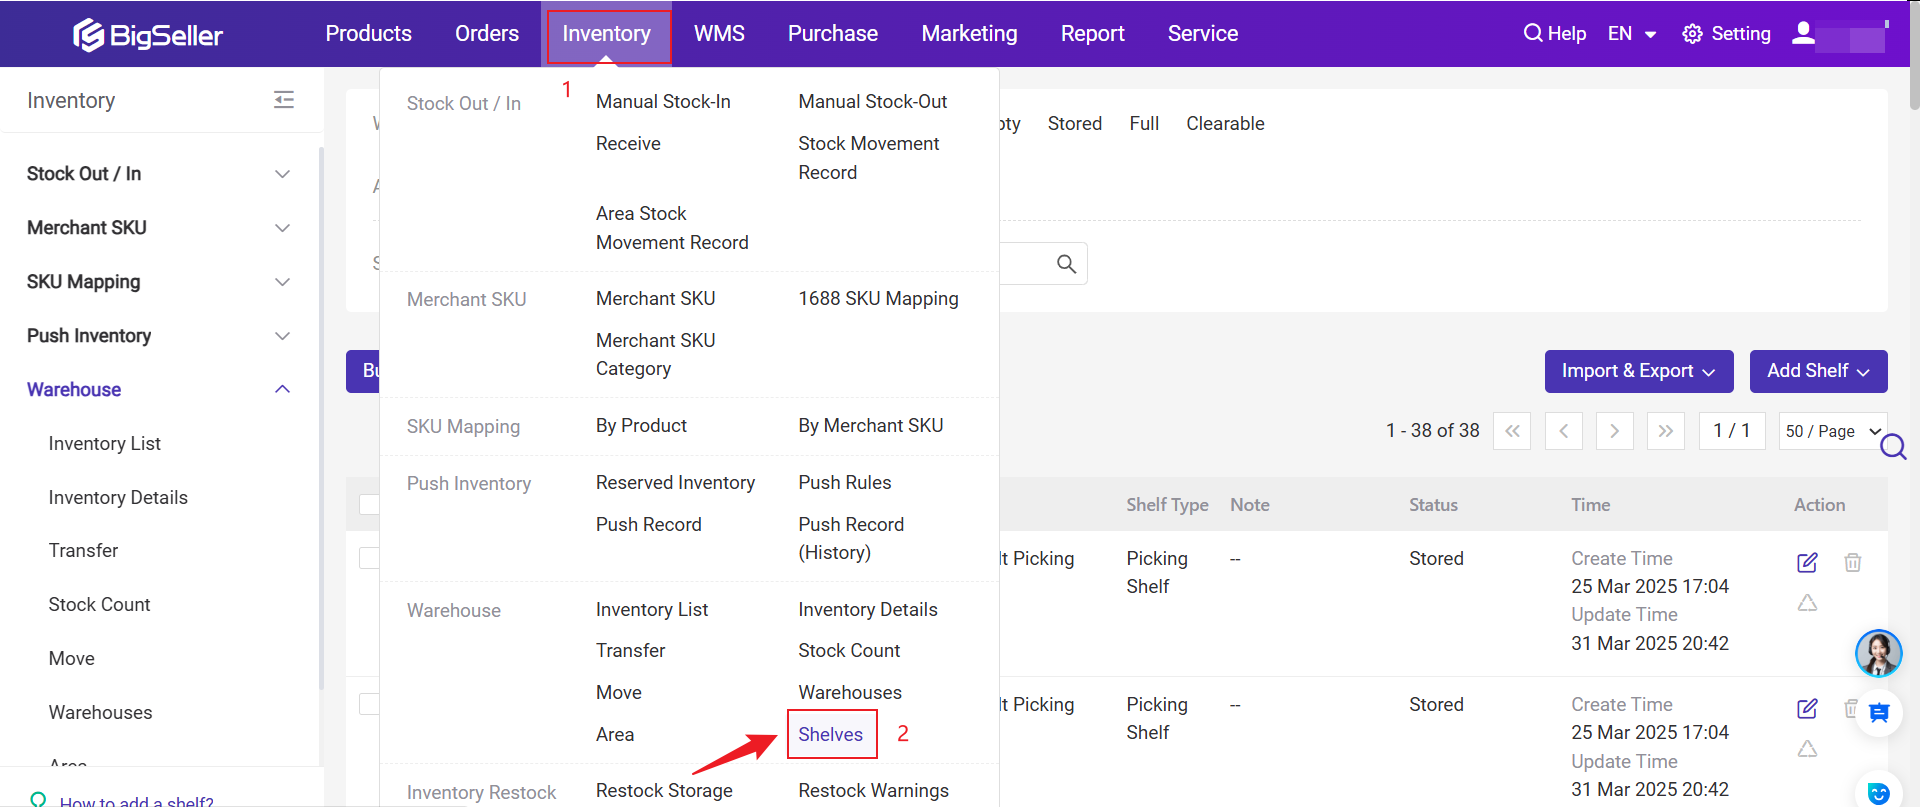
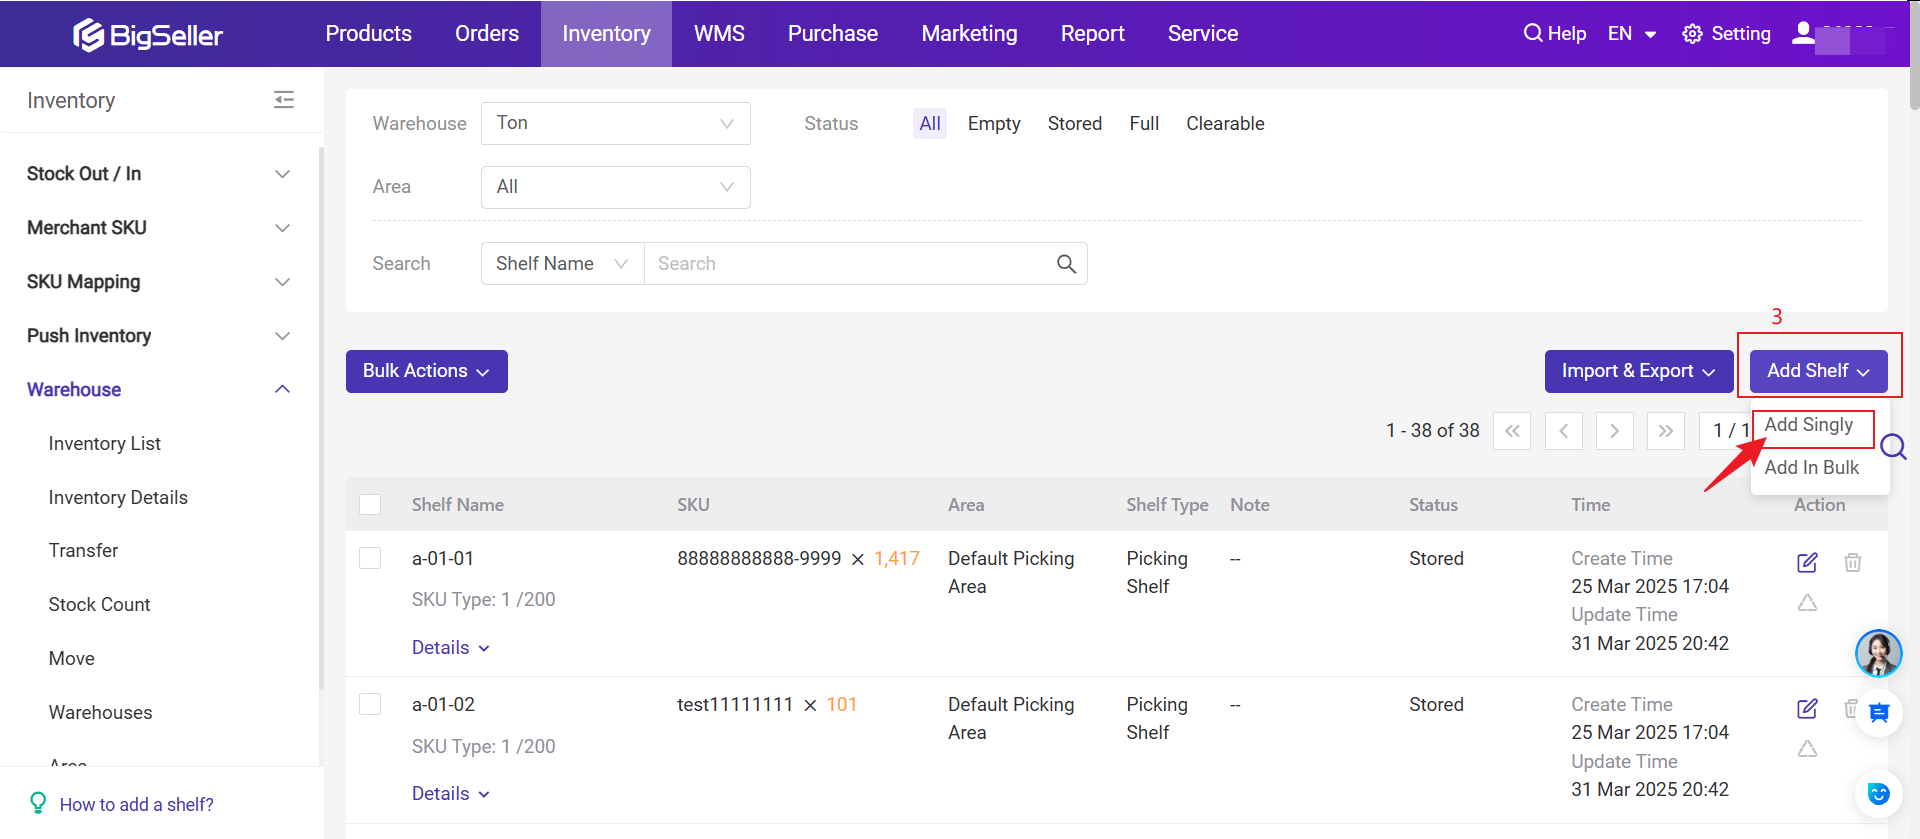
Method 1: Add A Shelf
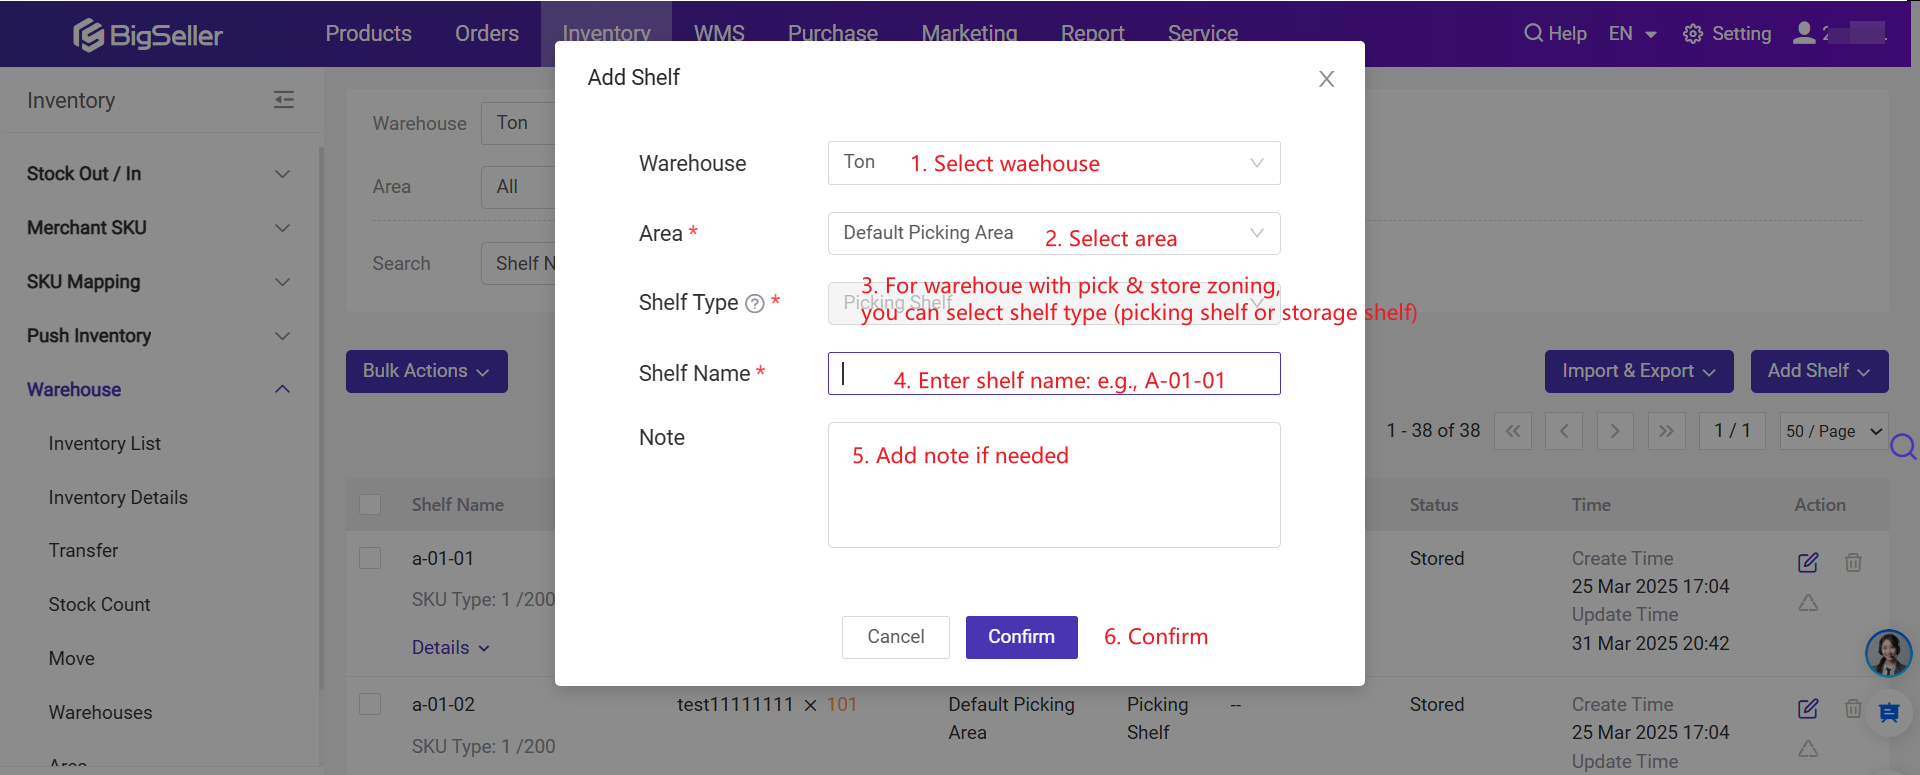
Click Inventory > Shelves > + Add Shelf > Add Singly
💡 Notes
- For Warehouse with One SKU One Shelf
- The system defaults to 2 Warehouse Areas – the Default Picking Area and the Default Piling Area (with default shelves).
- You are not able to select shelf type when creating the shelf.
- For Warehouse with One SKU Multiple Shelves
- The system defaults to 3 Warehouse Areas – the Default Picking Area (with picking shelves), the Default Storage Area (with storage shelves), and the Default Piling Area (with default shelves).
- If the warehouse area supports picking, you can select the shelf type (either picking shelf or storage shelf) when creating the shelf.
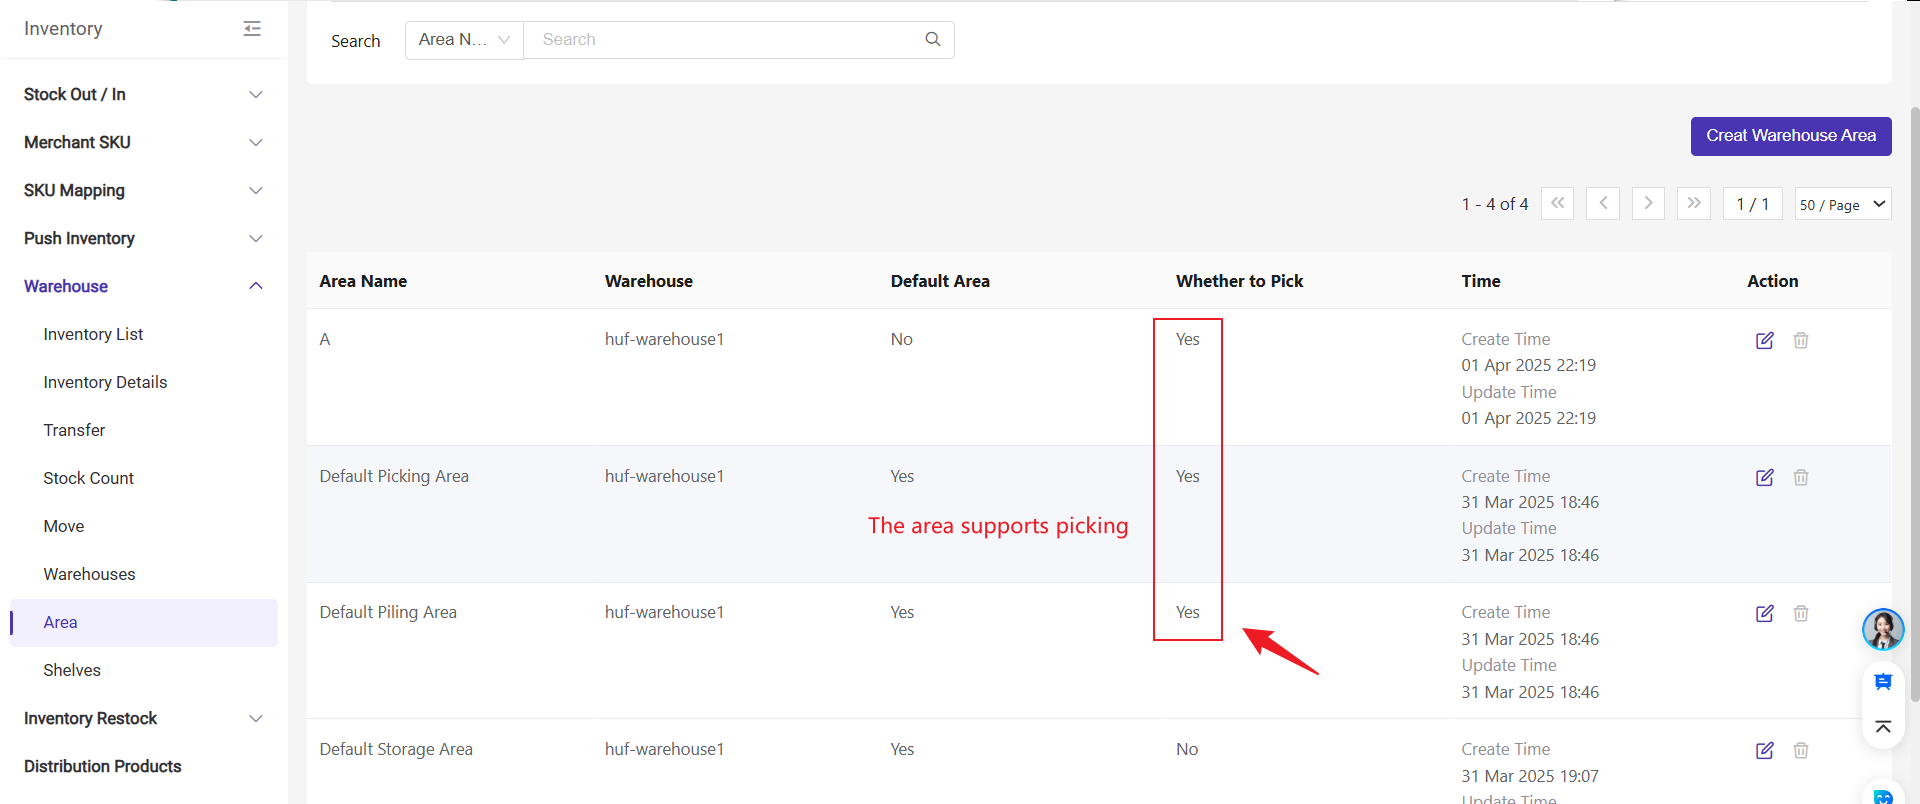
For more info about warehouse area, please visit the article: Introduction to Warehouse Area
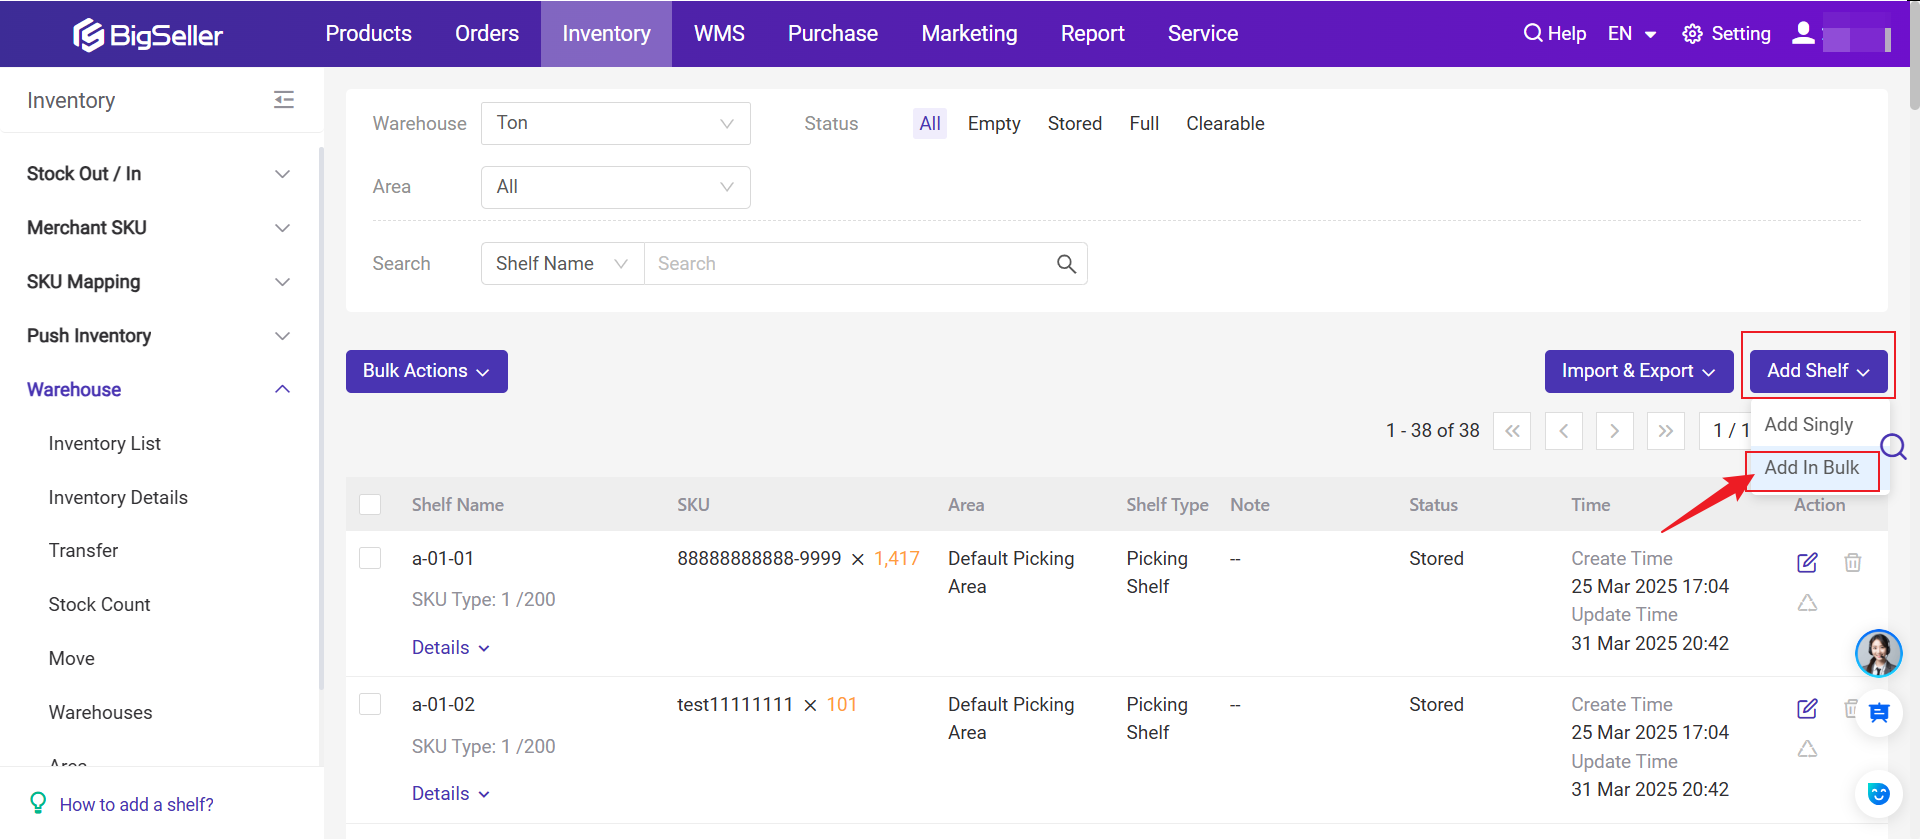
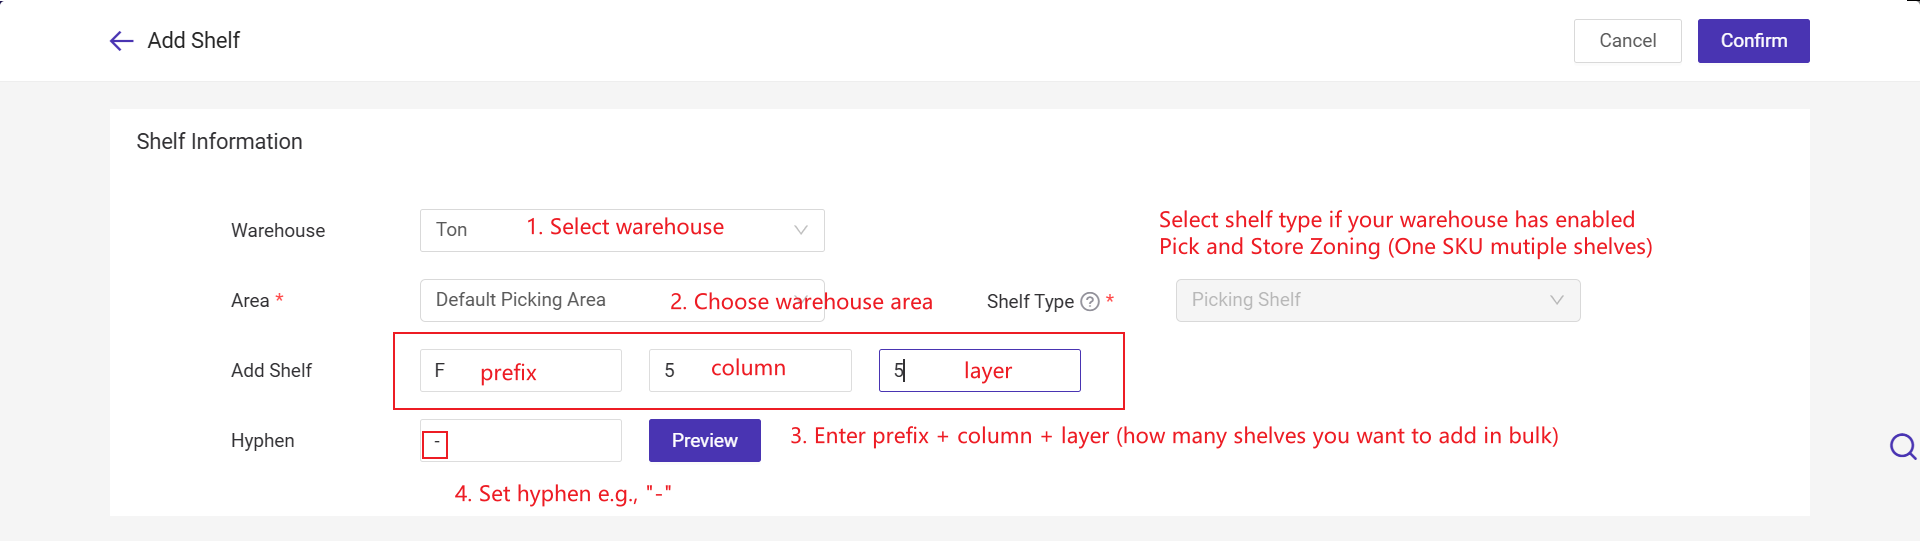
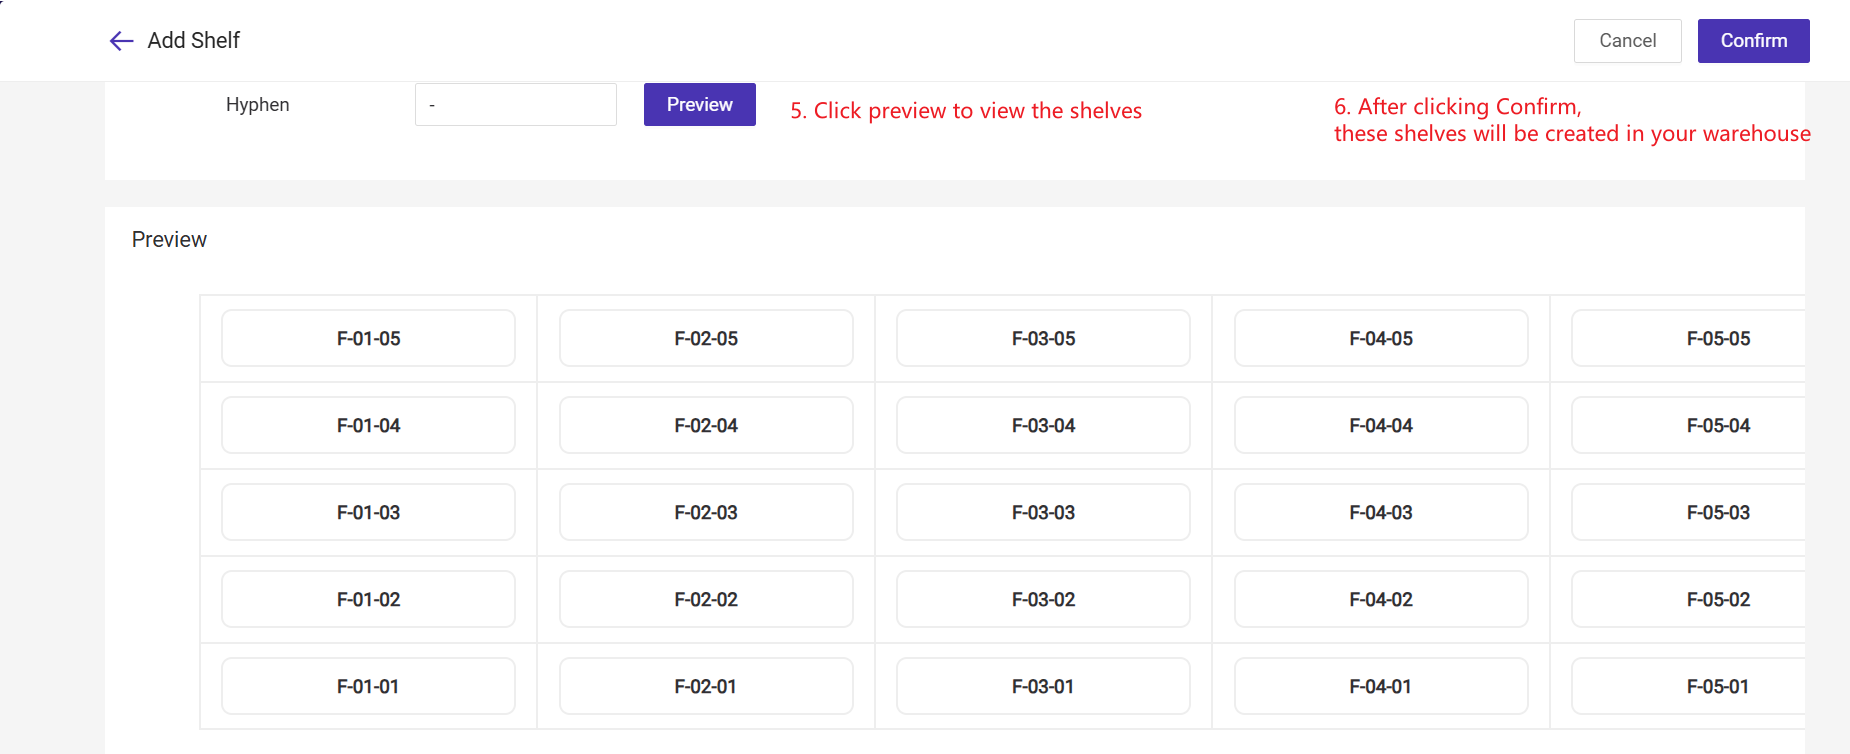
Method 2: Bulk Add Shelves
Step 1: Click Inventory > Shelves > + Add Shelf > Add in Bulk
Step 2: Select Warehouse and add shelf information
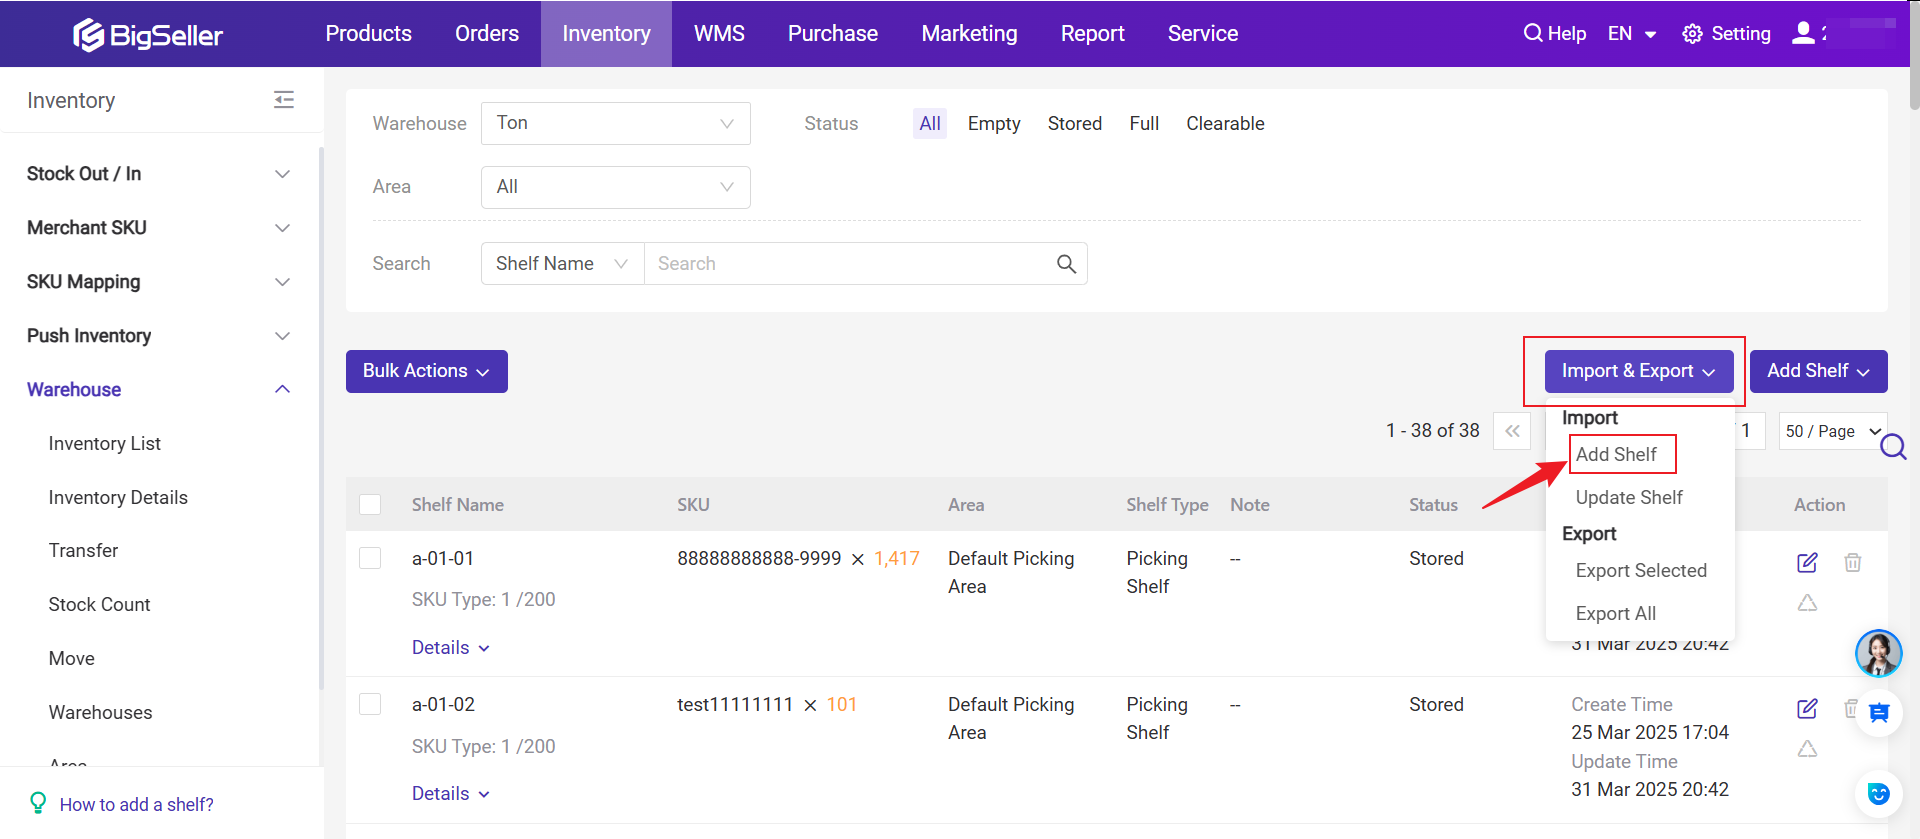
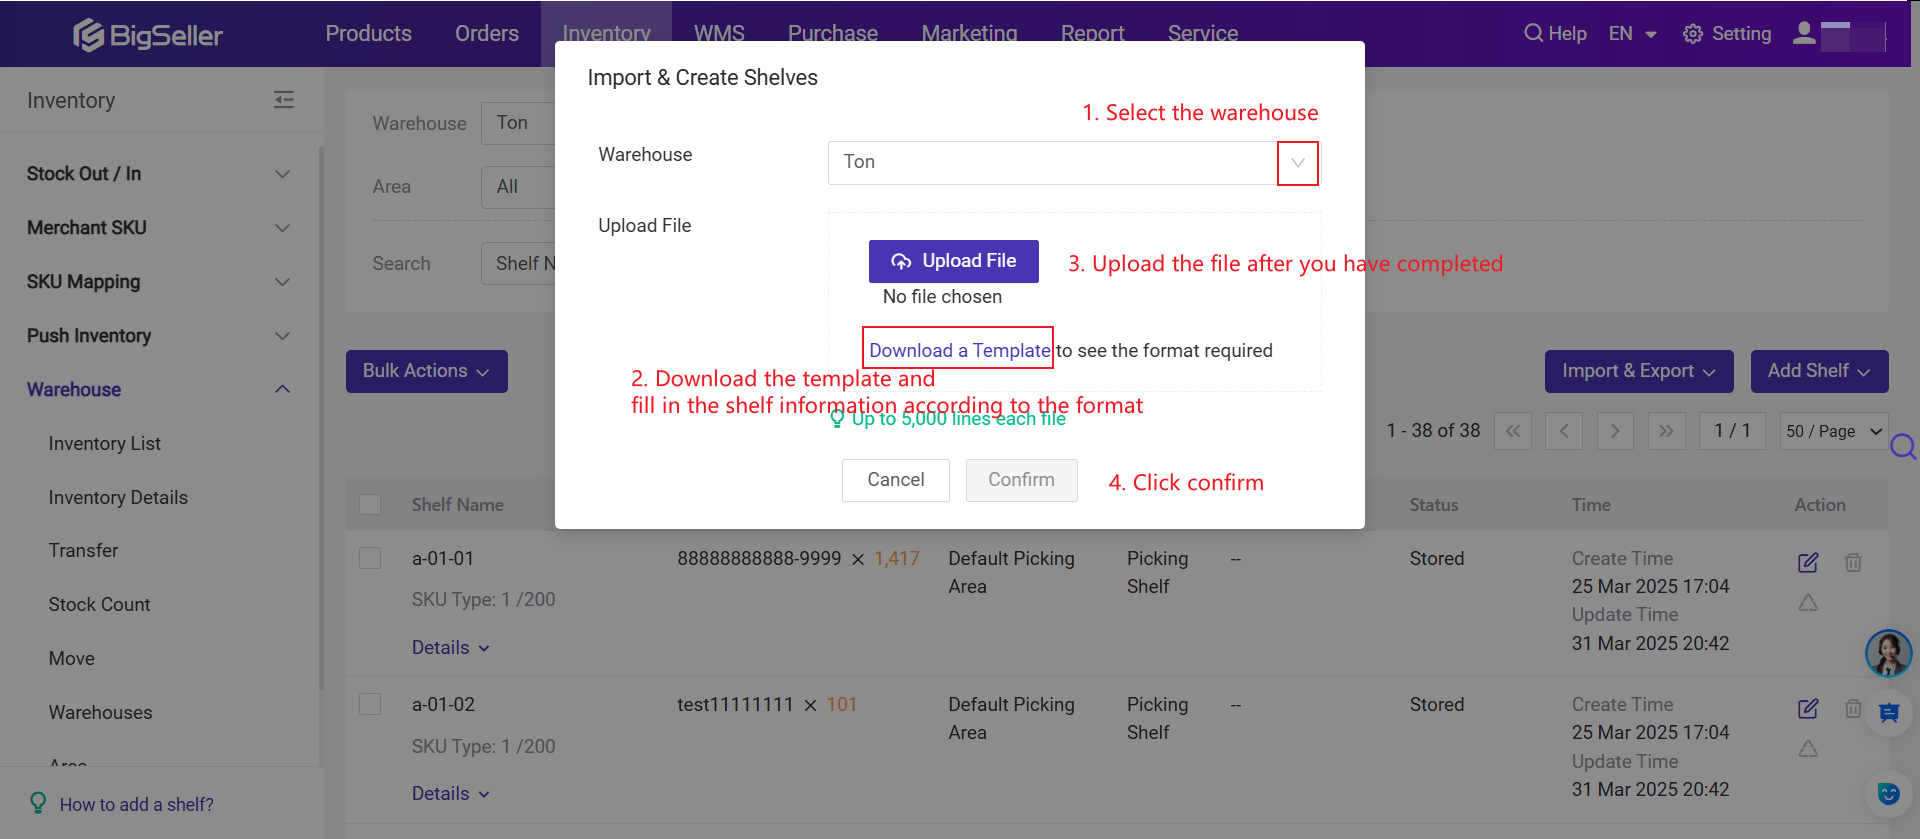
Method 3: Import Add Shelves
Step 1: Click Inventory > Shelves > Import
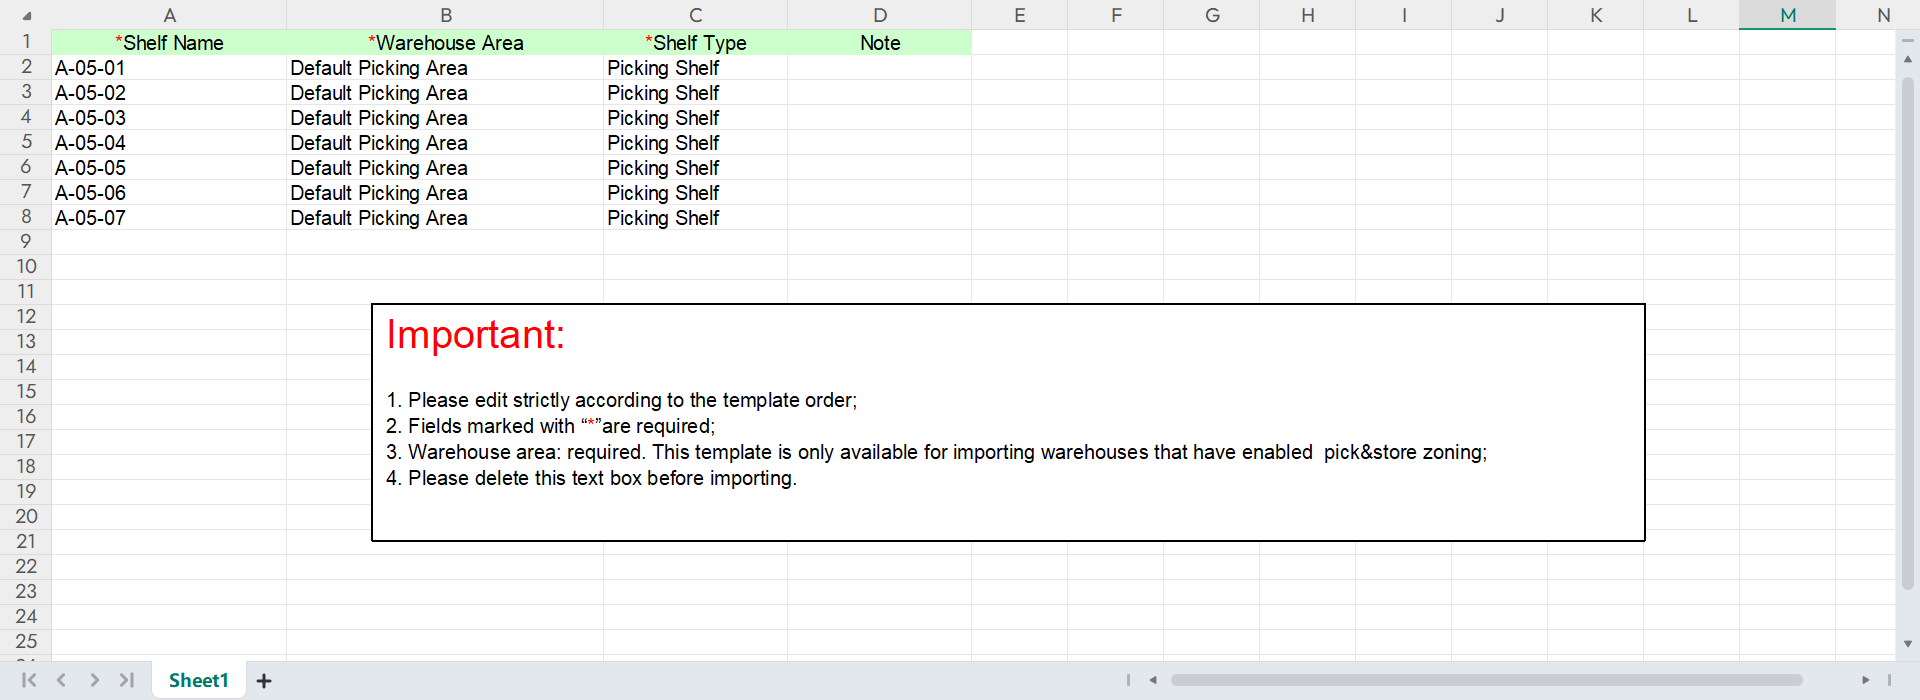
Step 2: Select Warehouse > Upload File. You need to first download the template, fill out the shelves info then upload.
Example:
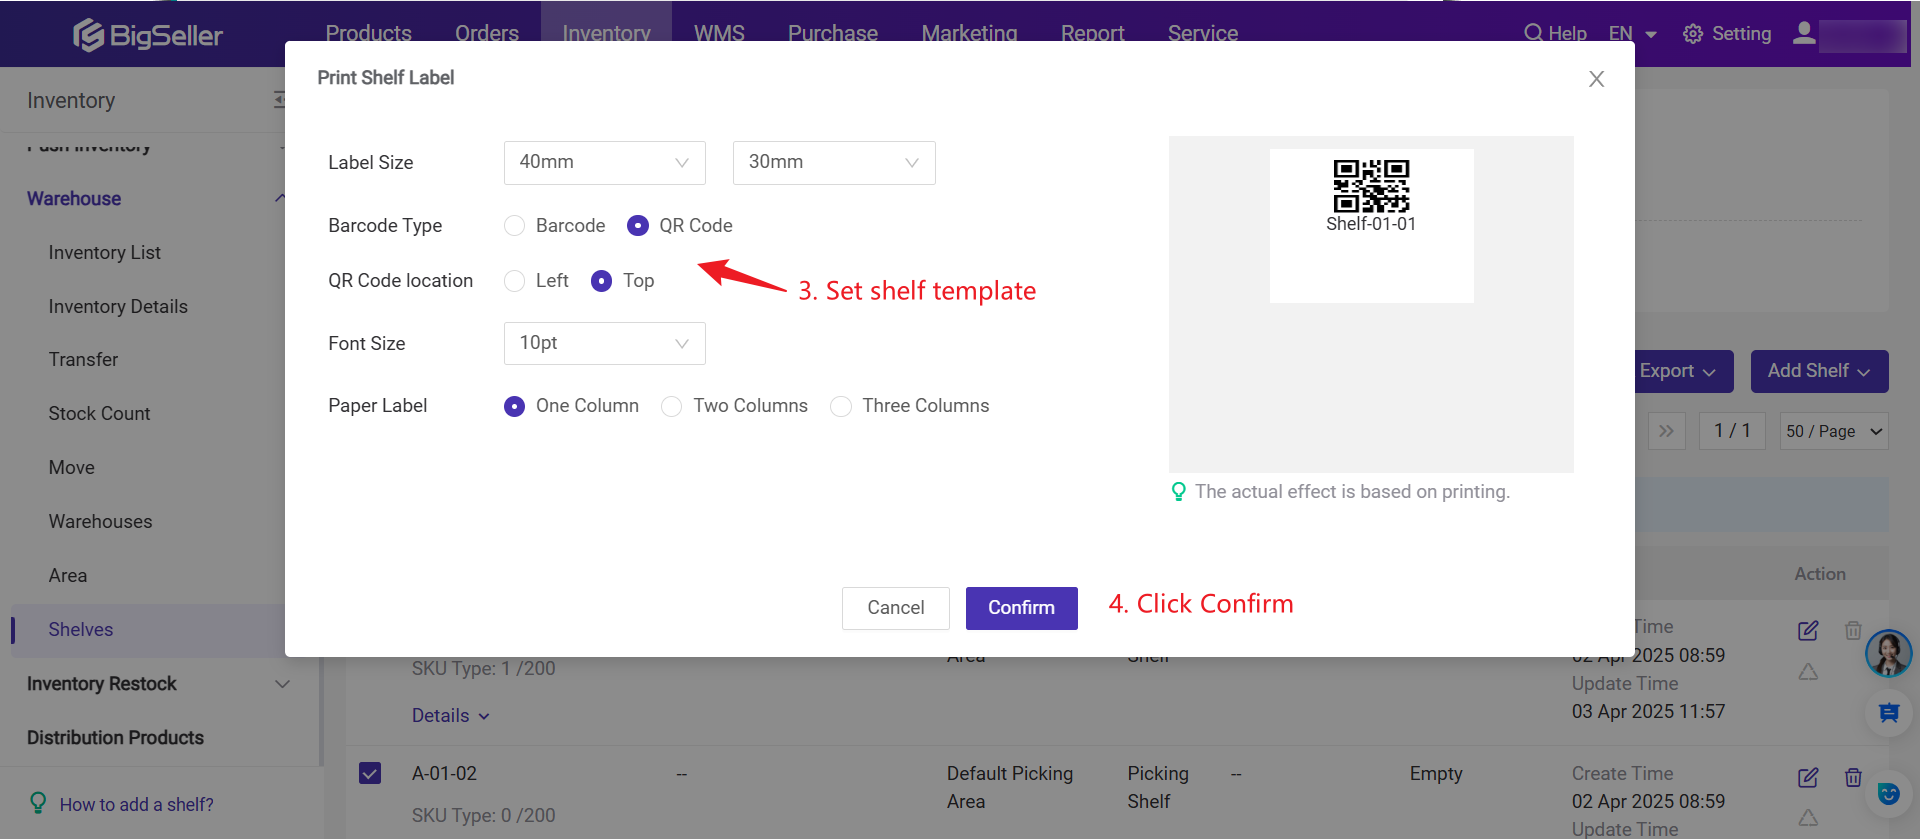
How to Print Shelf Label?
1. Go to Inventory > Shelves > Select shelves in bulk > Bulk Actions > Print Shelves Label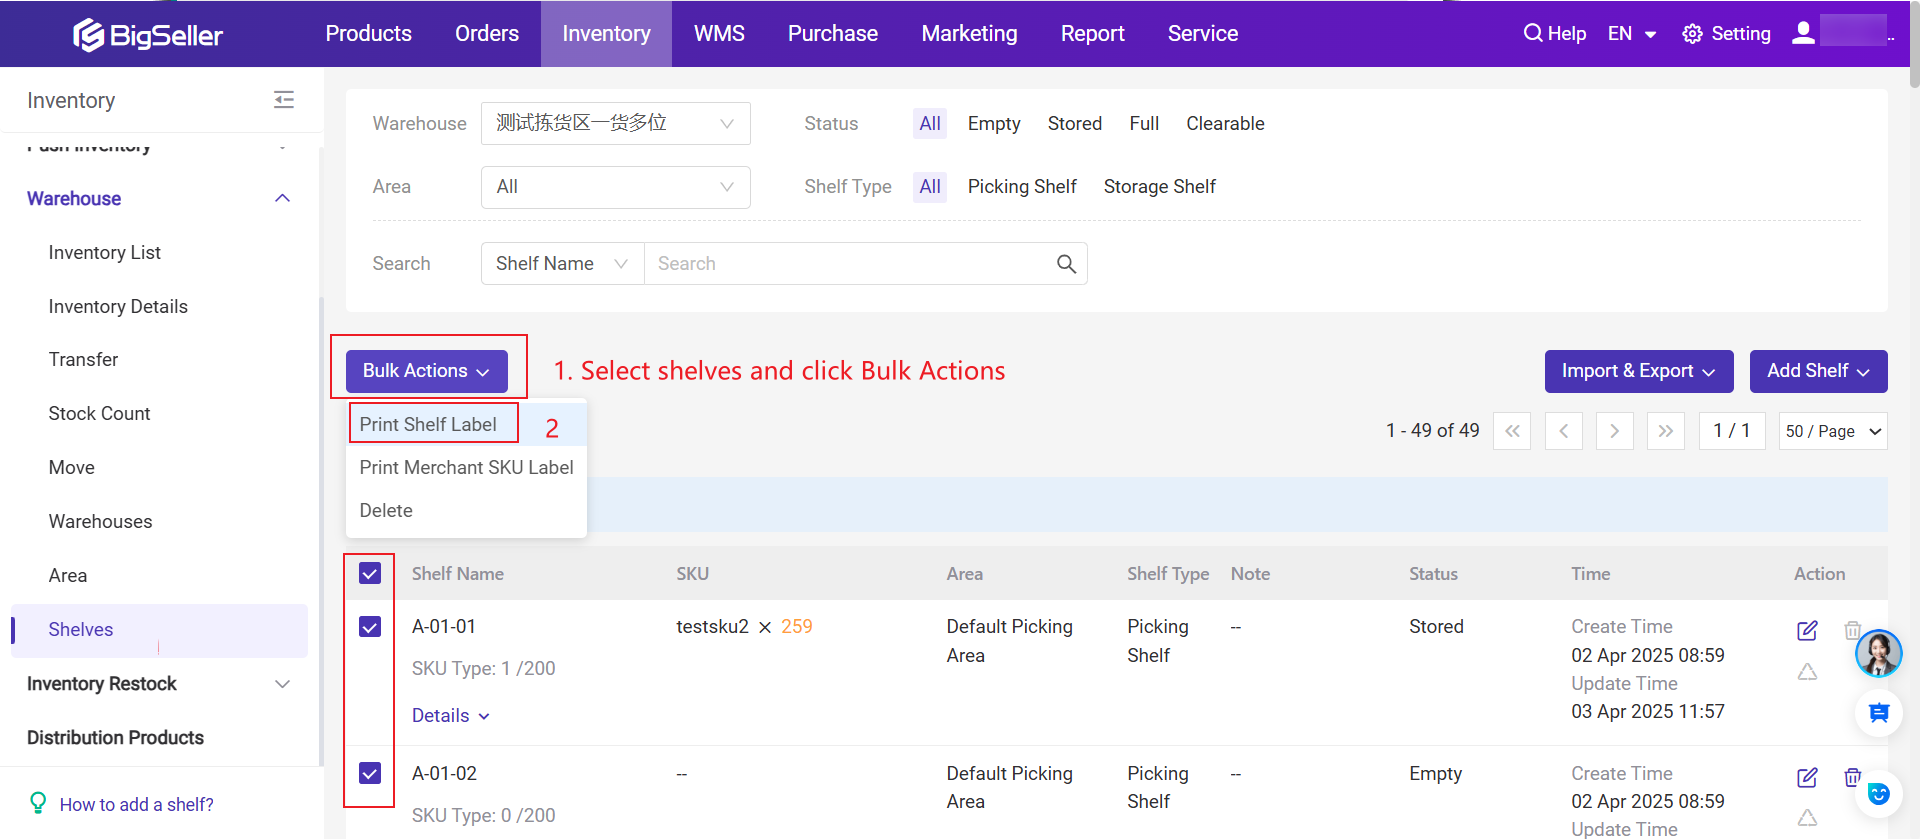
Is this content helpful?
Thank you for your feedback. It drives us to provide better service.
Please contact us if the document can't answer your questions