Introduction to Order Mark (Forward Orders)
Copy link & title
Update Time: 07 Aug 2025 13:25
The Order Mark feature can be used when seller processes orders, distinguish orders according to marks so that they can quickly manage different types of orders.
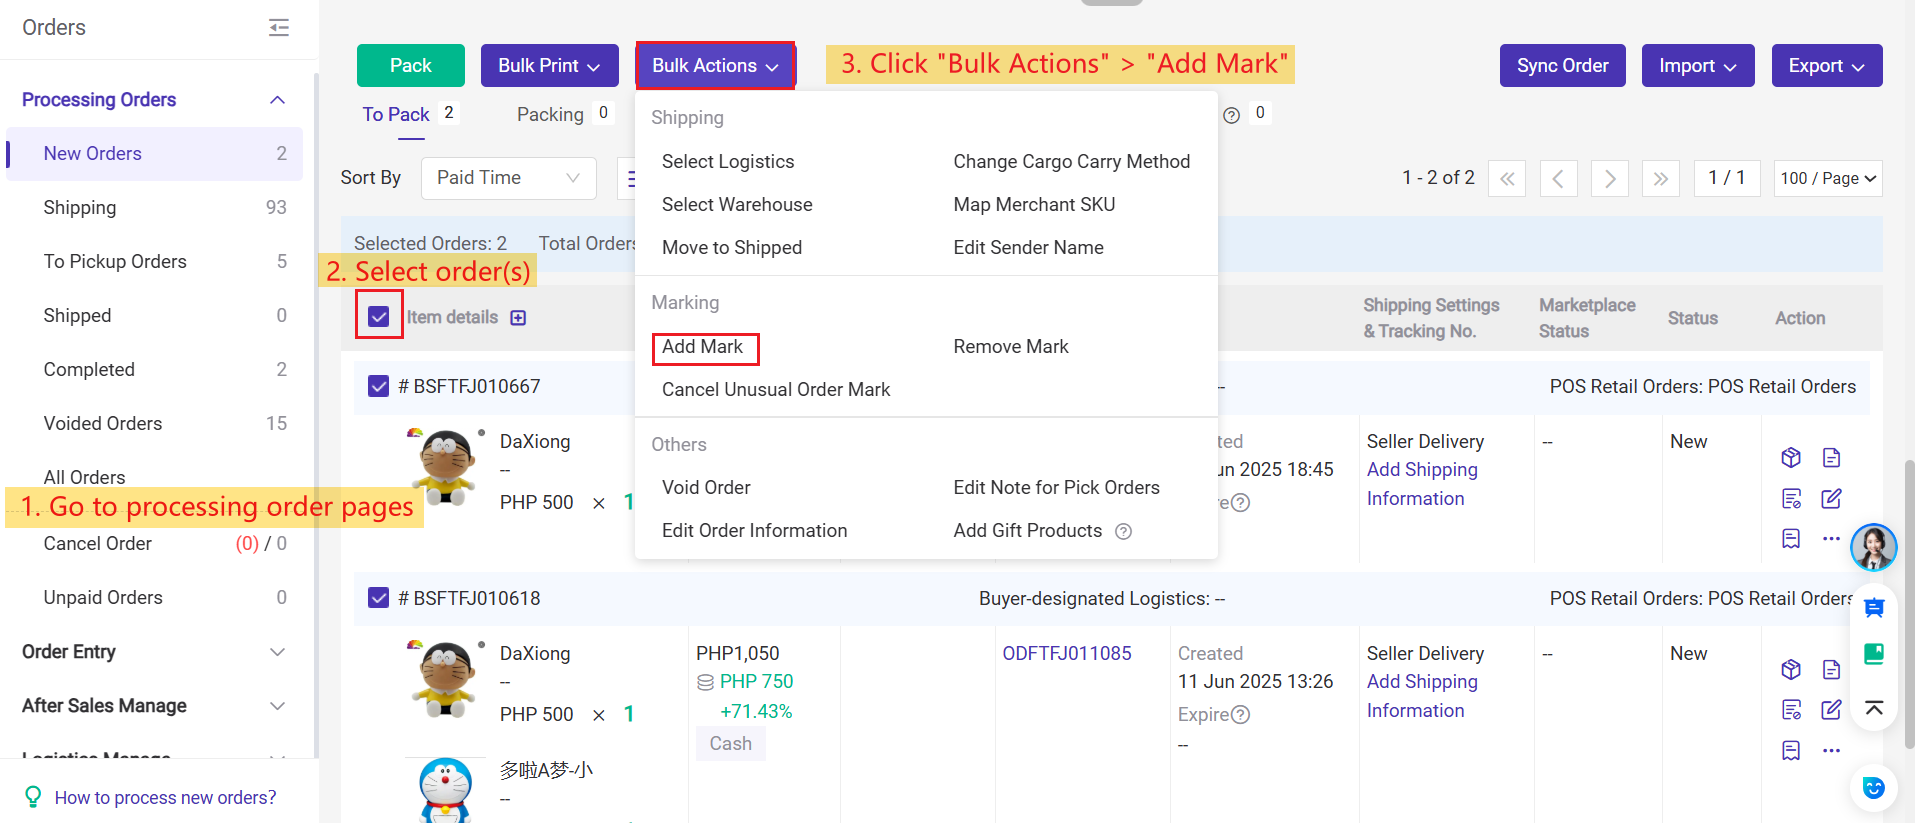
Method 2: You can also add mark to your orders in bulk. Select orders > Bulk Actions > Add Mark, then you can select marks and click Save.

The Mark Rules feature allows you to automatically tag orders based on specific conditions you set. This helps you quickly identify and manage different types of orders without having to add marks manually. It’s especially useful for sorting, filtering, or prioritizing orders in your workflow.
For more details, please refer to the article: How to use mark rules?
Notes
1. You can create up to 100 marks in settings, and the mark name can't be duplicate.
2. You can add more than one marks to one order.
3. You can add or cancel marks for orders under New Orders, In Process Orders, To Pickup Orders, and Voided Orders, you can do it one by one or in bulk.
1. You can create up to 100 marks in settings, and the mark name can't be duplicate.
2. You can add more than one marks to one order.
3. You can add or cancel marks for orders under New Orders, In Process Orders, To Pickup Orders, and Voided Orders, you can do it one by one or in bulk.
1. How to Create Order Mark
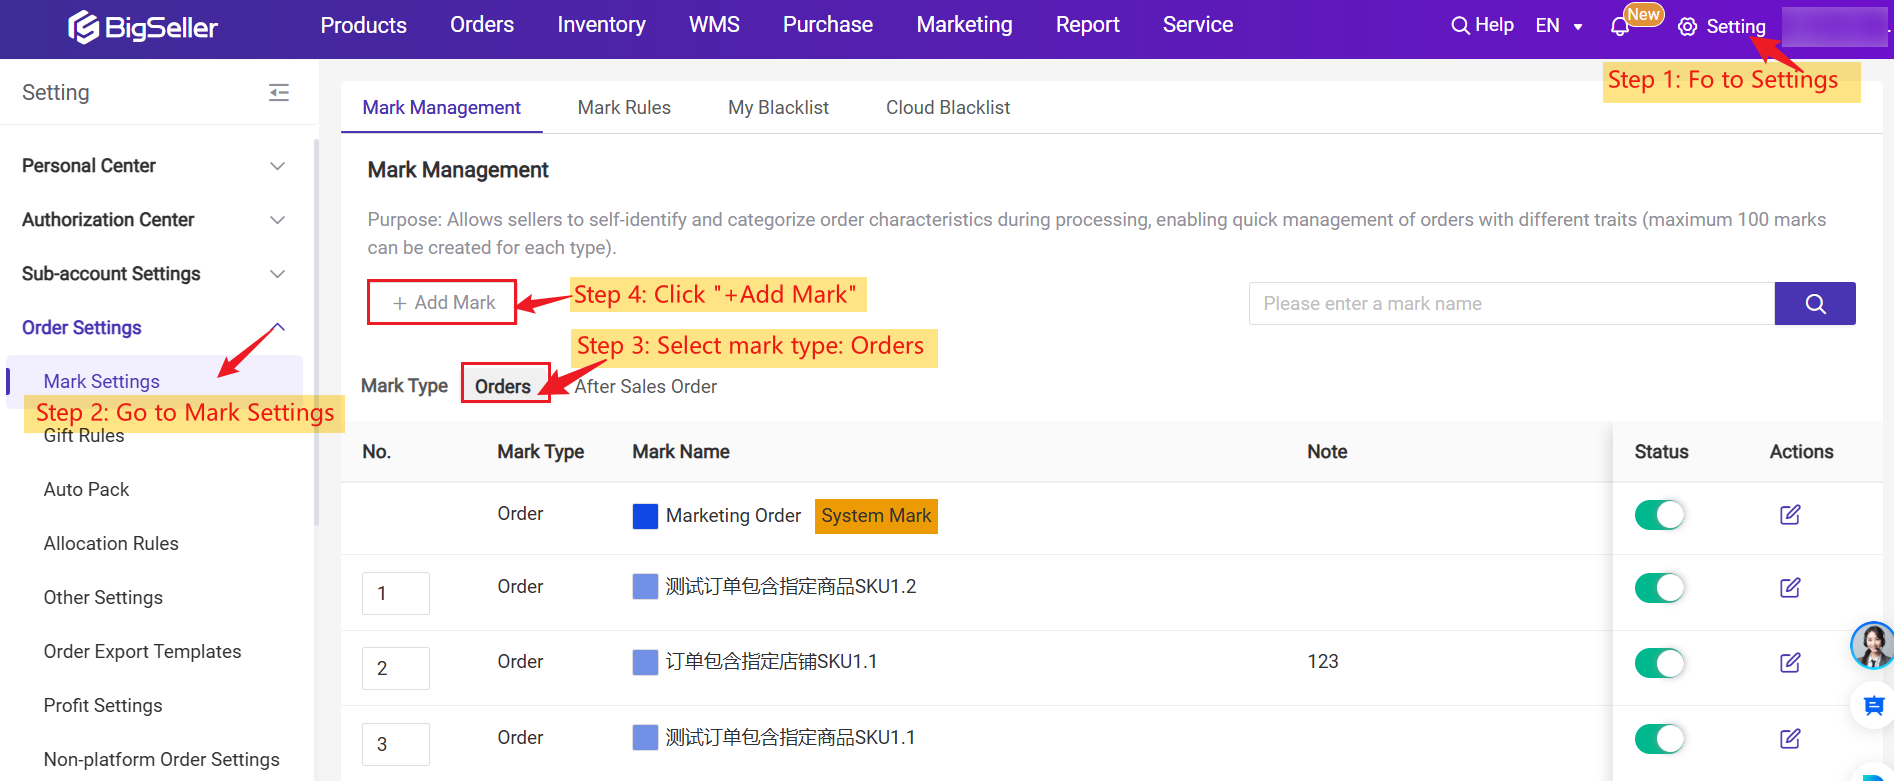
Step 1: Add mark in settings.
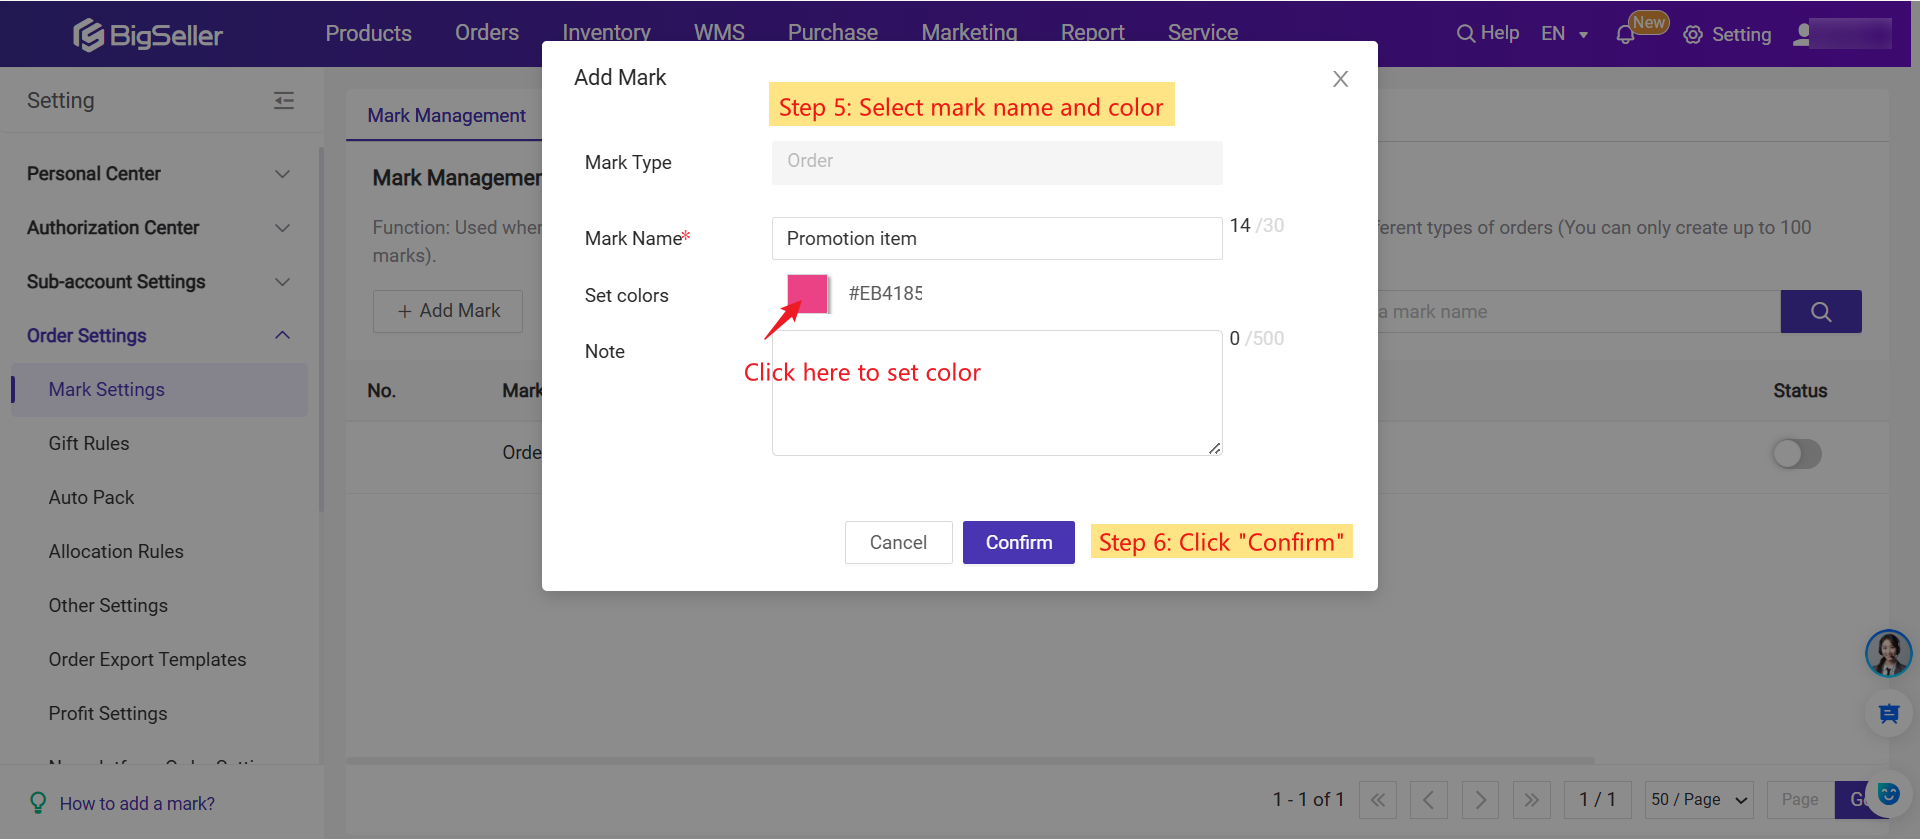
Path: Go to Settings > Order Settings > Mark Settings > Click Add Mark > Select Mark type (Order), then create a new mark and enter the mark info.Step 2: Add mark to orders
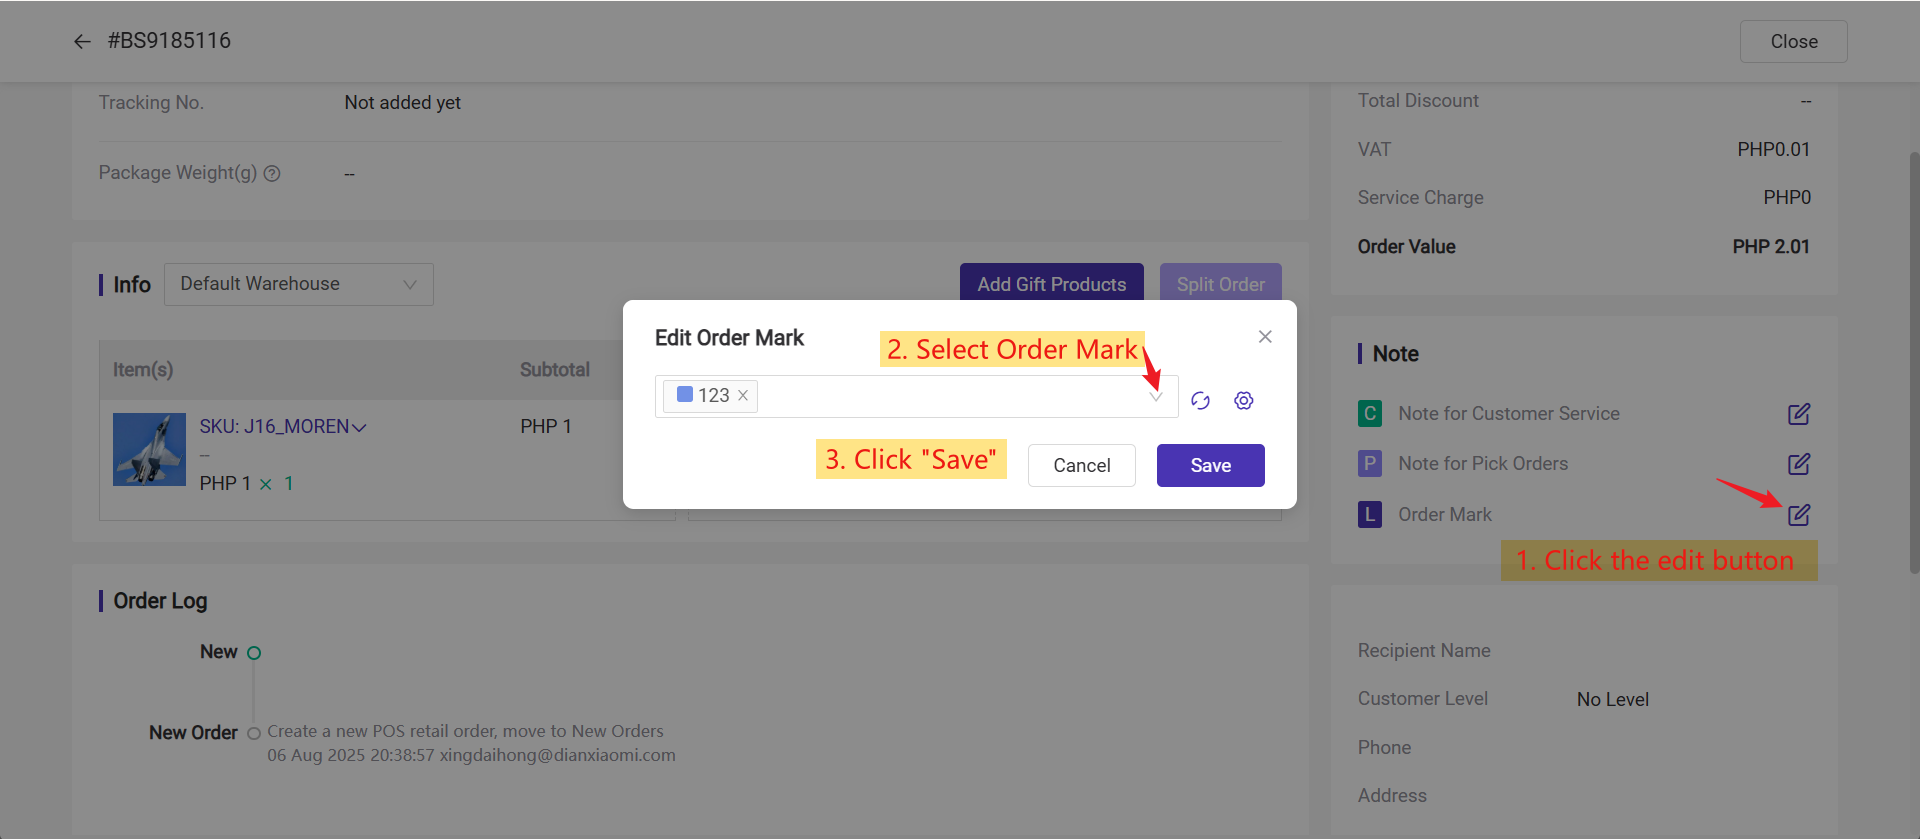
Method 1: To add mark to your orders one by one, you can find the order you want to add marks, click Order Details > Order Mark, you can select order or multiple marks, then click Save.Method 2: You can also add mark to your orders in bulk. Select orders > Bulk Actions > Add Mark, then you can select marks and click Save.
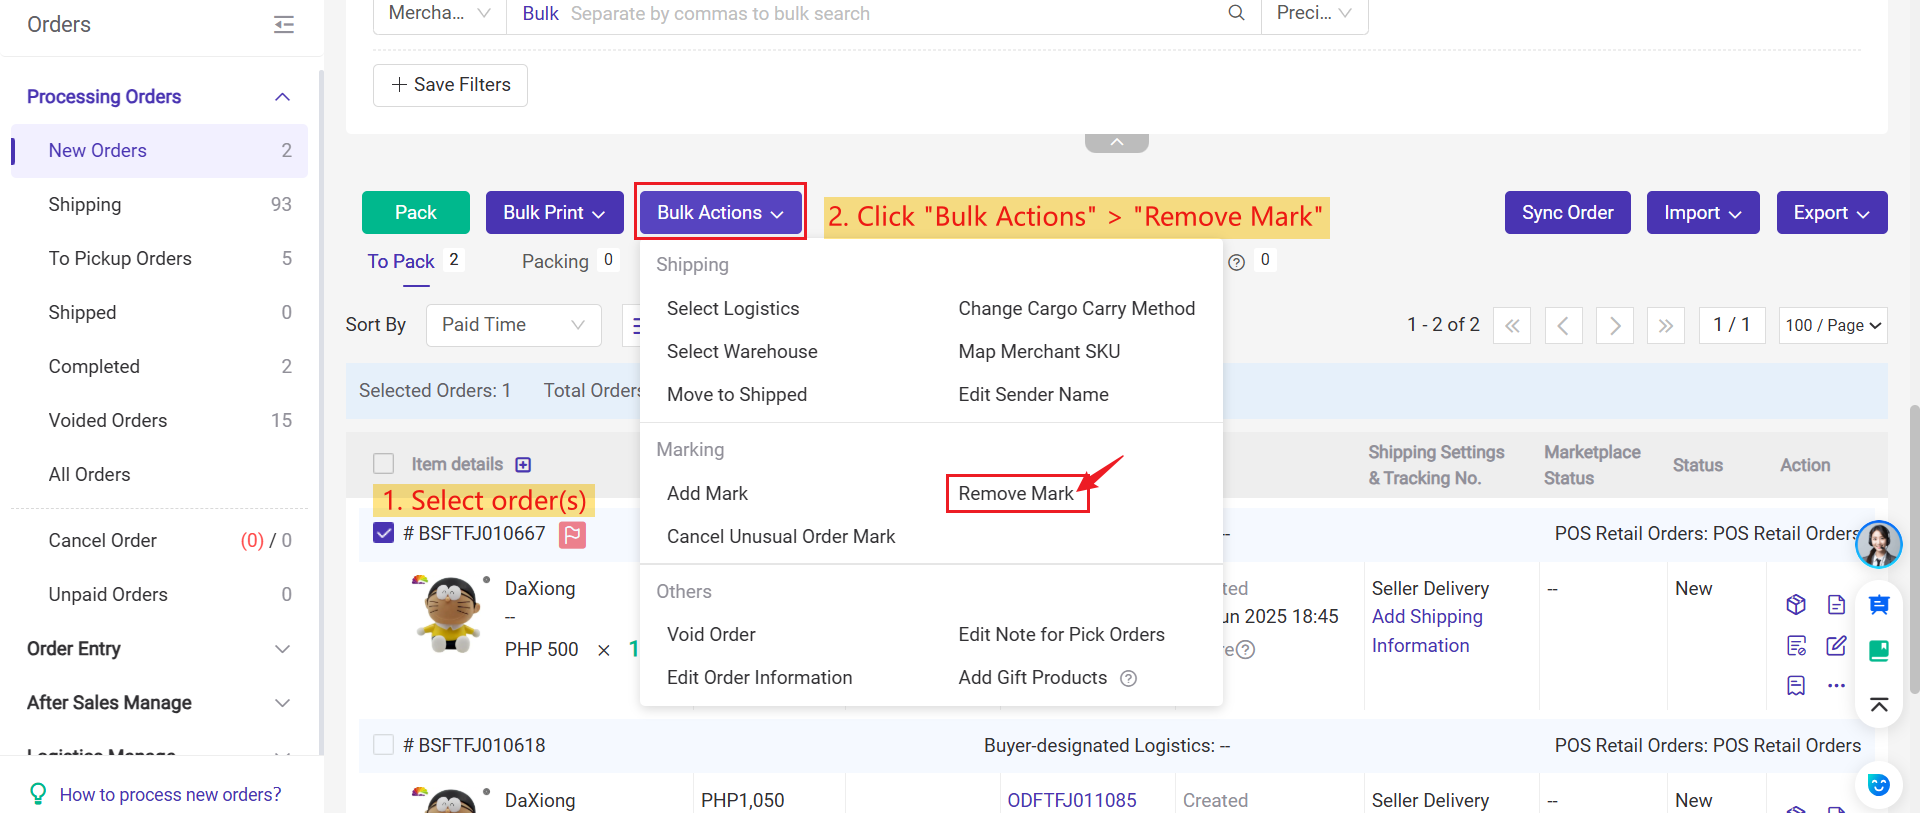
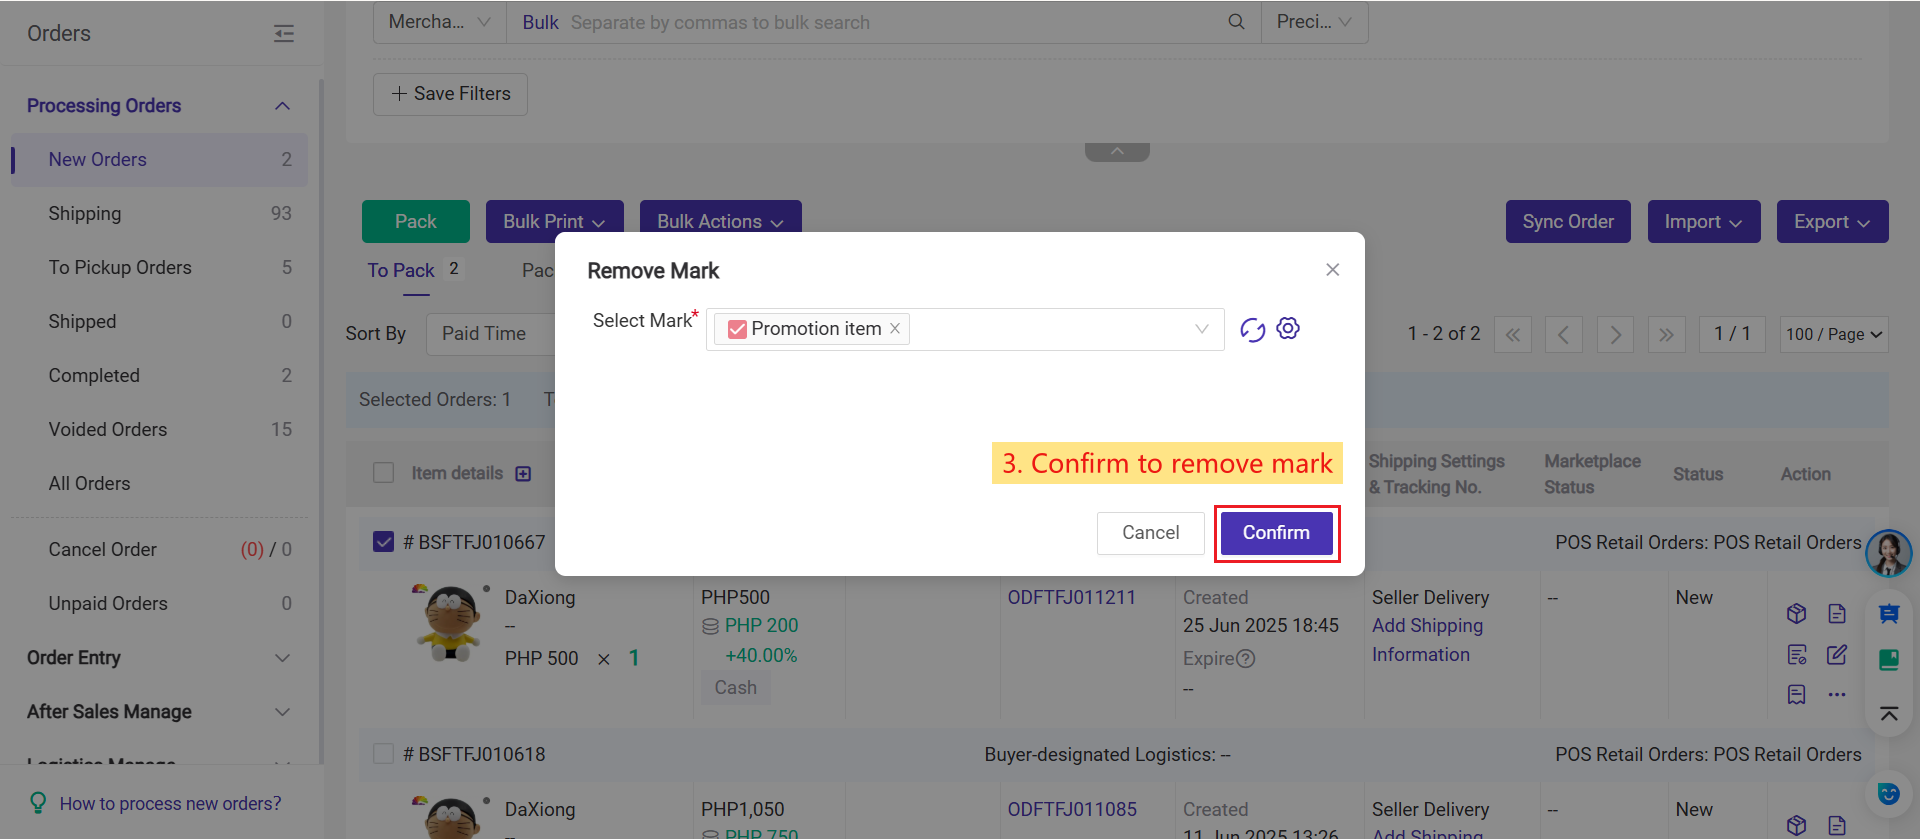
2. How to Cancel Mark
You can Select orders > Bulk Actions > Cancel Mark, then you can select marks you want to canel and click Confirm.
3. How to set mark rule
The Mark Rules feature allows you to automatically tag orders based on specific conditions you set. This helps you quickly identify and manage different types of orders without having to add marks manually. It’s especially useful for sorting, filtering, or prioritizing orders in your workflow.💡 Note
1. Mark Rules only support marks of the "Order" type. They do not apply to "After-Sales" marks.
2. There are two types of marks in the system:
- Order Marks – used for standard (forward) orders
- After-Sales Marks – used for return/refund (reverse) orders
For more details, please refer to the article: How to use mark rules?
Is this content helpful?
Thank you for your feedback. It drives us to provide better service.
Please contact us if the document can't answer your questions