🔥 [New] Introduction to Order Mark (After Sales Orders)
Copy link & title
Update Time: 27 Aug 2025 04:00
[New] BigSeller now supports adding marks to after-sales orders, making it easier for sellers to filter and manage returns or refunds. This feature helps improve workflow efficiency by enabling better tracking and communication for after-sales cases.
1. How to Create After Sales Order Mark
After-sales marks help manage returns and customer communications, separate from forward order marks that track normal shipments. This separation makes processes easier to follow.
Step 1: Go to Order Settings > Mark Settings > Mark Management
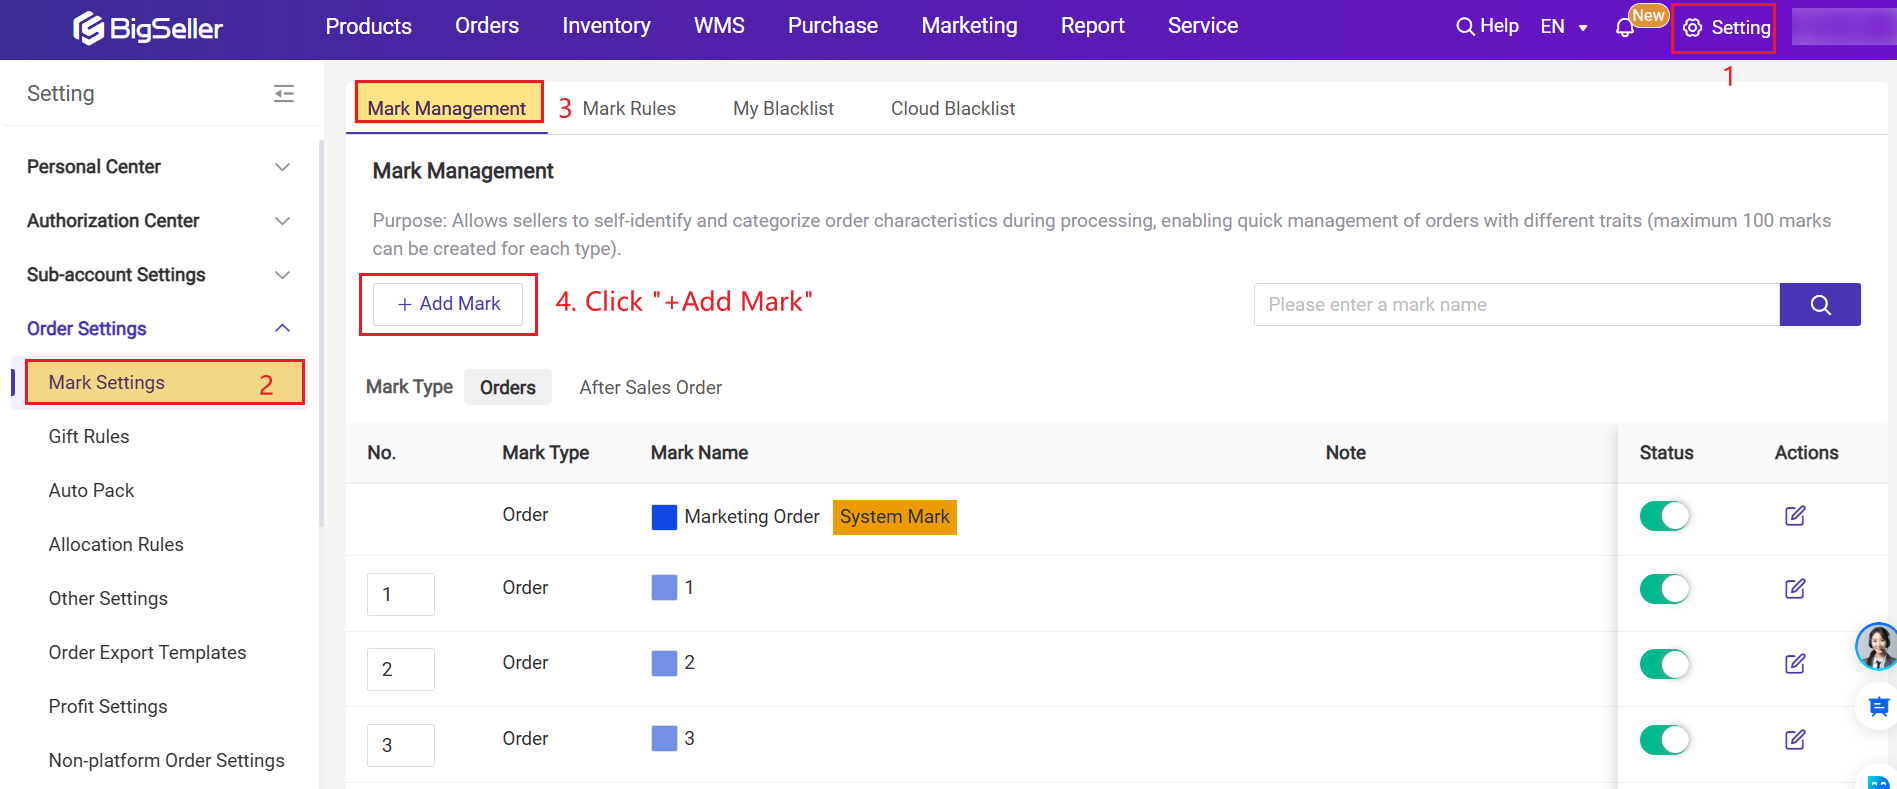
Step 2: Click + Add Mark, select the mark type (After Sales Order), then set color and notes. Click Confirm to save.
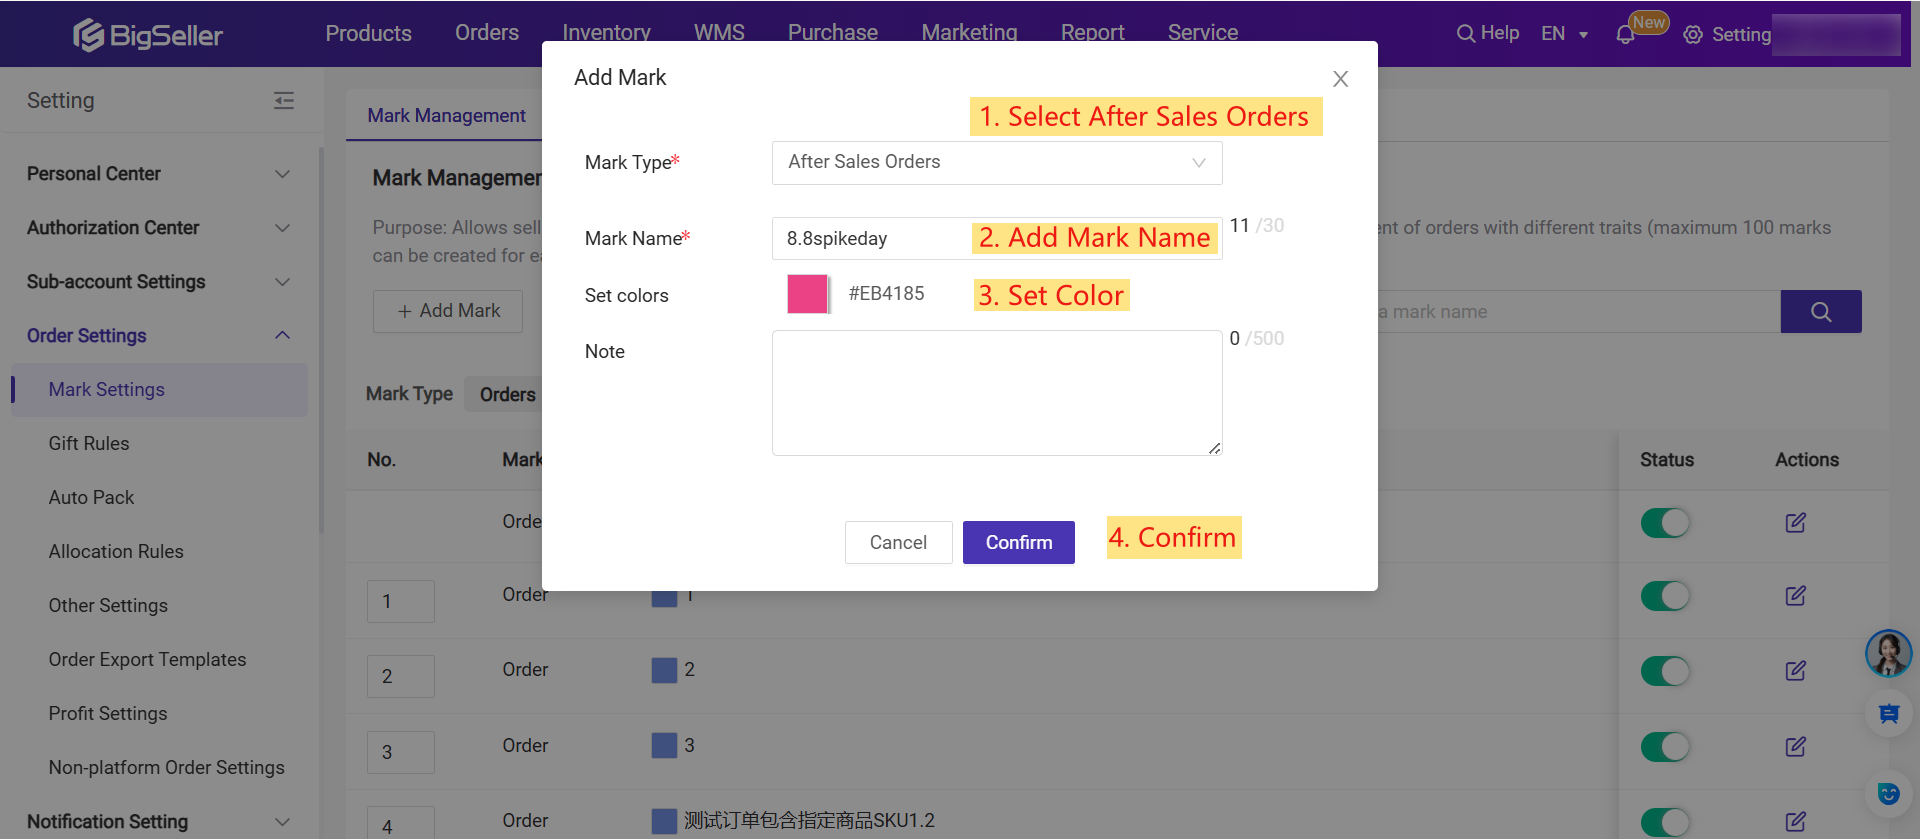
💡 Note: You can create up to 100 after-sales order marks in Bigseller.
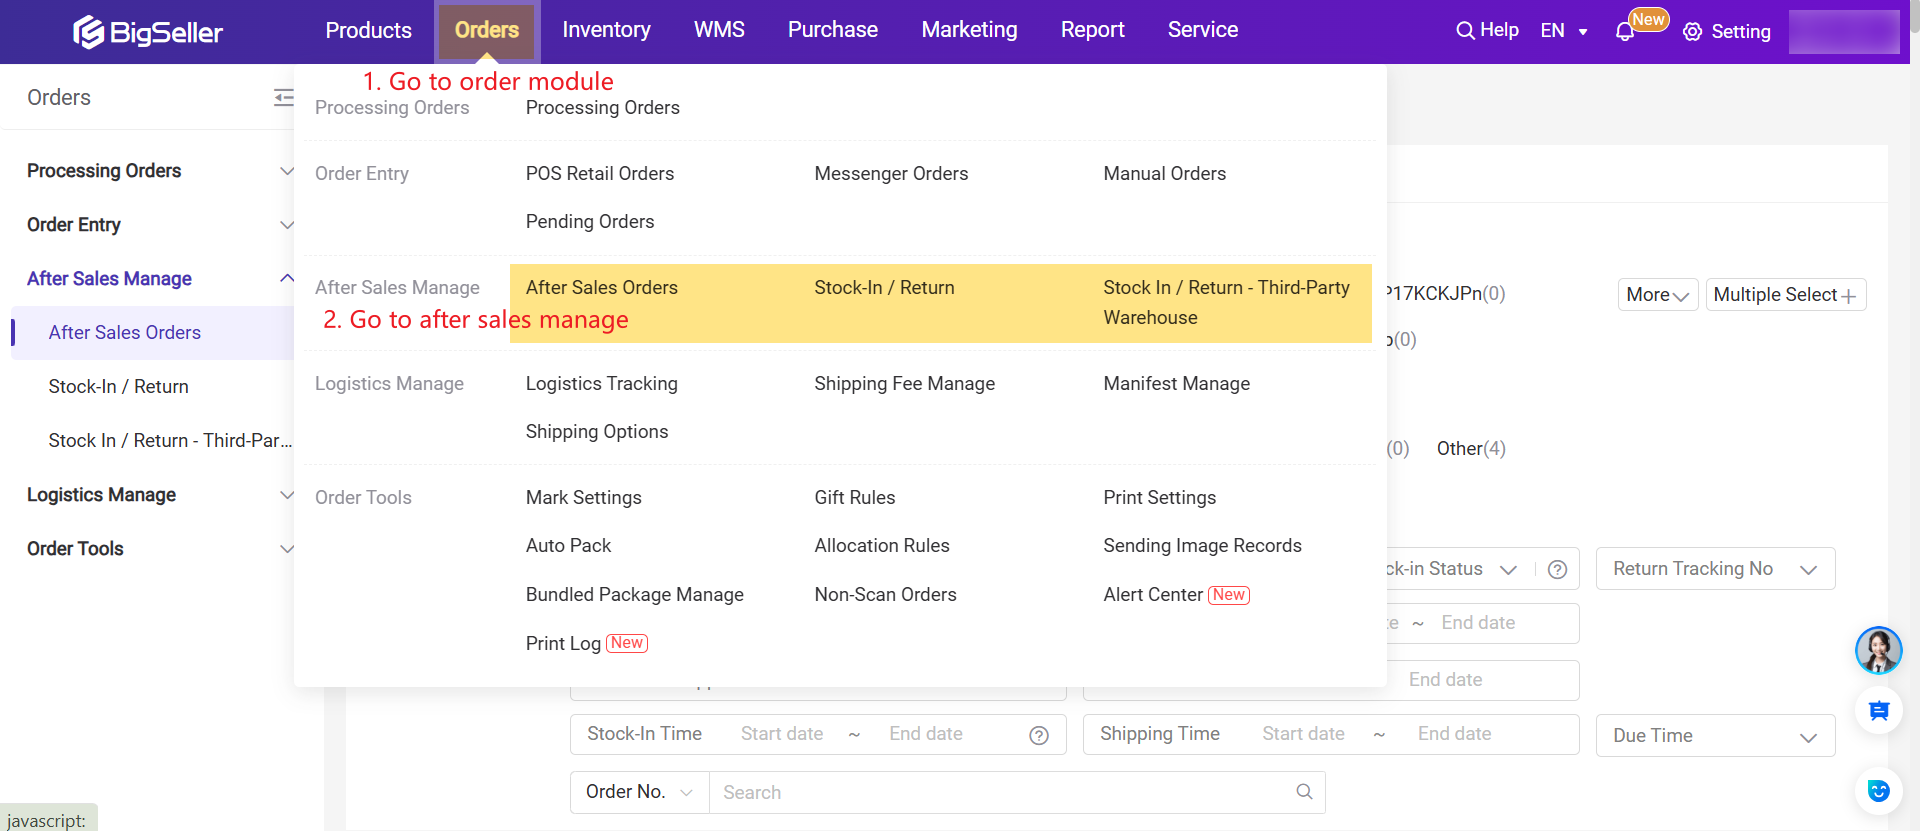
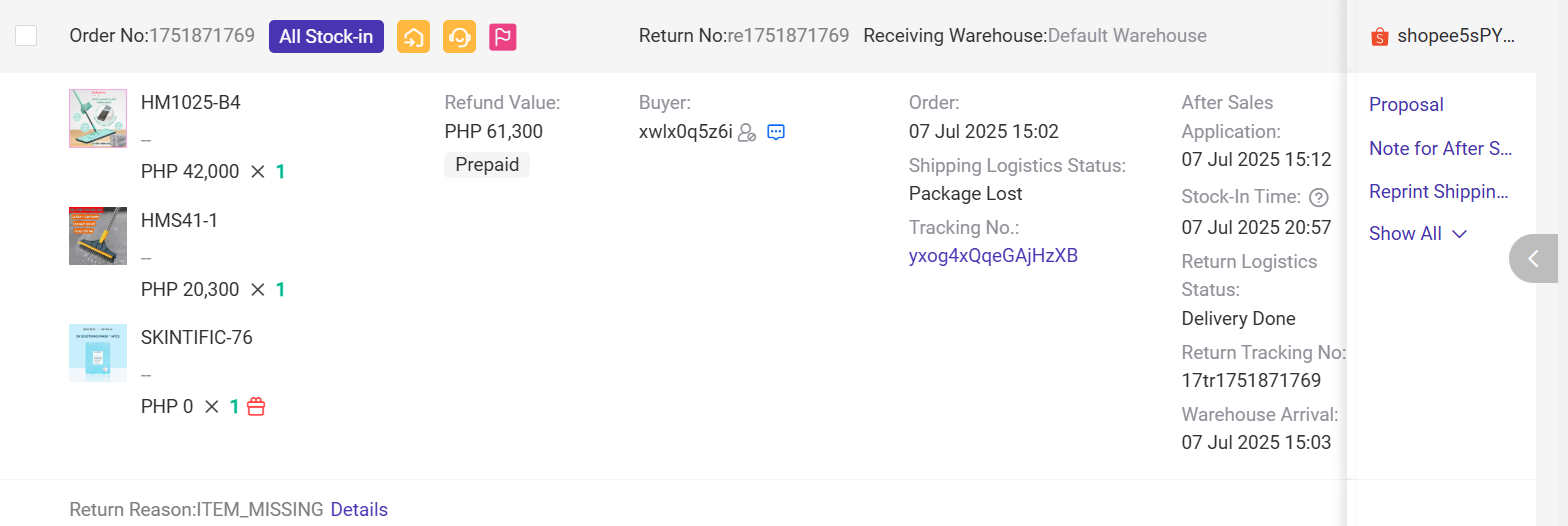
2. How to Apply After-Sales Marks to an Order
You can add after-sales marks on the following pages:
- After Sales Manage
- Stock-in / Return
- Stock-in / Return – Third-party Warehouse
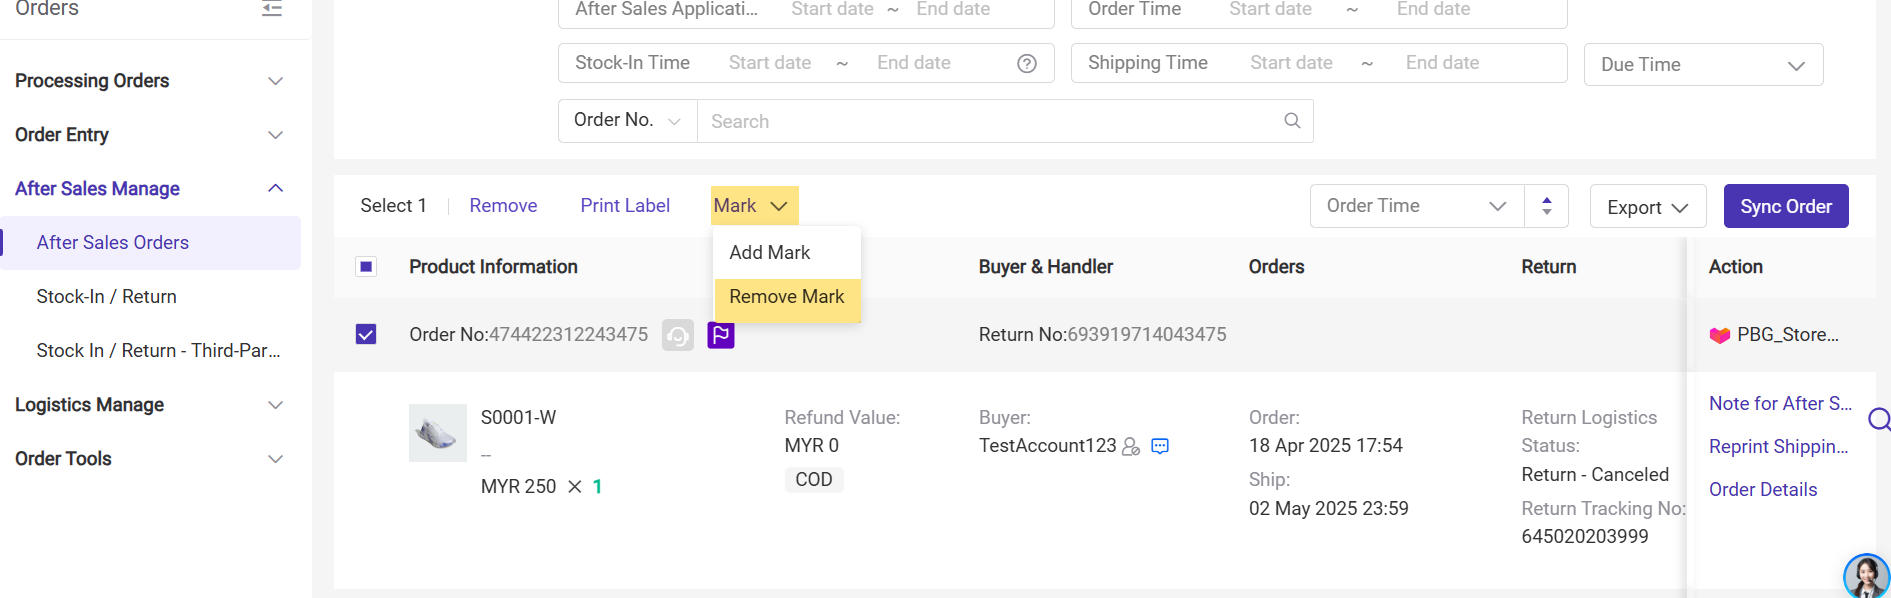
Step 1: Go to one of the pages above, select the order(s), then click Mark > Add Mark
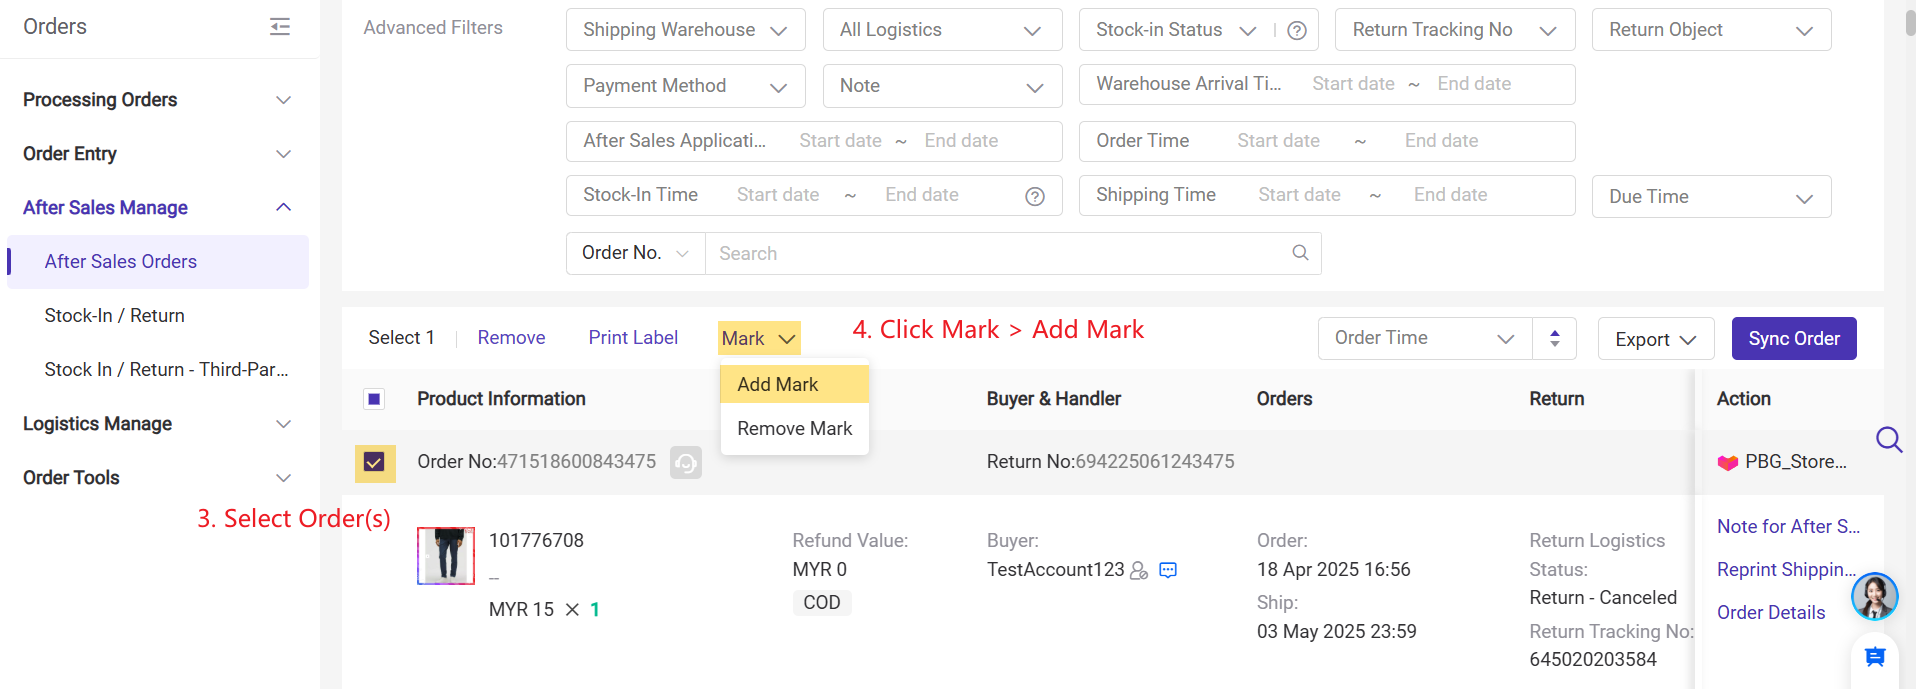
Step 2: Choose the desired mark and click "Confirm"
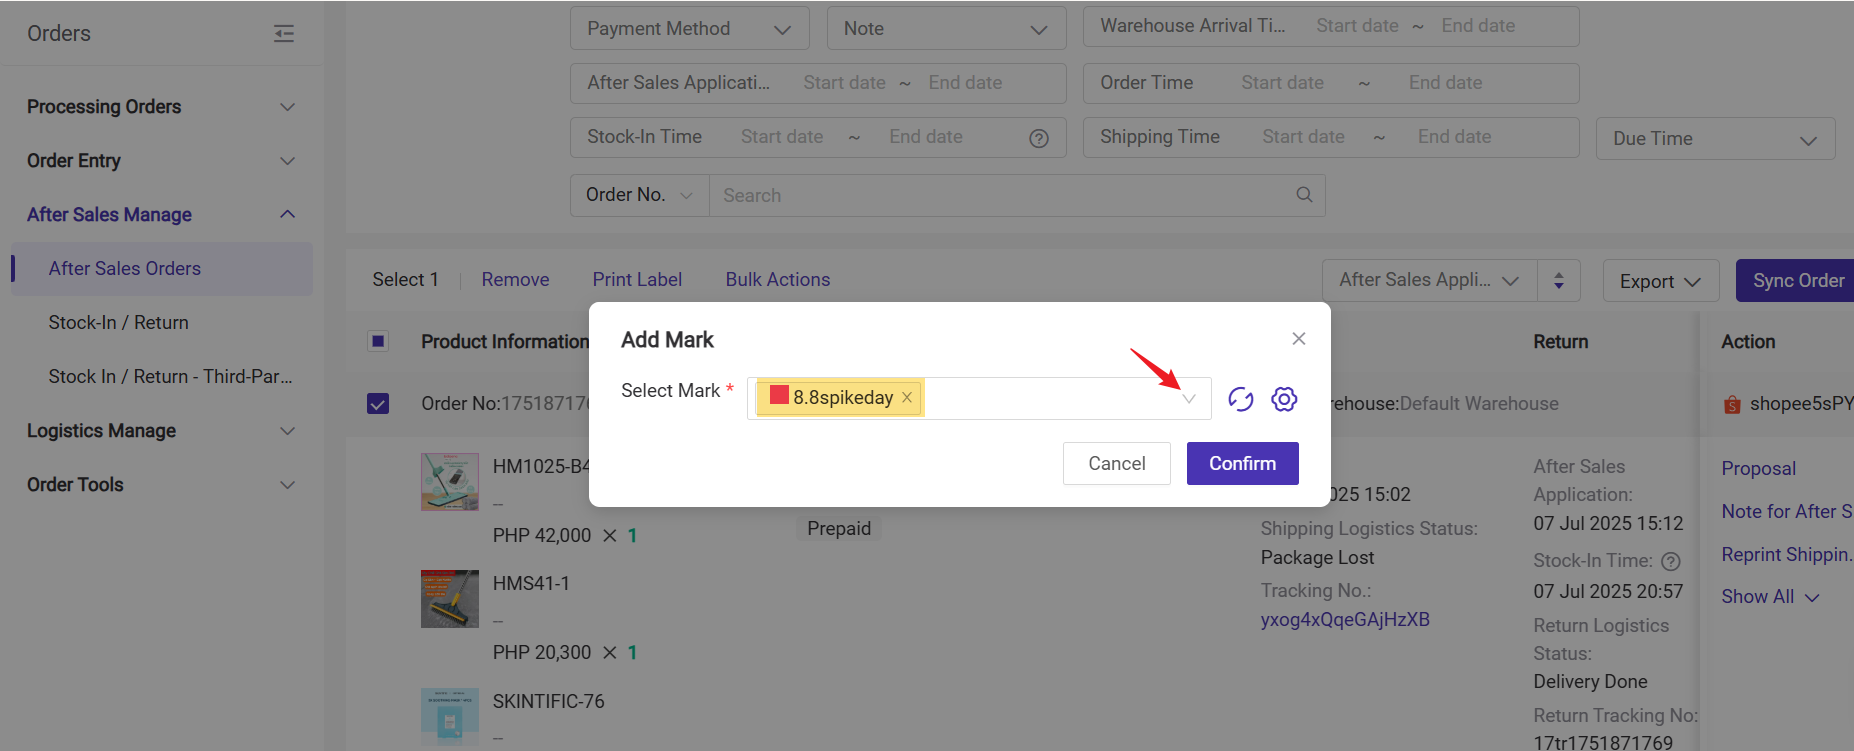
Step 3: Once added, the mark will appear next to the order number.
Available Actions
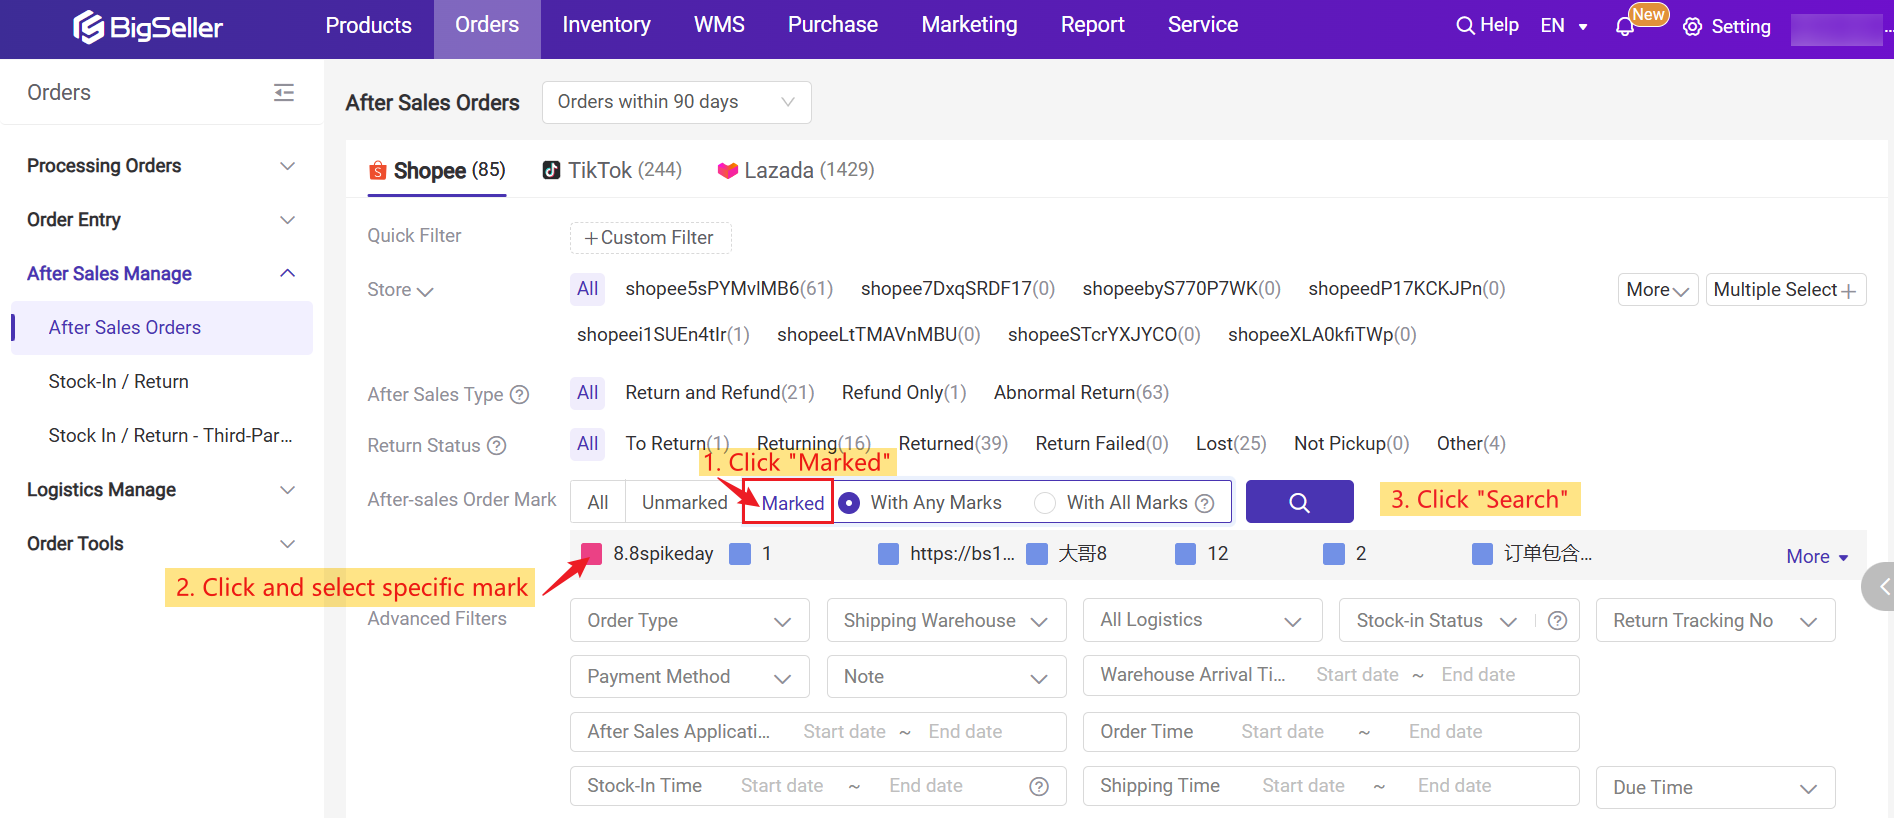
- Filter Orders by After Sales Order Marks:
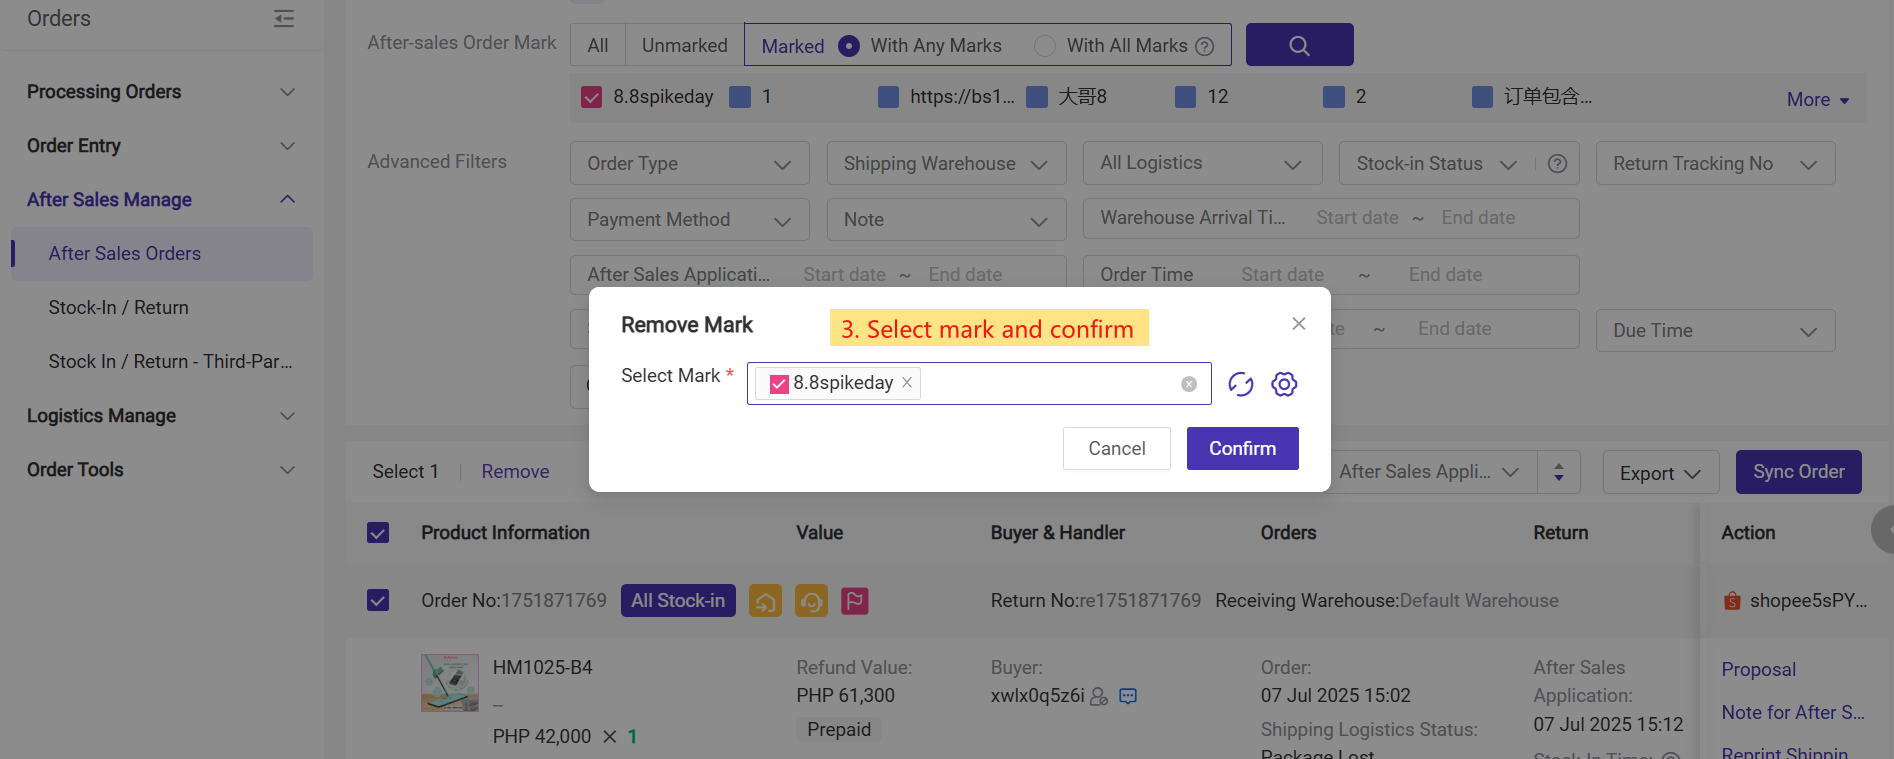
- Remove Mark: To remove an after-sales mark, click Mark > Remove Mark, select the mark, and confirm.
💡 Important Notes
- Mark Rules do not support after-sales marks. After sales order marks must be added or removed manually by users.
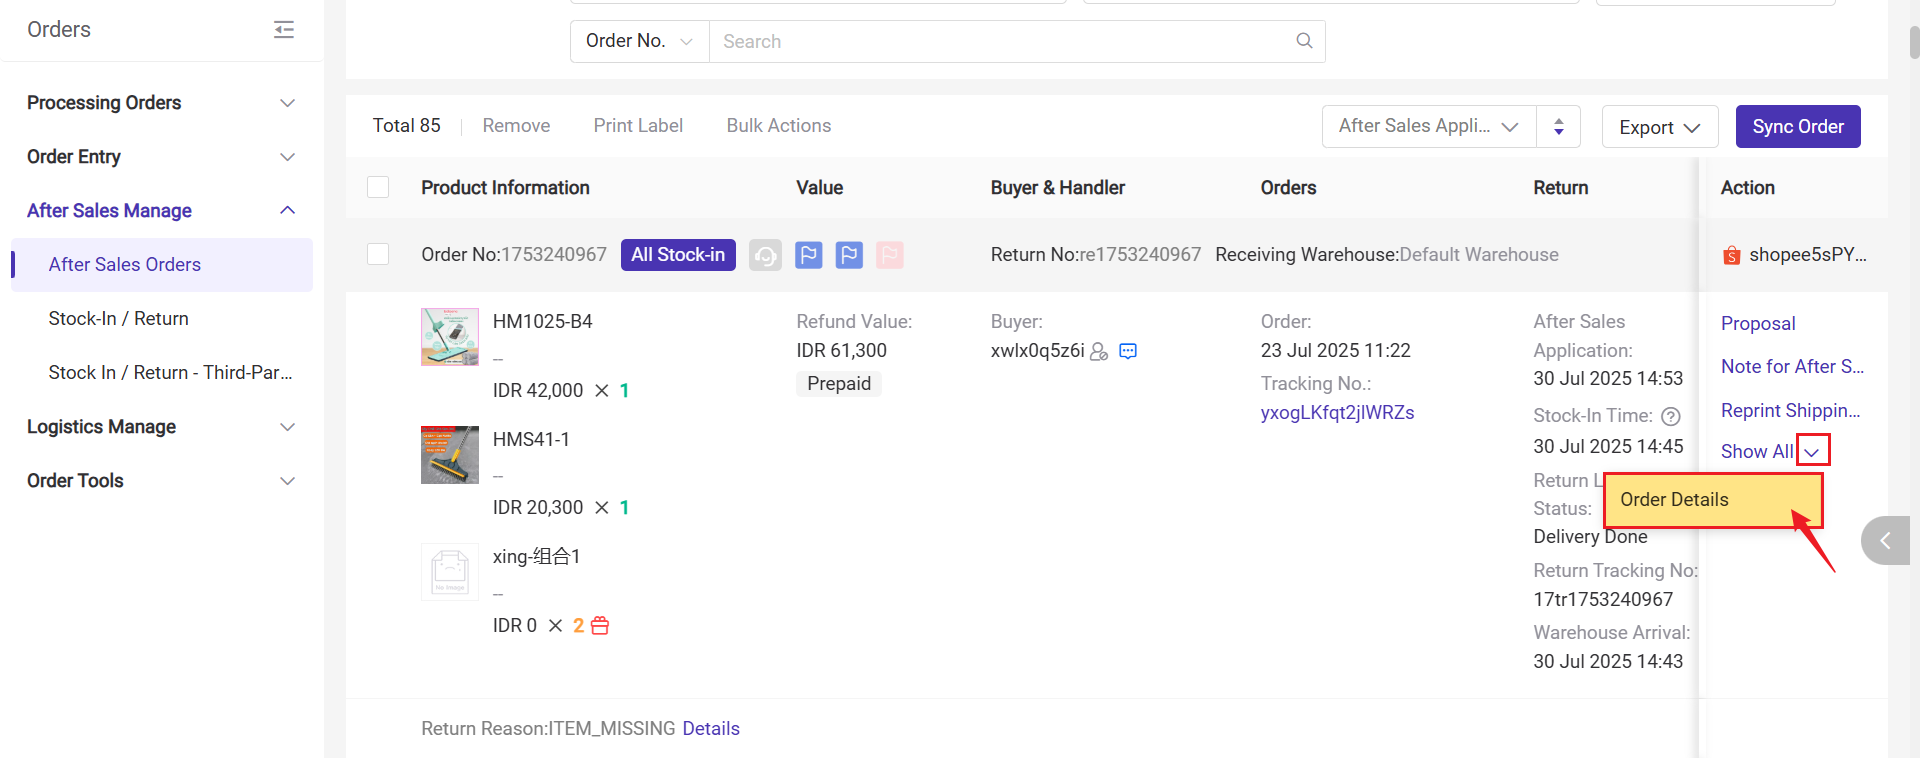
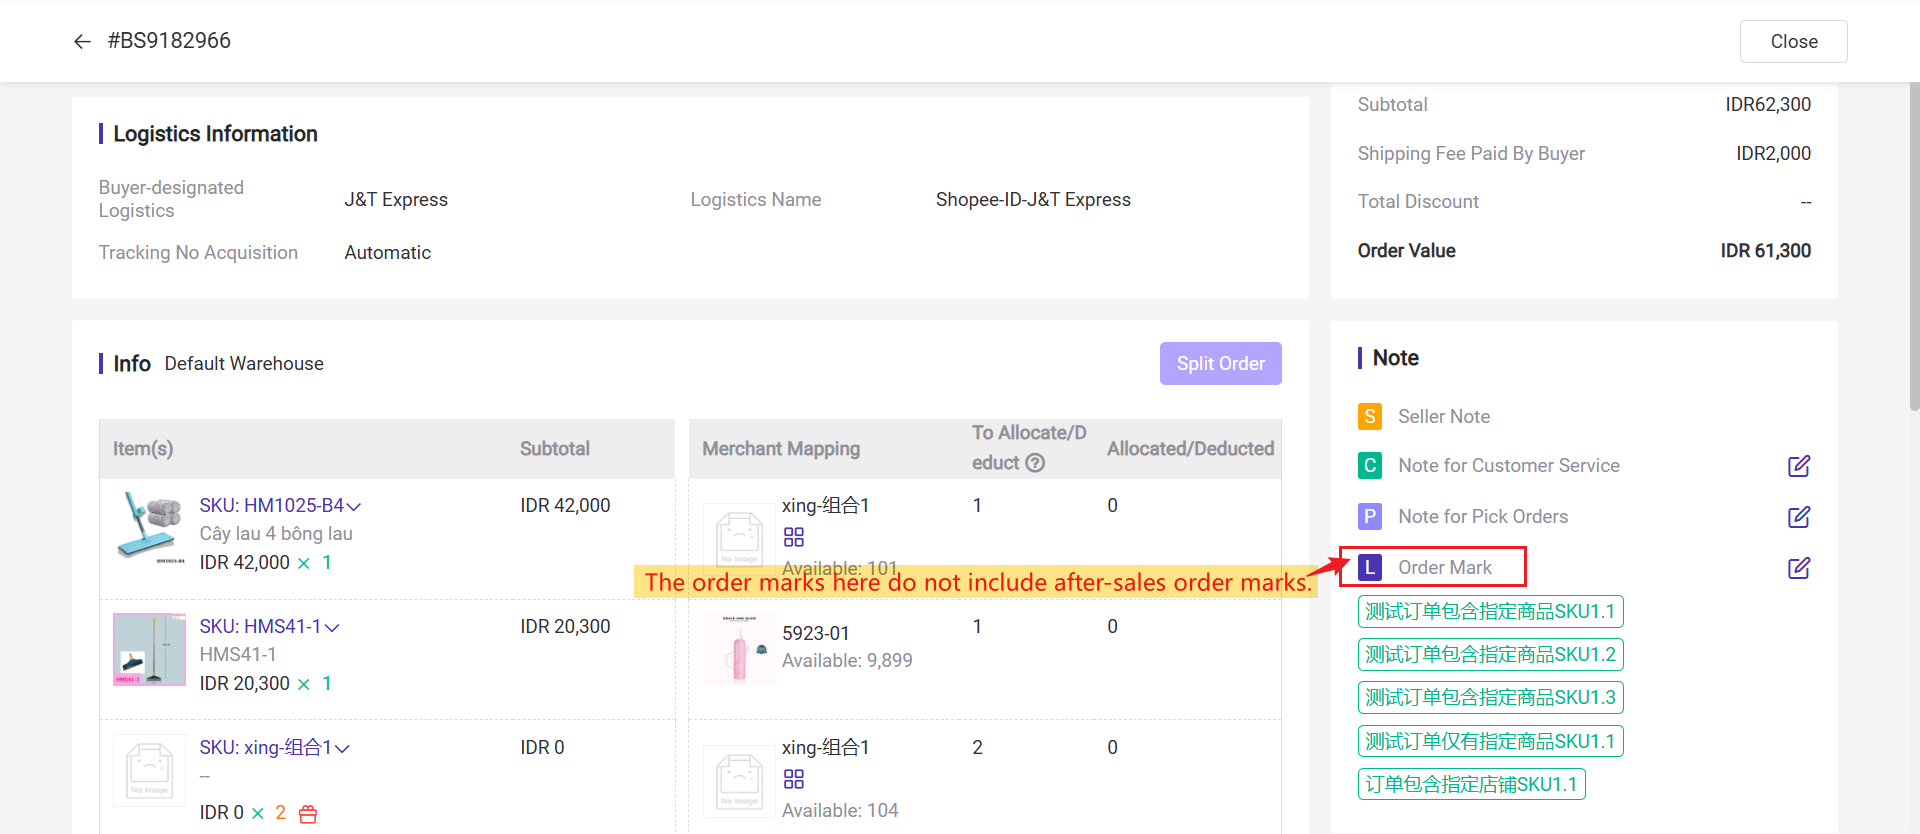
- On the After Sales Orders / Stock-in / Return > Order Details > Note page, the Order Mark section only shows forward order marks and does not support editing or displaying after-sales marks.
Is this content helpful?
Thank you for your feedback. It drives us to provide better service.
Please contact us if the document can't answer your questions